Chapter 5:Connection Mode
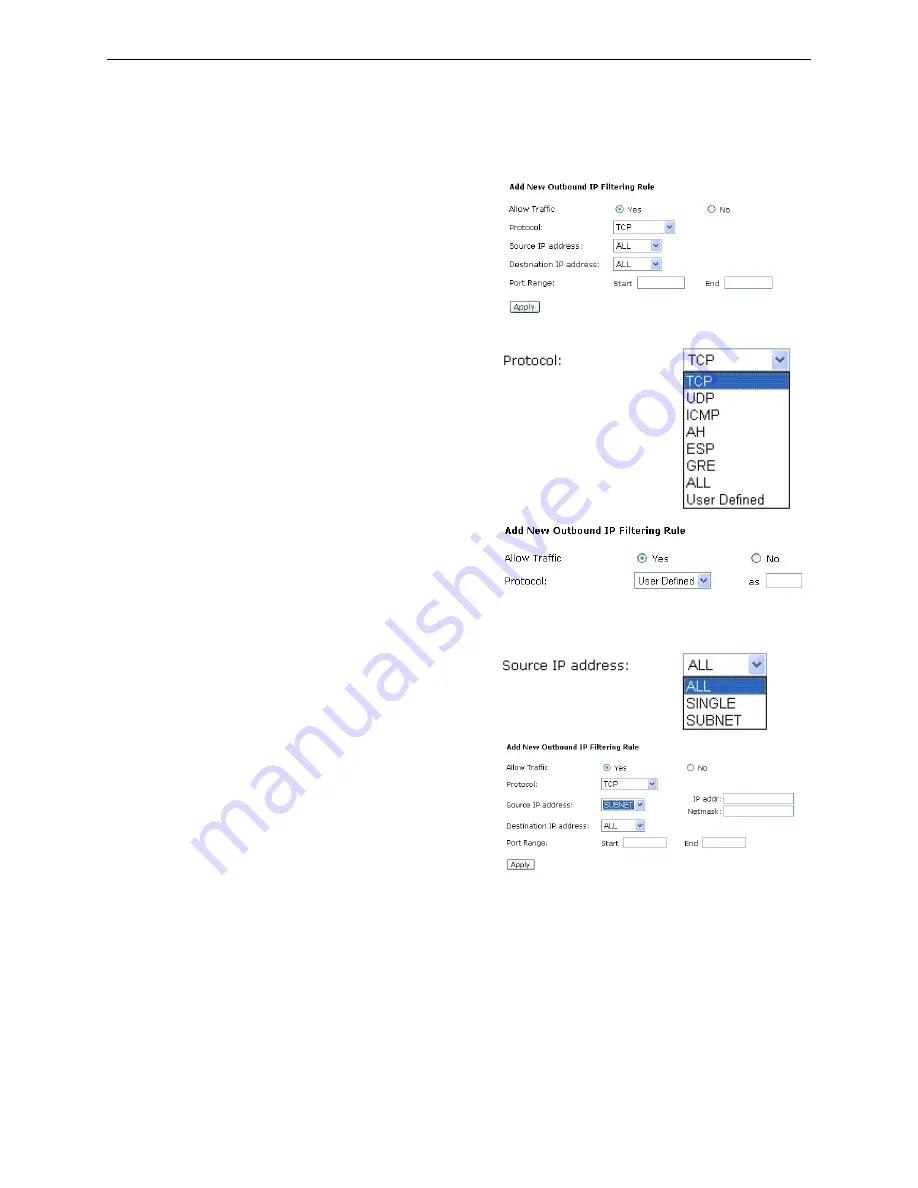
Then, to add a new IP Filtering, click
Add
.
This page provides some settings for you to
adjust for adding a new outbound IP
Filtering.
Allow Traffic:
No
stops the data transmission,
Yes
lets the
data pass through.
Protocol:
Here provide several default policies for
security levels for you to choose. If you
don’t want to use the predefined setting, you
can use
User Defined
to set a customized
protocol for your necessity. When you
choose
User Defined
setting, you have to
type in a port number in the “as” field.
Source/Destination IP address:
To specify IP address to allow or deny data
transmission, please pull down the
drop-down menu to choose a proper one.
All:
This setting means that all the IP
addressed in the network are allowed or
denied to pass through in Internet. If you
choose
Single
, an IP address field will
appear to the right side. You have to type in
the specific IP address as the start/end point
to let the router identify for granting or
denying pass through. If you choose
Subnet
,
the IP address and Netmask will appear to
the right side. Please type in the specific IP
address and Netmask as the start/end point to
let the router identify for granting or denying
pass through.
Port Range:
The port range is from 0 to 65535. Please
type in the start point and end point for the
IP Filtering.
After finish the settings, click
Apply
. A
new one will be added and shown on the
web page.
Содержание CL-010
Страница 8: ......
Страница 64: ...This table shows the IP address record for IP to Physical translation in your router ...
Страница 74: ...different interface Otherwise disable this function Click Apply to invoke the settings set here ...
Страница 99: ...Chapter 7 Glossary ...
Страница 101: ...Appendix A Specifications ...


