s
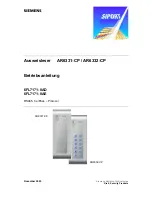
Operating instructions card reader AR6331-CP / AR6332-CP
Page
9
from
36
Order no.: A24205-A335-H050
GB
4.1 Mounting
4.1.1 Wall-mounting
The unit should be installed on as even a surface as possible.
•
Create openings for the lead in the bottom section of the housing and pull the lead
through.
•
Screw the bottom of the housing onto the selected position on the wall.
•
End of lead should be fixed at the bottom section (see figure below).
Figure 2: Back view of the bottom section of the housing with the terminal board slotted in
4.1.2 Installation
•
The electronic board (pcb) with terminal connectors is build into the top section of the
housing.
•
Connect the cable to the terminal strip (pcb) in the top section of the housing.
See chapter „5.1 Connecting the reader”
•
First, insert top section of housing on top part of mounted bottom section of the housing.
•
Then, push both parts of the reader housing together. In doing so, keep attention on the
wires.
•
Screw in the safety screw on the underneath of the bottom section of the housing.
Note
The maximum torque of the safety screw is 1,5 Nm.
Содержание 6FL7171-8AD
Страница 5: ...s Operating instructions card reader AR6331 CP AR6332 CP Page 5 from 36 Order no A24205 A335 H050 GB ...
Страница 16: ...s Page 16 from 36 Operating instructions card reader AR6331 CP AR6332 CP Order no A24205 A335 H050 ...
Страница 17: ...s Operating instructions card reader AR6331 CP AR6332 CP Page 17 from 36 Order no A24205 A335 H050 GB 7 Notes ...
Страница 22: ...s Seite 22 von 36 Bedienungsanleitung Ausweisleser AR6331 CP AR6332 CP Bestell Nr A24205 A335 H050 1 Zulassung ...
Страница 23: ...s Bedienungsanleitung Ausweisleser AR6331 CP AR6332 CP Seite 23 von 36 Bestell Nr A24205 A335 H050 D ...
Страница 34: ...s Seite 34 von 36 Bedienungsanleitung Ausweisleser AR6331 CP AR6332 CP Bestell Nr A24205 A335 H050 ...
Страница 35: ...s Bedienungsanleitung Ausweisleser AR6331 CP AR6332 CP Seite 35 von 36 Bestell Nr A24205 A335 H050 D 7 Notizen ...


