background image


ADSL2+ 4-Port Ethernet Wireless-G Router  -  User Guide   


Page 15 of 55 

Chapter 4 - Setting Up the ADSL Router 

This section will guide you through your ADSL Router’s configuration. The ADSL Router is 
shipped with a standard PPP configuration. 

The basic tabs consist of features which are catered for basic users. 

4.1  Logging into your ADSL Router 

To configure your ADSL Router, open your web browser. You may get an error message at this 
point;  this is normal. Type the default IP address (

192.168.1.1

) or 

login.router 

on the web 

address bar.  


            NOTE: 

Before setting up your ADSL Router, make sure you have followed the 

easy start guide. You should have your computers configured for DHCP 
mode and have proxies disabled on your browser. Upon accessing the 
ADSL Router, if the browser still displays a login redirection screen, you 
should check your browser's setting and ensure that the JavaScript support 
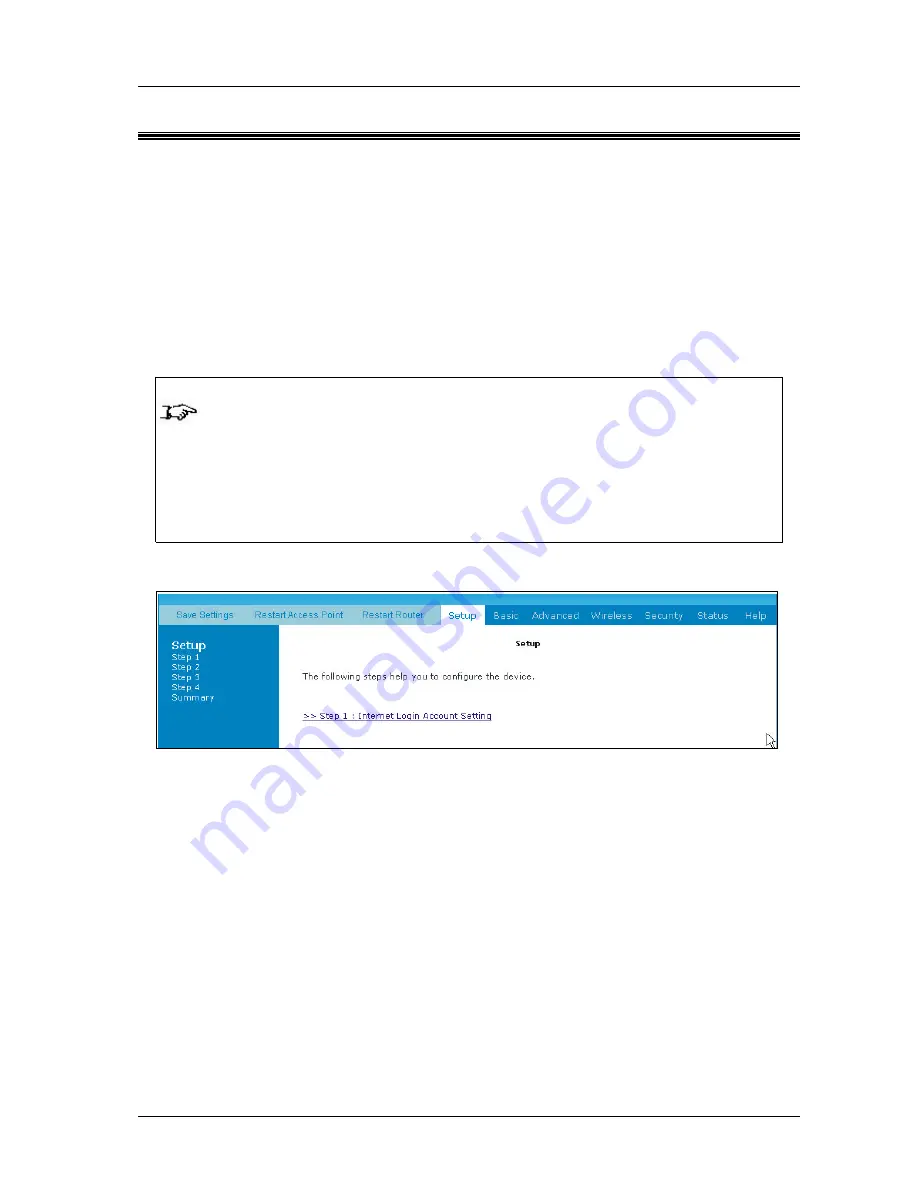
is enabled. If the screen shown in 

Fig 1-4

 is not attainable, you must delete 

your temporary Internet files to clear the web cache. 


Figure 1-4 : Setup Page 


Содержание ADSL2+ 4-Port Ethernet Wireless-G Router

Страница 1: ...ADSL2 4 Port Ethernet Wireless GRouter User Guide Page 1 of 55 WEB USER GUIDE Version 1 0...

Страница 2: ...eway At A Glance 12 3 1 Ports and Buttons 12 3 2 ADSL Router Overview 13 3 2 1 Front Indicators 13 3 2 2 Back Panel 14 Chapter 4 Setting Up the ADSL Router 15 4 1 Logging into your ADSL Router 15 4 2...

Страница 3: ...ystem Password 41 4 5 23 Firmware Upgrade 42 4 5 24 Restore to Default 42 4 6 Wireless 43 4 6 1 Wireless Setup 43 4 6 2 Wireless Configuration 44 4 6 3 Wireless Security 44 4 6 4 Wireless Management 4...

Страница 4: ...Figure 1 9 Diagnostics Test Screen 19 Figure 1 10 Diagnostics Test Result Screen 19 Figure 1 11 Ping TestScreen 20 Figure 1 12 Modem Test 20 Figure 1 13 Advanced Screen 21 Figure 1 14 New Connection...

Страница 5: ...irmware Upgrade 42 Figure 1 36 Restore to Default prompt 42 Figure 1 37 Wireless Setup Page 43 Figure 1 38 Wireless Configuration Page 44 Figure 1 39 Wireless Security 44 Figure 1 40 Wireless Security...

Страница 6: ...ADSL2 4 Port Ethernet Wireless GRouter User Guide Page 6 of 55 Figure 1 53 DHCP Clients 53 Figure 1 54 Modem Status 54 Figure 1 55 Product Information 54 Figure 1 56 Help Screen 55...

Страница 7: ...he user must use the configuration utility provided with this product to check the current channel of operation and confirm that the devices operating in conformance with the spectrum usage rules for...

Страница 8: ...e the receiving antenna Increase the separation between the equipment and the receiver Connect the equipment into an electrical outlet on a circuit different from that which the radio receiver is conn...

Страница 9: ...HIGH VOLTAGE is used in the equipment Make sure equipment is properly grounded BEFORE opening Failure to observe safety precautions may result in electric shock to user CAUTION Check voltages before c...

Страница 10: ...d to operate and perform first level maintenance of the ADSL2 4 Port Ethernet Wireless Router It assumes the user of this manual has basic knowledge and experience in operating similar modem configura...

Страница 11: ...essing your network For game users the ADSL Router had already pre configured for several low latency game ports Just click on the game you are playing on line and the rest is done for you The ADSL Ro...

Страница 12: ...d you lose the ability to interface to the ADSL Router via the web interface or following a software upgrade To reset the ADSL Router simply press the reset button for about approximately 10 seconds T...

Страница 13: ...cable is properly connected from your ADSL Router to the Ethernet Card Flickers when the ADSL is transmitting receiving data 3 Wireless Flickers when the Wireless LAN is operational 4 DSL Lights off...

Страница 14: ...2 RESET To reset the ADSL Router simply press the reset button for about 10 seconds all customised settings that you have saved will be lost 3 ETHERNET E1 E4 10 100 Base T Auto MDI MDIX Ethernet jack...

Страница 15: ...at this point this is normal Type the default IP address 192 168 1 1 or login router on the web address bar NOTE Before setting up your ADSL Router make sure you have followed the easy start guide Yo...

Страница 16: ...Fig 1 5 This page is meant for basic users whom only require easy connectivity to the Internet without worrying about any other advance configuration setting If you are in doubt for what content to e...

Страница 17: ...t than the starting IP address must be 192 168 1 2 or higher The End IP Address is where the DHCP server stops issuing IP addresses The ending address cannot exceed a subnet limit of 254 Hence the max...

Страница 18: ...red as DHCP relay it is responsible for forwarding the requests and responses negotiating between the DHCP clients and the server By turning off the DHCP server and relay the network administrator mus...

Страница 19: ...conds to complete To perform the test select your connection from the list and press the Test button Before running this test make sure you have a valid DSL link Figure 1 9 Diagnostics Test Screen Aft...

Страница 20: ...and the LAN sides are complete and you have the proper protocols configured you should be able to surf the Internet By default when you select ping test the ADSL Router will ping itself 3 times The A...

Страница 21: ...links are listed as shown below See Fig 1 13 Figure 1 13 Advanced Screen 4 5 1 WAN Connection The Wide Area Network WAN connection exists on the other side of the ADSL Router also referred to as a bro...

Страница 22: ...may need to utilize the static and dynamic routing capabilities of the modem to pass data correctly Figure 1 14 New Connection PPPoE Connection Setup 4 5 3 ADSL Modulation To configure the DSL modulat...

Страница 23: ...ve the default value if you are unsure or the ISP did not provide this information See Fig 1 16 Following is a description of the different options 1 Username The username for the PPPoE access this is...

Страница 24: ...ADSL2 4 Port Ethernet Wireless GRouter User Guide Page 24 of 55 Figure 1 16 Quickstart PPPoE Connection Setup...

Страница 25: ...ange your gateways IP address and you have DHCP enabled the DHCP configuration must reside within the same subnet The default gateway is the routing device used to forward all traffic that is not addr...

Страница 26: ...as enabled in the configuration all DHCP clients are automatically assigned with IP address If a fixed IP address server is on the LAN and you want this server to be visible via the WAN you must add i...

Страница 27: ...flooding the LAN ports with multicast frames and will instead direct them to the CPU port for processing Users are able to specify connection speed and set their values accordingly from the following...

Страница 28: ...one active DSL connection In presence of multiple DSL connections select the one over which the incoming traffic will be present for example the default Internet connection To enable UPnP you must fi...

Страница 29: ...he program sleeps for Polling_interval amount of minutes before starting the whole process again Use the following procedures to enable SNTP 1 Check Enable SNTP 2 Primary SNTP Server The IP address or...

Страница 30: ...fill the network management needs The agent is a separate station that can request data from an SNMP agent in each of the different managed system in the network The agent uses the MIBs as dictionarie...

Страница 31: ...ee priority queues associated with transmit data The high priority queues have strict priority over the medium priority and low priority queues and therefore can exhaust all available bandwidth The we...

Страница 32: ...y on the network Multicast delivers IP packets to just a group of hosts on the network IGMP Internet Group Multicast Protocol is a session layer layer 3 protocol used to establish membership in a Mult...

Страница 33: ...listed The dynamic DNS will be linked with the WAN IP of the router even after the ISP update the WAN IP to another IP address It can be useful in web hosting and FTP services See Fig 1 25 Note The Us...

Страница 34: ...GRouter User Guide Page 34 of 55 4 5 14 DNS Proxy This feature allows the user to select the Domain Name Server DNS Server Priority as well as enter IP addresses for Primary DNS and secondary DNS See...

Страница 35: ...alid or invalid DNS Auto DNS still allow user s PC to surf the web 3 Auto Proxy Any valid Private IP proxy setting with any port number ie 1234 on the web browser such as Internet Explorer Auto Proxy...

Страница 36: ...me or other application select the external connection for example the Internet connection from the Home screen click Advanced and under Application select Port Forwarding Next select the computer hos...

Страница 37: ...d or frame type When bridge filtering is enabled each frame is examined against each defined filter rules sequentially When a match is determined the appropriate filtering action determined by the acc...

Страница 38: ...t Access Control screen The Access Control is disabled by default remote management from the WAN side IP addresses is denied most services from the LAN side IP addresses is enabled Remember to 1 Check...

Страница 39: ...the remote LAN network or host to which you want to assign a static route Enter the IP address of the host for which you wish to create a static route here For a standard Class C IP domain the networ...

Страница 40: ...routes will be updated Selecting In means that the ADSL Router will only incorporate received RIP information Selecting Out means that the ADSL Router will only send out RIP information Selecting Both...

Страница 41: ...le 4 5 22 System Password You can change your ADSL Router s username and password by clicking on System Password You can also change the idle timeout you will need to log back onto the ADSL Router onc...

Страница 42: ...plete Note Do not remove power from the ADSL Router during the firmware upgrade pr ocedure See Fig 1 35 Figure 1 35 Firmware Upgrade 4 5 24 Restore to Default The restore to factory defaults feature w...

Страница 43: ...can be changed SSID is wireless network name for the wireless router Your wireless client will need this name for wireless connection The wireless setup allows the user to enable or disable the AP ac...

Страница 44: ...tton The options listed can be changed to cater for advance users See Fig 1 38 Figure 1 38 Wireless Configuration Page 4 6 3 Wireless Security It is important for user to enforce security in wireless...

Страница 45: ...Cipher option the available options are 64 bits 128 bits and 256 bits 4 You can configure up to 4 sets of keys for your wireless client Figure 1 40 Wireless Security settings Enter the IP Address of t...

Страница 46: ...5 WPA is the short term for WiFi Protected Access WPA is an industry supported pre standard version of 802 11i that utilizes the Temporal Key Integrity Protocol TKIP which fixes the problems of WEP wh...

Страница 47: ...essing the wireless router You must add the MAC address of the client s wireless LAN card 4 6 4 2 Associated Stations Wireless client which are connected to the wireless router will be displayed in th...

Страница 48: ...ture section allows users to configure the following IP Filters LAN Isolation URL Filters Figure 1 44 Security 4 7 1 IP Filters IP filter is identical to Port blocking in Access Control The router wil...

Страница 49: ...u to secure information in private portions of the LAN from other publicly accessible LAN segments Figure 1 46 LAN Isolation 4 7 3 URL Filters This feature allows the router to block access to certain...

Страница 50: ...ser Guide Page 50 of 55 4 8 Status This status section allows users to view the following connections and interfaces Connection Status System Log Remote Log Network Statistics DHCP Clients Modem Statu...

Страница 51: ...t will display the type of protocol used the WAN IP address the connection state and the duration connected See Fig 1 49 Figure 1 49 Connection Status 4 8 2 System Log You can view the ADSL Router s l...

Страница 52: ...e 52 of 55 4 8 3 Remote Log Settings This feature is for users to enable remote logging Settings mentioned below are essential for this feature to work See Fig 1 51 Log Level Adding Deleting IP addres...

Страница 53: ...s Information regarding the Status and Statistics of your Ethernet DSL and Wireless line will be displayed Figure 1 52 Network Statistics 4 8 5 DHCP Clients This section shows the users connected It a...

Страница 54: ...m Status This section displays the Modem status and DSL statistics Figure 1 54 Modem Status 4 8 7 Product Information This screen will show a summary of all the product information and software versio...

Страница 55: ...s GRouter User Guide Page 55 of 55 4 9 Help The Help screen takes you to the different Help Sections for Firewall Bridge Filters LAN Clients LAN Group Configurations PPP Connection UPnP IP QoS and RIP...

Отзывы: