Shining 3D Transcan-C_User Manual_V1.4.2
21
If the calibration fails, click the "Recalibrate" button and repeat the steps above to recalibrate.
After successful calibration, click
Next
to enter the white balance calibration.
4.2.2.
White Balance Calibration
To ensure that accurate texture data is obtained, it is recommended that a white balance
calibration be performed each time the ambient brightness changes.
To select white balance calibration, you need to select whether to use a light box. Select a light
box based on the actual situation.
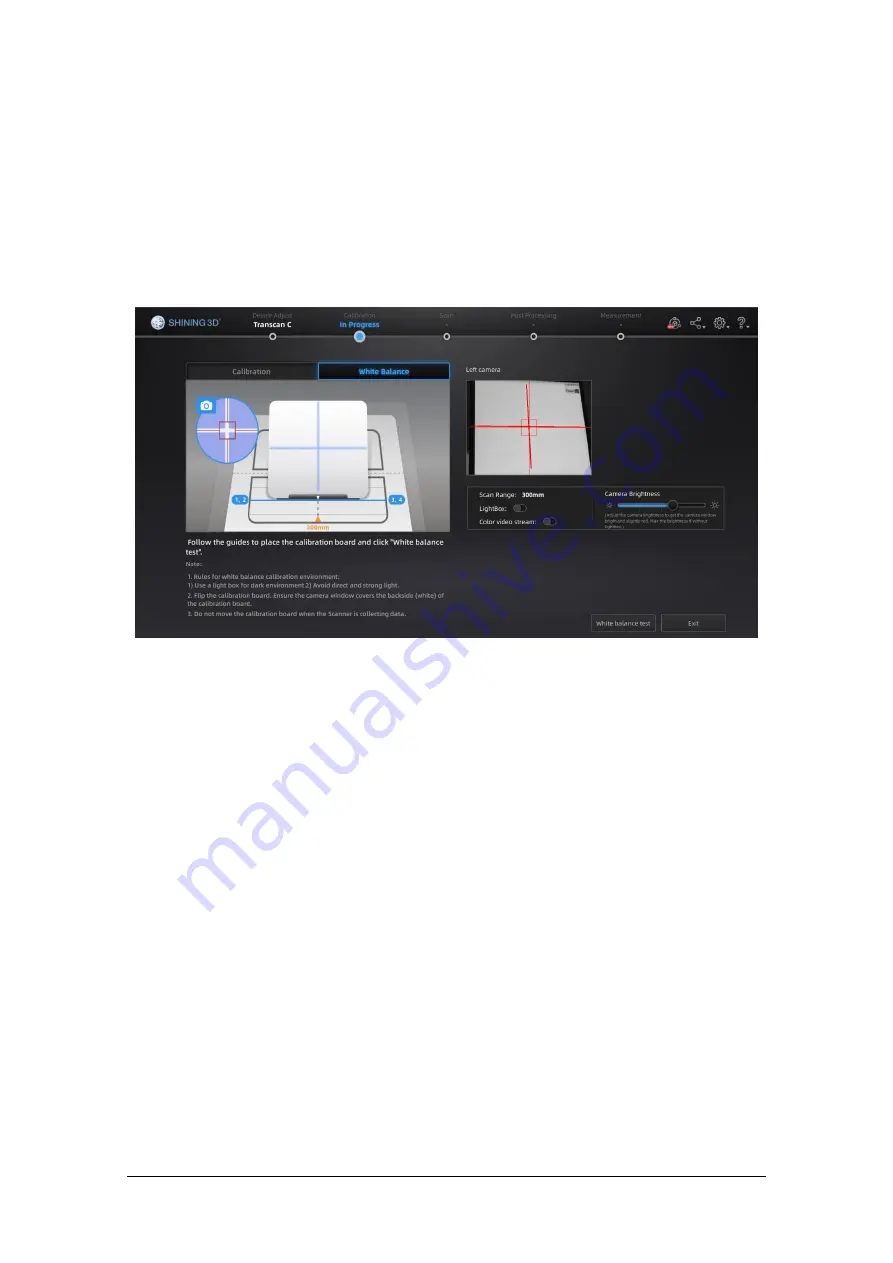
White balance calibration interface
During white balance calibration, the back of the calibration board is placed on the calibration
board bracket, and the bracket is moved to the initial position to ensure that the calibration board is
placed smoothly and the back is facing the probe.
Click the camera brightness bar on the white balance interface to adjust the brightness of the
windows. Adjust the brightness until the back of the calibration board in the window is slightly red. If
the brightness is insufficient or too bright, adjust the ambient light or light box brightness.
Click
White balance test
. The white balance verification is complete when the white balance
calibration is successful.
To obtain good texture effect, it is necessary to ensure that the back of the calibration board is
clean.
If you are not satisfied with the texture effect, you can change the ambient brightness or redo
white balance calibration.
Click
Exit
on the calibration screen to enter the scan for a new project.
After the white balance is finished, enable
View real-time color effect
to check whether the
colors in the white balance effect are consistent with the left camera viewport.
If it is not the same, you need to
disable
View real-time color effect
, re-adjust the brightness and click
White balance test
; if it is the same, you can click
Exit
to exit the calibration interface.


