background image


Copyright (C) Sherpa 4x4  |  www.sherpa4x4.com.au  |  [email protected] 

WINCH INSTALLATION 

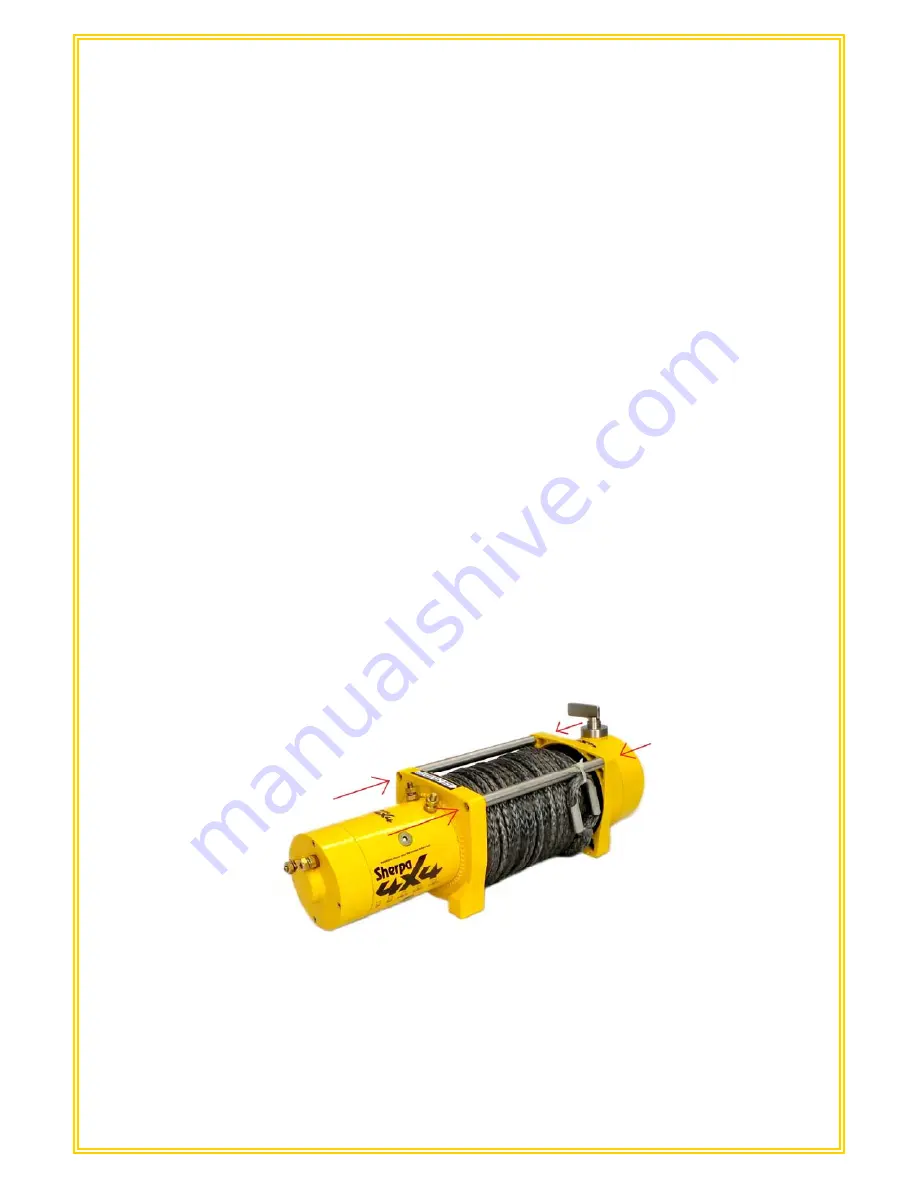
Mounting Your Winch  

The winch is to be mounted into a suitable steel mounting frame using the 4 point foot 
mounting system in either a horizontal or vertical plane. Your winch should only ever be 
installed with the rope/cable winding onto the drum on the lower side, closest to the 
mounting bolts. Your winch is not designed or rated for the rope/cable winding onto the top 
of the drum near the cross member supports.  

Ensure your winch rope or cable is wrapping onto the drum as per the arrow stickers on your 
winch. Typically, when looking at the vehicle front on, the winch motor will be installed on the 
left hand side of the vehicle. Installing your winch backwards will result in the winch brake 
failing to work.  

It is very important that the winch is mounted on a flat surface so that the three sections 
(motor, cable drum and gear housing) are properly aligned. Before commencing installation, 
ensure the mounting facility being used is capable of withstanding the winches maximum 
rated capacity. The fitment of winches and / or a frontal protection systems may affect the 
triggering of SRS air bags. Check that the mounting system has been tested and approved 
for winch fitment in air bag equipped vehicles. 

The winch should be secured to the mounting plate with the steel bolts and spring washers 
provided. The fairlead or hawse is to be mounted so as to guide the rope/cable onto the 
drum evenly.  

Your winch tie rod bolts may be loose from transport. These bolts should only be removed 
one at a time so your winch holds together. Apply a drop of thread locker to each bolt and 
tighten.  


Winches are mounted in a high vibration environment. It is highly recommended both liquid 
thread locker and spring washers are used on all connections. All connections should be 
checked for tightness after 1,000km of travel.  

Содержание 4x4 Stallion

Страница 1: ...Copyright C Sherpa 4x4 www sherpa4x4 com au info sherpa4x4 com au 1 www sherpa4x4 com au info sherpa4x4 com au SHERPA 4x4 WINCH OWNER S MANUAL...

Страница 2: ...gher the load the higher the current and heat produced Remember to monitor the temperature of the winch motors and cabling As a rule of thumb when winching at high loads do not winch for longer than 3...

Страница 3: ...Rating Capacity Rating Capacity Rating Capacity Rating Capacity Rating Capacity lb m lb m lb m lb m lb m 1st 25 000 4 3 17 000 4 3 12 500 4 3 10 000 4 4 9 500 6 2 2nd 19 000 10 1 12 730 11 5 9 520 11...

Страница 4: ...rotector or chain of suitable strength and rating Observe your winch at all times when performing a winch recovery and stand at a safe distance Stop the recovery every few meters to assure the cable r...

Страница 5: ...ation Spool out the cable until the red cable mark appears around five wraps on the drum and then rewind the cable onto the drum under a load of 500lbs 230kgs Winching your vehicle up a slight incline...

Страница 6: ...ed on a flat surface so that the three sections motor cable drum and gear housing are properly aligned Before commencing installation ensure the mounting facility being used is capable of withstanding...

Страница 7: ...ting bolts and winch foot mounts The rope cable should enter the drum on the lower side of the drum in keeping with the direction labels on the winch Ensure your mount is rated for the force that can...

Страница 8: ...head and match the recommended torque setting Bolt Grade Torque Nm 8 8 44 10 9 62 12 9 75 If you are planning on loading the winch to it s limit it is recommended that the load be centred onto the dru...

Страница 9: ...various ways depending on your vehicle type configuration and winch mounting point A range of brackets are offered to assist with mounting Keep in mind the outer enclosure of your control box is not w...

Страница 10: ...light penetrating oil Inspect for broken strands and replace the cable as necessary A small amount of lubricating oil can be applied to the engagement lever if stiffness or engagement difficulties occ...

Страница 11: ...ome counter rotation of the winch drum The brake should set and hold the vehicle If winching down a hill the winch brake won t set when the winch out button is released and users should always rely on...

Страница 12: ...D connecting to Terminal D BLACK of the motor 3 Short red cable with RED sleeve B connecting to Terminal B RED of the motor 4 Earth thin cable Terminal a connecting to Terminal A of the motor 5 Termin...

Страница 13: ...Copyright C Sherpa 4x4 www sherpa4x4 com au info sherpa4x4 com au 13...

Страница 14: ...om au info sherpa4x4 com au 14 Winches with 8 9hp motors Take care failure to correctly connect the cables may result in motor damage Short Black w Yellow sleeve Short Black w Black sleeve Short Red w...

Страница 15: ...tically up Fit the drum taking care to ensure the gear adaptor is fits into the gearbox 9 Fit the drive rod through the centre of the drum into the centre of the gearbox and ensure it locates correctl...

Страница 16: ...dden change in direction can cause damage to the winch which is not covered by warranty Ensure your winch has completely stopped before changing direction in operation Wiring Dual Motor Winches Please...

Страница 17: ...Copyright C Sherpa 4x4 www sherpa4x4 com au info sherpa4x4 com au 17...

Страница 18: ...NG The clutch must be engaged fully for pulling If not engaged correctly damage may occur 3 Re check all cable rigging before proceeding 4 Plug in the winch hand held remote switch It s recommended th...

Страница 19: ...power back in This will keep all components lubricated and in good working condition so that the winch can be relied on when needed Scheduled maintenance should be performed annually If you are exposi...

Страница 20: ...ORD Please complete this form each time the winch is serviced Service schedule is every 12 months New forms available at www sherpa4x4 com au Winch Purchase Date Date of last service Date of this serv...

Страница 21: ...al condition comments 3 Remove electric drive from winch Inspect motor internals for signs of moisture and dirt clean as appropriate with circuit cleaner Inspect motor brushes and armature for cleanli...

Страница 22: ...ed deep within the gearbox Only replace brake shoes where extreme wear presents Brake shoes must be orientated as per below Report on any work completed Winch Motor Only service the winch motor with t...

Страница 23: ...pect electrical cables and report on condition including effectiveness of cable sheathing Also report any adjustment or work completed 6 Inspect control box general condition and cleanliness Check int...

Страница 24: ...d by persons considered appropriate If unsure give us a call or email Examples include qualified mechanics auto electricians engineers 4x4 shops The winch shall be removed from vehicle prior to beginn...

Страница 25: ...th Sherpa 9 500Lb Steel Cable Winches 5 Years Sherpa 9 500Lb Steel Cable Winches 5 Years Sherpa 12 000Lb Steel Cable Winches 5 Years Sherpa 12 000Lb Synthetic Rope Winches 5 Years Sherpa 17 000Lb Stee...

Страница 26: ...ter mud and dust will not void your winches warranty however users should be able to show proof they have made efforts to maintain their winch if they are operating in environments which result in thi...

Страница 27: ...d serviced asked of your winch A copy of service receipts may be requested for a warranty claim The winch should be used with a minimum 650 Cold Cranking Amps battery The winch MUST have at least 1 co...

Отзывы: