- 3 -
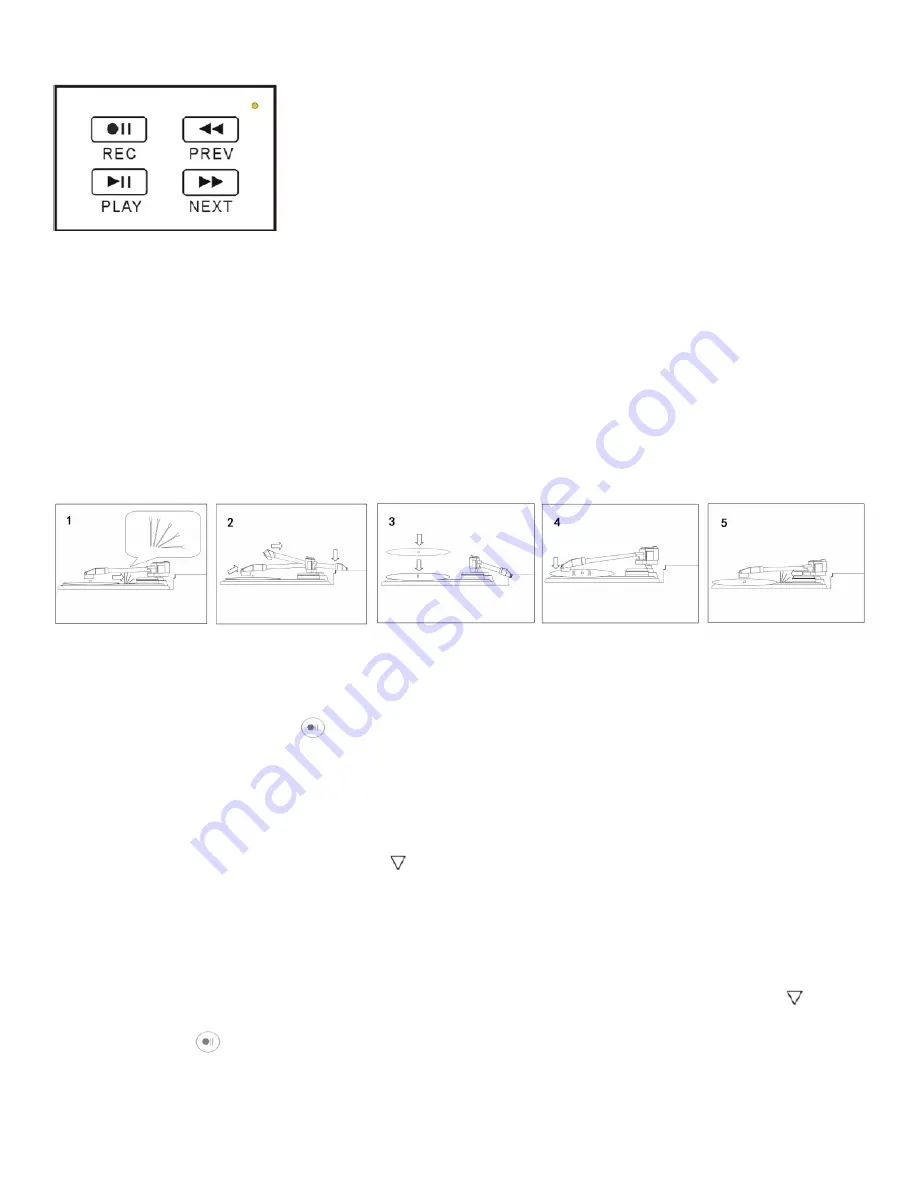
CONTROL PANEL
REC/STOP BUTTON –
Press to start convert (record). Press again to stop.
PLAY/STOP BUTTON –
Press to playback the converted MP3 file in USB flash or Micro SD card.
PREV BUTTON –
During playback, press to play previous file.
NEXT BUTTON –
During playback, press to play next file.
OPERATING THE TURNTABLE AUDIO RECORDER
1. Unhook and lower the arm clip.
2. Raise the tone arm and move it to the side.
3. Place your record on the platter.
4. Lower the tone arm onto the record. The record will begin playing.
5. When finished, raise the tone arm and return it to rest on the arm clip.
CONVERTING RECORDS TO MP3 – MANUAL MODE
1. When the turntable is playing and a USB flash drive or Micro SD card is connected, the device is
in standby mode (
GREEN
indicator light is on continuously).
2. Press the recording button and the device will begin recording. The
GREEN
indicator light will
be flashing while it is converting. Press the recording button again to
STOP
recording and save
the file onto your USB flash drive or Micro SD card.
NOTE:
If the indicator light does not flash
green, remove your USB flash drive or Micro SD card. Then reinsert the USB flash drive or Micro
SD card and try again.
3. At the interval between two songs, where you want to
STOP RECORDING
one file and
START
RECORDING
a new file, short press the button. The flashing green indicator will be
OFF
for
about 2 seconds while it saves your first song. Then, it will resume flashing to indicate it is
recording the
NEXT
song.
CONVERTING RECORDS TO MP3 – AUTO MODE
The Turntable Audio Recorder has an automatic mode that automatically starts a new recording
when it detects a pause in the music. When the device is in standby mode, press and hold the
button for 3 to 5 seconds, until you see the indicator light change from
GREEN
to
BLUE.
Press the
recording button to begin recording in auto mode.


