Summar
y of
Operations
32
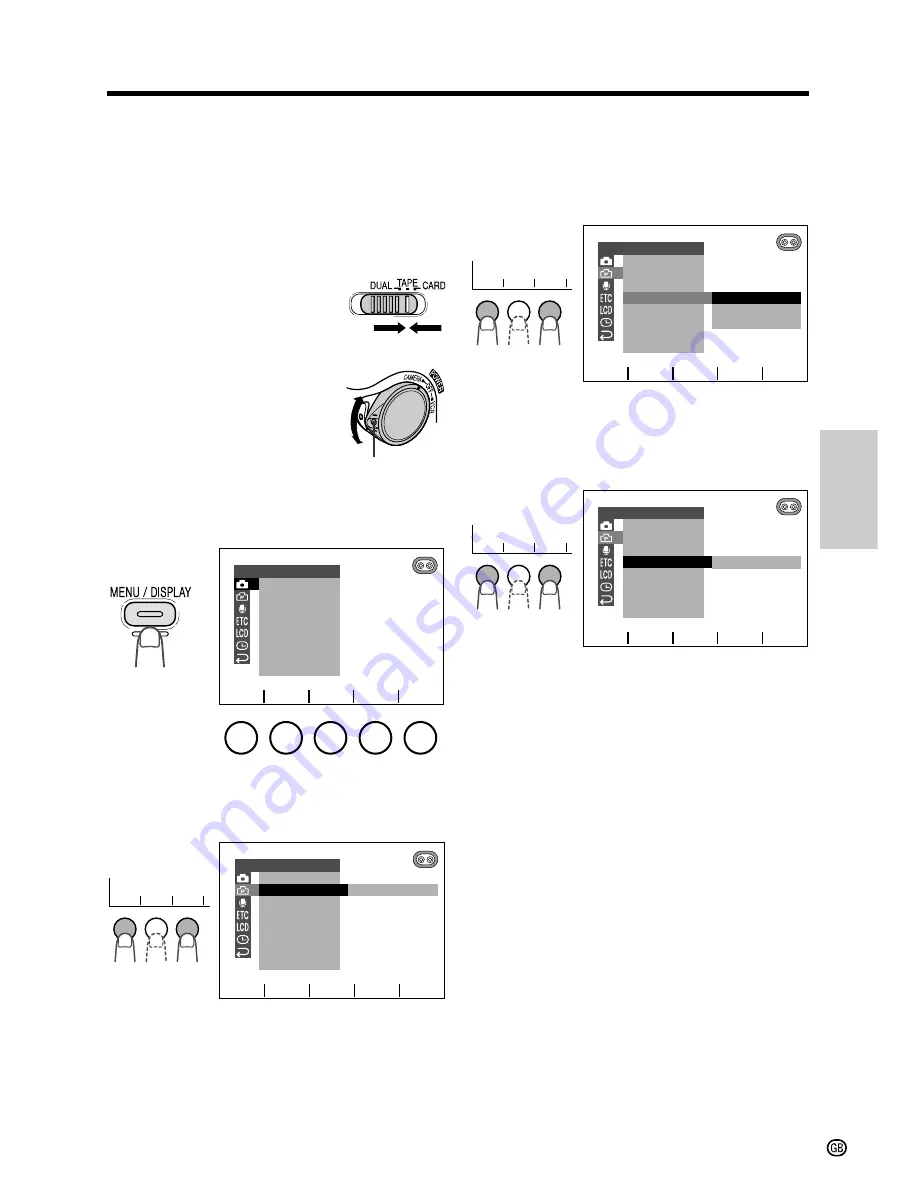
Using the Menu Screens
The menu screens can be used to adjust the
various settings of the camcorder.
1
Open the LCD monitor and adjust the
angle (see page 22).
2
Set the Media Selection
switch to TAPE or
CARD.
3
Hold down the Lock
button and set the
POWER switch to
CAMERA or VCR.
4
Press the MENU/DISPLAY button until
the menu screen appears.
5
Press
f
or
d
(
1
) to select the desired
menu screen, then press SET
(
2
).
MAN. F OCUS
E XPOSURE
SHU T. SP E ED
P I C. E F F E C T
SC E NE ME NU
QK.
D I S
RE TURN
RE T URN
MANUA L SE T
SET
a
s
PHO TO SNAP
SNAP
DGT L
RE C
ZOOM
E FF.
MOD E
SNAP
SP E E D
1 6 9
:
CAME RA SE T
T AP E
RE TURN
SET
a
s
Lock button
SET
a
s
1
1
2
SET
a
s
1
1
2
SET
a
s
1
1
2
6
Press
f
or
d
(
1
) to select the desired
menu item, then press SET
(
2
).
• The available settings for the selected
menu item are displayed.
7
Press
f
or
d
(
1
) to select the desired
menu setting, then press SET
(
2
).
• The selected menu setting is set.
• To adjust another menu item, select
RETURN to returns to the status in step
5 or 6, then repeat the procedure from
the point.
To turn off the menu screen
Press the MENU/DISPLAY button.
Notes:
• Certain menu items are common among
Camcorder modes. If the DISPLAY menu item,
for example, is set to “DATE+TIME” in TAPE-
CAMERA mode, it will be automatically set to
“DATE+TIME” in other modes.
• The menu items are displayed in yellow when
the corresponding functions are selected. The
menu items are displayed in gray when the
corresponding functions cannot be selected.
• The menu screen automatically turns off if no
settings are made within five minutes.
• The example screens in this operation manual
are for explanation purposes, and may differ
slightly from the actual screen displays.
Example
Example
Example
OF F
4 0
2 0 0
PHOTO SNAP
RE C
E F F.
DGT L ZOOM
SP E E D
1 6 9
:
CAMERA SE T
MODE
SNAP
T APE
RE TURN
SET
a
s
2 0 0
PHOTO SNAP
RE C
E F F.
DGT L ZOOM
SP E E D
1 6 9
:
CAMERA SE T
MODE
SNAP
T APE
RE TURN
SET
a
s


