


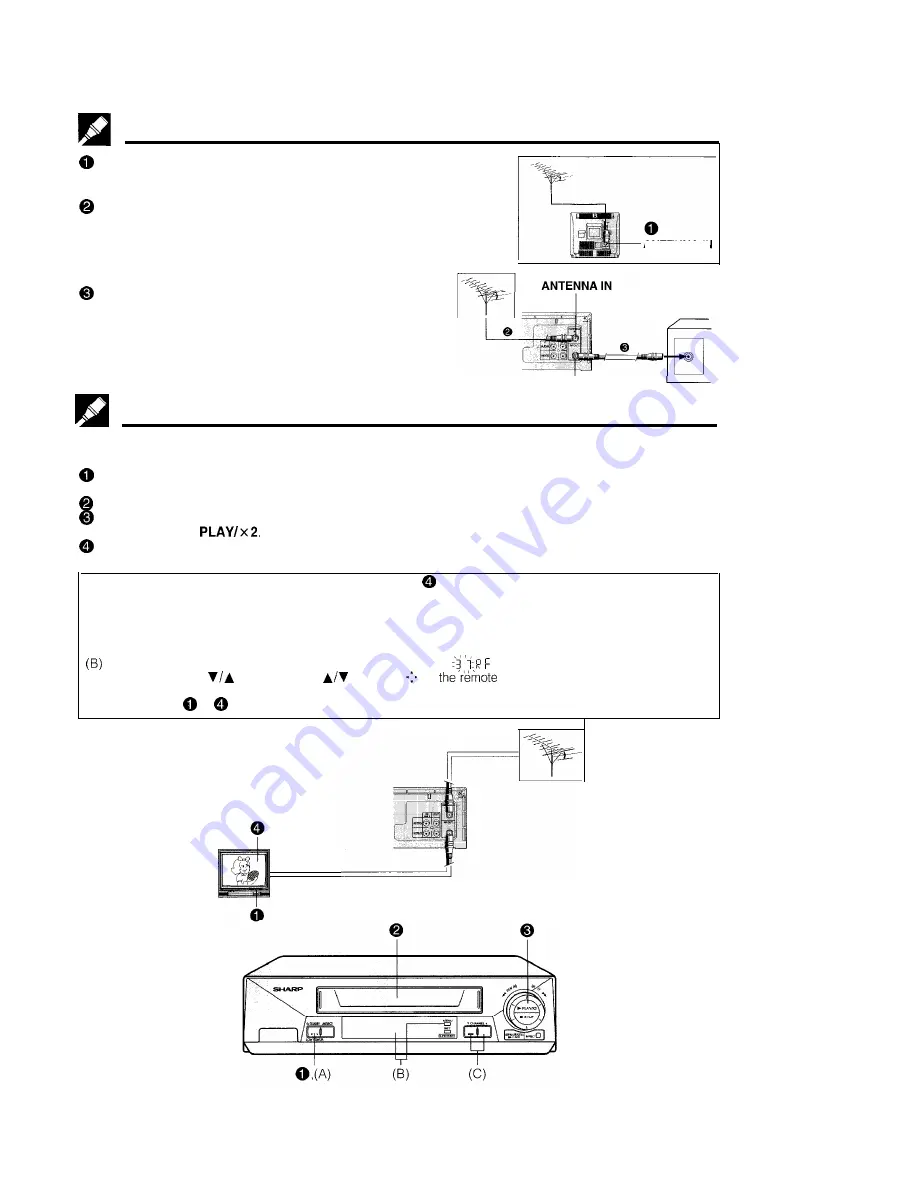
Connections
Disconnecting TV Cable
Disconnect the aerial cable from the back of your TV set.
Connecting Aerial Cable to VCR
Connect the aerial cable to the ANTENNA IN terminal of your VCR.
ANTENNA IN
Connecting VCR to TV
Connect the supplied coaxial cable to the RF
OUT
terminal of the VCR. Plug the other end into
your TV’s ANTENNA IN terminal.
TV back panel
RF OUT
Adjusting the Video Channel
To view the output of your VCR on the television screen, you must select an unused channel on your TV and
tune it to the output of your VCR (factory preset to UHF channel 37).
Turn on the TV, select the AV channel or an unused channel on the TV, and turn on the power on the VCR.
(See page 5, item 3.)
Load a prerecorded tape (not supplied) into the VCR.
If the erasure protection tab on the tape is removed, the VCR will automatically play back the tape.
Otherwise press
Tune the selected channel on the TV until the picture from the VCR is displayed on the TV screen. (This TV
channel must be selected each time the VCR is used.)
l
If picture interference appears on the TV screen in step
above, you can change the video channel (RF
output channel from the VCR) with the following procedure. (If UHF channel 37 is an active broadcast channel in
your area, manually select a different channel (UHF 28 to UHF 69) (see below) and then retune your TV as
above.)
(A) Press STANDBY (LOW POWER) on the VCR or STANDBY on the remote control. The VCR enters POWER
STANDBY mode. (See page 5, item 2.)
Keep pressing MENU for more than two seconds to light up the
on the VCR display.
(C) Press CHANNEL
on the VCR or
button of
on
control to manually select an unused
channel for use as the video channel, then press SET.
(D) Repeat steps
to
above using the newly selected video channel.


