


9
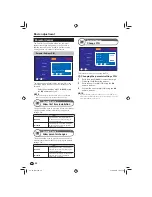
Before turning on the power
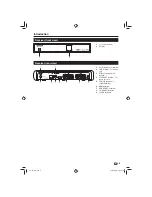
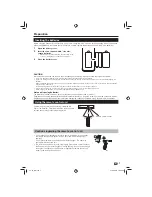
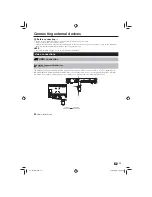
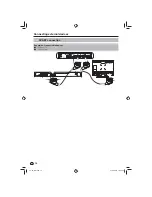
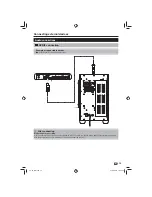
RF IN
RF OUT
USB
ETHERNET
SPDIF
HDMI
VCR
TV
12V DC - 2A
-
+
Connect the antenna (standard DIN45325 plug (IEC 169-2)
n
75
q
coaxial cable)
Connect the HDMI cable
o
Connect the p
p
ower adapter
Place the TV close to the AC outlet,
and keep the power plug within
reach.
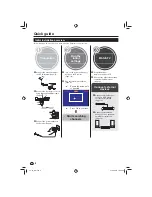
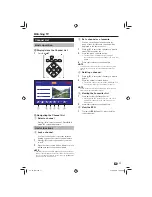
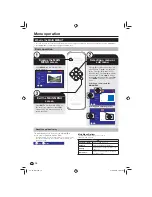
Initial auto installation
When the Receiver is powered on for the first time after purchase, the first time installation screen appears. Follow the
on-screen instructions to search for all available channels.
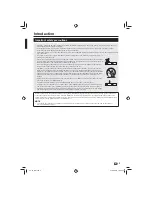
Confirm the following before turning on the power
Is the antenna cable connected?
E
Is the power adapter connected and plugged in?
E
Is the HDMI cable connected between the Receiver and your TV?
E
Press
1
a
on the Receiver.
The first time installation screen is displayed.
•
Ensure the antenna cable is connected.
2
Press OK to start the channel search.
3
The Receiver will search for, sort and store all
•
receivable channels.
NOTE
The first time installation process will be aborted if the
•
Receiver is left unattended for more than 30 minutes before
searching for channels.
After the first time installation has been completed, the
•
default PIN is automatically set to ‘0000’. To change the PIN
setting, refer to Page 20.
First Time Installation
OK
Please ensure that an aerial is connected
Then press
to scan for services
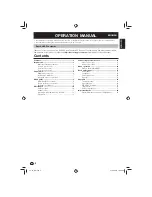
Quick guide
n
o
p
TU-T2_GB.indd 9
TU-T2_GB.indd 9
01/06/2010 16:02:54
01/06/2010 16:02:54
Содержание TU-T2
Страница 30: ...30 Notes TU T2_GB indd 30 TU T2_GB indd 30 01 06 2010 16 03 18 01 06 2010 16 03 18 ...
Страница 31: ...31 Notes TU T2_GB indd 31 TU T2_GB indd 31 01 06 2010 16 03 18 01 06 2010 16 03 18 ...
Страница 32: ...TU T2 EN 03 10 dcs 8595 TU T2_GB indd 32 TU T2_GB indd 32 01 06 2010 16 03 18 01 06 2010 16 03 18 ...


