background image

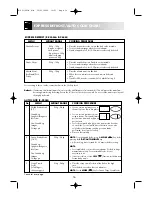
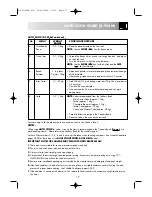
MENU

WEIGHT RANGE

COOKING PROCEDURE

Roast Beef / Lamb

0.6kg - 1.8kg

• Place the meat in a flan dish on the low rack. 
• Turn the meat over when the oven indicates.
• After cooking, leave the meat to stand wrapped in aluminium

foil for 10 minutes.

NOTE:

Select 

MORE 

(

) for well done.

It is not possible to use the 

LESS 

(

) function for

beef/lamb.

Roast Pork

0.6kg - 1.8kg

• Place the meat in a flan dish on the low rack.
• Turn the meat over when the oven indicates.
• After cooking, leave the meat to stand wrapped in aluminium

foil for 10 minutes.

NOTE:

It is not possible to use the 

LESS 

(

) function for

pork.

Roast Poultry

1.2kg - 3.6kg

• Place the poultry breast side down in a flan dish on the low

rack. 

• Turn the poultry over when the oven indicates. When you

cook frozen poultry with giblets, remove the giblets at the first
or second turn over.

• After cooking, leave the poultry to stand wrapped in

aluminium foil for 10 minutes.

NOTE:

It is not possible to use the 

LESS 

(

) function for

poultry. 

14

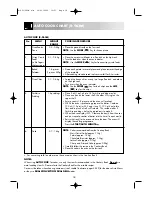
EXPRESS COOK CHART

EXPRESS COOK

WEIGHT RANGE:

• Food weight should be rounded up to the nearest 0.1kg or 1oz, for example, 0.65kg to 0.7kg and 12.5oz to 13oz.
• You are restricted to enter a weight within the range (see the chart below).
• To cook weights above or below that range, or foods not included in the chart below, refer to the charts in the

Cookery Book.

NOTES:

• Press the 

MORE 

(

)

or 

LESS 

(

)

keys before pressing the 

START/AUTO MINUTE

key where

recommended in the chart below.

• When action is required (example, to turn food over), the oven stops, the audible signal sounds, and the display

shows the necessary action. To continue cooking, press the 

START/AUTO MINUTE

key.

• The final temperature will vary according to the initial food temperature. Check food is piping hot after cooking.

If necessary, you can extend the cooking time and change the power level.

• You can enter the weight in Lb/oz or Kg/g. To convert to either weight range press the 

WEIGHT

CONVERSION

key once before entering the weight. See page 27.

• When freezing foods for Express Cook, ensure food is fresh and of good quality.

For converting to Lb/oz see the conversion chart in the Cookery Book.

R-953/963M O/M  16/03/2000  10:51  Page 14

Содержание R-953M

Страница 1: ...TEAK CHOPS CHICKEN PORTIONS COMBINATION OVEN MICROWAVE GRILL CONVECTION OPERATION MANUAL 900W IEC 60705 R 953M ROAST BEEF LAMB ROAST PORK ROAST POULTRY STEAK CHOPS CHICKEN PORTIONS FRESH VEG 10min 1min 10sec FROZEN READY MEALS CHILLED READYMEALS 1 Oven Ready Pizza 2 Crispy Crumb Foods 3 Baked Potatoes 4 Oven Chips 5 Yorkshire Pudding 6 Cake LESS Time MORE GRILL Kg Lb AUTO START CLOCK CONV CONV DUA...

Страница 2: ...R 953 963M O M 16 03 2000 10 49 Page B ...

Страница 3: ...n 7 Energy Save Mode 7 Setting the Clock 8 How to Operate the Oven 9 Defrosting 9 Grilling 10 Preheating the oven 10 Convection Cooking 11 Dual Cooking 12 Express Cook 13 Express Cook Chart 14 Express Defrost Auto Cook 15 Express Defrost Chart 16 Auto Cook Chart R 953M 16 17 Auto Cook Chart R 963M 18 SensNcook R 963M 19 SensNcook Chart R 963M 20 21 Convenient Functions 22 27 Cooking Advice Suitabl...

Страница 4: ...rntable and support fitted correctly This promotes thorough even cooking A badly fitted turntable may rattle may not rotate properly and damage the oven The turntable rotates clockwise or counter clockwise The rotary direction may change each time you start the oven This does not affect cooking performance When you order accessories please mention two details part name and model name to your deale...

Страница 5: ...R key 20 MICROWAVE POWER LEVEL key 21 GRILL key 22 WEIGHT keys R 953 10min 1min 10sec LESS Time MORE GRILL Kg Lb AUTO START CLOCK CONV CONV DUAL GRILL DOWN UP STOP CLEAR AUTO MINUTE START 1 Chilled Ready Meals 2 Frozen Ready Meals 3 Crispy Crumb Foods 4 Oven Ready Pizza 5 Oven Chips 6 Baked Potatoes 7 Rice Pasta 8 Cake ROAST BEEF LAMB ROAST PORK ROAST POULTRY STEAK CHOPS CHICKEN PORTIONS ROAST BEE...

Страница 6: ... BUILDING IN KIT An installation frame is available which enables the microwave oven to be integrated within a kitchen unit The microwave oven is not designed to be built above or near a conventional oven SHARP recommend the use of the build in kit EBR 9900 SL W available from your SHARP dealer Only the use of this frame will guarantee the quality and safety of the oven When building follow instal...

Страница 7: ...operations unless wearing thick oven gloves as they will become hot Before cleaning make sure they are not hot Fire If smoke is observed switch off and unplug the appliance and keep the door closed in order to stifle any flames Liquids Microwave heating of beverages can result in delayed eruptive boiling therefore care has to be taken when handling the container Stir the liquid prior to and during...

Страница 8: ...ck the microwave power level during cooking defrosting press the MICROWAVE POWER LEVEL key The power level will be displayed as long as the key is pressed This does not affect the programme or cooking time 100 HIGH 70 MEDIUM HIGH 50 MEDIUM 30 MEDIUM LOW 10 LOW x1 x2 x3 x4 x5 Your oven has 5 power levels To choose the power level for cooking follow the advice given in the cookbook Generally the fol...

Страница 9: ...ng will appear in the display at this time 2 Open the door The display will flash the message shown opposite NOTE If the display shows different messages from ENERGY SAVE MODE the oven may be set in demo mode Close the door see page 34 to cancel the demo mode 3 Close the door The oven display wil show 0 If you set the clock Energy Save mode will be off If you want to keep Energy Save mode go to st...

Страница 10: ...the oven is in cooking or timer mode and you wish to know the time of day press the AUTO START CLOCK key As long as your finger is pressing the key the time of day will be displayed If the electrical power supply to your microwave is interrupted plug in the oven again then open and close the door The display will show 0 If this occurs during cooking the programme will be erased The time of day wil...

Страница 11: ...count down again when the door is closed and the START AUTO MINUTE key is pressed When oven operation is finished the time of day will reappear on the display if set MICROWAVE COOKING EXAMPLE To cook on 10 LOW power for 2 minutes To defrost foods not included in the Express Defrost menu use microwave power levels 30 MEDIUM LOW or 10 LOW Stir or turn food at least 2 3 times during defrosting shield...

Страница 12: ...tinue working for a short time to lower the temperature of the electrical and mechanical components The display may show NOW COOLING EXAMPLE To preheat the oven to 180 C NOTES When the oven reaches the desired temperature the audible signal will sound and the temperature in C will be displayed If you prefer not to preheat the oven where recommended in the Cookery Book allow extra cooking time The ...

Страница 13: ... as a conventional oven using the convection mode The temperatures available in degrees Centigrade are 250 C 230 C 220 C 200 C 180 C 160 C 130 C 100 C 70 C 40 C NOTES CONVECTION cooking is ideal for cooking Victoria sandwich cakes buns biscuits scones and for proving bread at 40 C When using the CONVECTION facility all metal cookware can be used See SUITABLE COOKWARE page 28 29 To achieve the best...

Страница 14: ...es bacon or burgers Turn over halfway through cooking Food can be placed directly on the rack on a heat resistant plate or in a flan dish on the rack EXAMPLE 2 For DUAL CONVECTION To cook for 20 minutes on DUAL CONVECTION 230 C combined with MICROWAVE POWER LEVEL 10 LOW 5 Press the START AUTO MINUTE key once to start cooking 2 Press the DUAL CONVECTION GRILL key to select the cooking mode 3 Press ...

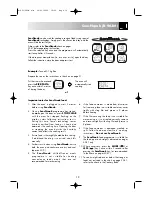
Страница 15: ...tart cooking AUTO MINUTE START The display counts down through cooking time x1 x1 2 Enter the weight by pressing the WEIGHT keys until the desired weight is displayed 1 Press the ROAST PORK key twice to select cooking from chilled ROAST PORK Example 2 To cook Roast Pork from chilled weighing 0 6kg NOTE For R 963M the INFO indicator will also be lit at step 2 NOTE For R 963M the INFO indicator will...

Страница 16: ...K CHART EXPRESS COOK WEIGHT RANGE Food weight should be rounded up to the nearest 0 1kg or 1oz for example 0 65kg to 0 7kg and 12 5oz to 13oz You are restricted to enter a weight within the range see the chart below To cook weights above or below that range or foods not included in the chart below refer to the charts in the Cookery Book NOTES Press the MORE or LESS keys before pressing the START A...

Страница 17: ...y is pressed If the UP weight key is pressed the display will count up from the lowest weight range number of pieces each time the key is pressed Press the MORE or LESS keys before pressing the START AUTO MINUTE key where recommended in the charts on pages 16 18 When action is required example to turn food over the oven stops the audible signals sound and the display shows the necessary action To ...

Страница 18: ... Foods rack ie fish fingers Turn the food over when the oven indicates chicken nuggets NOTE Use the MORE key for Frozen Crispy Crumb foods MENU WEIGHT RANGE COOKING PROCEDURE Chicken Portions 0 3kg 1 2kg Place the portions best side up in a flan dish on the turntable Approx weight of Turn over and rearrange when the oven indicates each portion Stand wrapped in foil for 15 30 minutes until evenly d...

Страница 19: ... 953M For converting to Lb oz please see the conversion chart in the Cookery Book NOTES When using AUTO COOK for cakes use only the utensils recommended in the Cookery Book Do not use metal cooking utensils Please refer to the Cookery Book for the suitable recipes For Auto Menu numbers 3 4 5 6 and 8 care must be taken when choosing containers see Suitable Cookware pages 28 29 as these menus use DU...

Страница 20: ... 2 pint milk 2 eggs size 3 100 g 4 oz plain flour and a pinch of salt until smooth This recipe makes 8 Yorkshire puddings halve the ingredients to make 4 When the oven displays 220 C remove the tray s from the oven and pour equal quantites of batter into the hot oil in each mould Return the tray s to the oven and close the door The oven will display the cooking programme Press the START AUTO MINUT...

Страница 21: ...ntainer cover tightly with cling film and pierce in 5 places before heating 7 If the film covering the food is not suitable for microwaving or is not sealed correctly remove and recover tightly with cling film and pierce in 5 places 8 If the food container is damaged cracked or split follow food manufacturers cooking instructions Do not use SensNcook 9 The SensNook food programme is suitable for t...

Страница 22: ...ng automatically after 2 3 seconds After cooking leave to stand covered for 2 3 minutes before serving For stirrable foods stir as the oven indicates For food in bags manipulate contents For non stirrable foods it is not necessary to stir It is not possible to use the LESS function for chilled ready meals As above but press the FROZEN READY MEALS key NOTES Press MORE key for cooking non stirrable ...

Страница 23: ...dd boiling water Place the dish on the centre of the turntable Press the RICE PASTA key once When the oven indicates stir and replace into the oven and press start Stir and stand for 2 3 mins after cooking NOTES RICE Add 300ml of boiling water per 100g white rice PASTA Add 400ml of boiling water per 100g pasta DO NOT COVER THE DISH Cut chop and slice into evenly sized pieces Place into a suitable ...

Страница 24: ...ess the START AUTO MINUTE key once to start cooking 2 Press the MICROWAVE POWER LEVEL key twice for 70 MEDIUM HIGH x2 x2 x1 The time can be extended at any stage during the 5 minutes EXAMPLE To cook on 70 MEDIUM HIGH for 5 minutes and then extend the cooking time by 1 minute during cooking 1 Enter the cooking time by pressing the 1 MIN key 5 times x5 The timer will count down 4 Press the START AUT...

Страница 25: ...otatoes softer use the MORE key TO USE LESS AND MORE WITH EXPRESS COOK EXPRESS DEFROST AUTO COOK Press the LESS MORE key after entering weight and before pressing the START AUTO MINUTE key TO USE LESS AND MORE WITH SENSNCOOK Press the LESS MORE key within 2 seconds after pressing a SENSNCOOK menu key NOTE To cancel LESS MORE simply press the same key again To change MORE to LESS simply press the L...

Страница 26: ...automatic Weight ranges for automatic programmes As you get more familiar with your oven the guide can be turned off EXAMPLE To set the guide off 1 Hold the KITCHEN TIMER The display will flash a series of messages key down for 4 seconds 2 Press the STOP CLEAR key The display will return to the time of day if set STOP CLEAR x1 4 GUIDE ON OFF R 953M To restore the guide hold the KITCHEN TIMER key d...

Страница 27: ...y if set If you want to cancel the guide press the STOP CLEAR key There are two options when you use the INFO key 1 Guide of Keys allows you to press a key to display information about it The information will be displayed twice The display will flash a series of messages ROAST PORK STOP CLEAR 2 Guide on off allows you to turn the guide on or off EXAMPLE To set the guide off 1 Press the INFO key on...

Страница 28: ...ant to set the clock 1 Press the 1 MIN key 4 times to enter the desired starting time 2 Press the AUTO START CLOCK key once 3 Press the 10 MIN key twice to enter the desired cooking time 4 Press the MICROWAVE POWER LEVEL key 3 times for 50 MED 5 Press the START AUTO MINUTE key once to start the programme Check the display x4 x1 x2 x3 x1 1min 10min AUTO START CLOCK AUTO MINUTE START 6 AUTO START On...

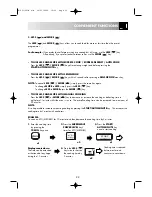
Страница 29: ...the display will show The UP key starts from the lowest weight pieces The DOWN key starts from the highest weight pieces 7 KITCHEN TIMER You can use the KITCHEN TIMER for timing where microwave cooking is not involved For example to time a boiled egg cooked on a conventional hob to monitor the standing time for microwaved food or to remind you of the time when making a phone call Example To set th...

Страница 30: ... become very hot Popcorn Only use microwave popcorn within recommended packaging follow popcorn manufacturer s instructions Never use oil unless the manufacturer recommends and never cook for longer than instructed NO COOKWARE Heat resistant glass e g Pyrex Fire King Corning Ware Microwave safe plastic cookware Microwave cling film microwave roasting bags Heat resistant china and ceramics Disposab...

Страница 31: ...ng bags or popcorn packaging direct steam away from face and hands For even cooking stir turn or rearrange food during cooking Where recommended leave food to stand after cooking or defrosting The initial temperature of food affects the amount of cooking time needed eg chilled food requires more cooking than food at room temperature The temperature of the container is not a true indication of the ...

Страница 32: ...potatoes require more cooking than peas four potatoes will take longer to cook than two Food hygiene standards storage handling and preparation apply to microwaving Always store convenience foods as recommended by the food manufacturer and keep no longer than the Use By date WARNING Always attend the oven when in use Carefully follow the SHARP Operation Manual at all times If you exceed recommende...

Страница 33: ...oultry with giblets Place in a flan dish separate during defrosting and turn over at least 2 3 times Shield if necessary Place in a bowl stir or turn over at least 3 4 times during defrosting remove defrosted parts each time For frozen blocks of meat see Minced Beef in the charts in the cook book Place in a flan dish separate during defrosting and turn over at least twice Shield if necessary Remov...

Страница 34: ...d meals Casseroles Poultry portions Sliced meat Pies Vegetables Remove any poultry or meat portions reheat these separately see below Place smaller items of food to the centre of the plate larger and thicker foods to the edge Cover with vented microwave cling film and reheat on 50 MEDIUM stir rearrange halfway through reheating Ensure food is thoroughly reheated before serving Cover with vented mi...

Страница 35: ...er possible 33 CLEANING AND MAINTENANCE 8 Programme the oven on convection 180 C for 3 minutes Does the oven light come on YES NO Does the turntable rotate YES NO After 3 minutes is the oven cavity hot YES NO If you answer NO to any question first check that the oven is plugged in properly and the fuse has not blown If there is no fault with either Check against the troubleshooting chart on page 3...

Страница 36: ...defrosting Your oven may be set in demo mode Follow the steps below to cancel the demo mode 1 Press the STOP CLEAR key for ten seconds until you hear the beep twice 2 Press the STOP CLEAR key ten times within ten seconds 3 The oven display will show DEMO OFF PROBLEM Digital display does not light up Draught circulates around the door Flashing or arcing from within the cavity when cooking Arcing po...

Страница 37: ... oven may not correspond with the coloured marking identifying the terminals in your plug connect the wires as shown opposite Make sure the terminal screws are tight and the cable is held securely by the cable grip where it enters the plug Like most appliances in your home your oven must be connected to a single phase 230 240 Volt 50Hz alternating current supply If you do not make the proper elect...

Страница 38: ...y accident misuse fair wear and tear neglect tampering with the equipment or any attempt at adjustment or repair other than by a Service Technician Appointed by Sharp Please clean your microwave oven regularly and remove any stains or fat residues without delay Failure to do this may affect the quality and safety of the product or prejudice your guarantee 4 In the unlikely event of your equipment ...

Страница 39: ...ion to our best knowledge were correct at the time of going to print The right to change specifications at any time without notice is reserved as part of our policy of continuous development and improvement AC Line Voltage Single phase 230 240 V 50 Hz AC Power requried Microwave 1 55kW Convection 2 85kW Grill 2 85kW Convection Microwave 2 95kW Grill Microwave 2 95kW Output Power Microwave 900W IEC...

Страница 40: ...SHARP ELECTRONICS U K LTD Manchester U K 0990 274 277 PRINTED IN THE UK TINS A208URR0 100 of the pulp used in making this paper comes from sustainable forests R 953 963M O M 16 03 2000 10 54 Page 38 ...

Отзывы: