background image

Содержание R-3A53

Страница 1: ... Page GENERAL IMPORTANT INFORMATION 1 CAUTION MICROWAVE RADIATION WARNING 1 PRODUCT SPECIFICATIONS 2 APPEARANCE VIEW 3 OPERATION SEQUENCE 4 FUNCTION OF IMPORTANT COMPONENTS 5 SERVICING 7 TEST PROCEDURE 10 TOUCH CONTROL ASSEMBLY 19 COMPONENT REPLACEMENT AND ADJUSTMENT PROCEDURE 25 MICROWAVE MEASUREMENT 33 TEST DATA AT A GLANCE 34 WIRING DIAGRAM 35 PICTORIAL DIAGRAM 37 CONTROL PANEL CIRCUIT 39 PRINT...

Страница 2: ... and repair work must be carried out only by trained service engineers All the parts marked I on parts list are used at voltages more than 250V SHARP CORPORATION OSAKA JAPAN R 3A53 R 3A53B PRODUCT SPECIFICATIONS b S I I b i i 1x II I V L I I 9 l i pap I 4 A _ WXhI _ Li y t I a x j OPERATING SEQUENCE 1 sj I 7 l s P jlll t i I v s jx l 2 p ai 1 _ r_ s z c n I i 6 FUNCTION OF IMPORTANT a COMPONENTS I...

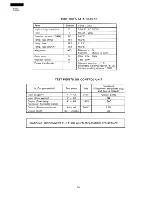
Страница 3: ...ntrol Complement Touch Control System Clock I 00 12 59 Timer 0 99 minutes 99 seconds Microwave Power for Variable Cooking Repetition Rate HIGH Full power throughout the cooking time MEDIUM HIGH approx 70 of Full Power MEDIUM t approx 50 of Full Power MEDIUM LOW approx 30 of Full Power LOW approx 10 of Full Power AUTO COOK Set Weight 1 EASY REHEAT EASY DEFROST 1 INSTANT COOK START j MEMORY AUTO STA...

Страница 4: ...e power setting If not touched HIGH is auto matically selected STOP CLEAR PAD Touch to erase gramming Touch once to stop operation of oven during cooking touch twice to cancel cooking pro gramme I I INSTANT ACTION AUTO START CLOCK PAD Touch to set clock or Auto Start time To cook two serves touch this pad prior to touching the INSTANT ACTION pad 3 SERVE QUANTITY PAD To cook three serves touch this...

Страница 5: ... 24 cm This energy is channeled through the waveguide transport channel into the oven cavity where the food is placed to be cooked When the cooking time is up a signal tone is heard and the relays RYI RY2 go back to their home position The circuits to the oven lamp power transformer fan motor and turntable motor are cut off When the door is opened during a cook cycle the switches come to the follo...

Страница 6: ...e switch lever is moved upward operating the latch head The latch head is moved upward and released from the latch hook Now the door can be opened Door Latch hook Latch head 2nd latch switch Do 1st latch switch IST LATCH SWITCH SW1 2ND LATCH SWITCH SW2 STOP SWITCH SW4 1 When the oven door is closed the contacts COM NO must be closed 2 When the oven door is opened the contacts COM NO must be opened...

Страница 7: ...onents are short circuited the fuse M6 3A blows to prevent an electric shock of fire hazard NOISE FILTER FOR NEW ZEALAND The noise filter assembly prevents radio frequency in terference that might flow back in the power circuit TEMPERATURE FUSE TFI 150 C MG This fuse protects the magnetron against overheating If the temperature goes up higher than 150 C because the fan motor is interrupted the air...

Страница 8: ...solated from other components and the oven chassis Use insulation tape if necessary When the testing is completed carry out 3D checks and reconnect the leads to the primary o he power transformer Microwave ovens should not be run empty To test for the presence of microwave energy within a cavity place a cup of cold water on the oven turntable close the door and set the microwave timer for two 2 mi...

Страница 9: ... does not start when START pad is touched Display appears 0 0 Oven lamp does not light Display appears Fan motor does not operate Display appears 0 Turntable motor assembly does not operate Display apears 0 Oven or any electrical parts does not stop But cooking time is 0 or STOP CLEAR pad is touched IIN 30NDITION Oven seems to be operating but little or no heat is produced in oven load Micro 000 0...

Страница 10: ...53B CK CHECK RE REPLACE I I Y w w Y L c3 u u u u ii 5 v v 5 I 2 z 00 00 0 0 0 0 0 I I I I I I I I I I I I I 0 0 0 lo o 0 0 10 0 0 0 00 I I 000 00 I 0 0 o 101 0 01 lOI IOI 0 a 00 I I 0 00 I I I I 00 OOA n A0 0 0 9 ...

Страница 11: ...ating period the calorie of the water is V x AT I The formular is as follows I P x t 4 2 V x AT P W 4 2 x V x AT t I Our condition for the water load is as follows 1 Room temperature around 20 C Power supply Voltage Rated voltage Water load 2000 ml Initial temperature 1O 1 C P 60xAT Heating time 2min 20 sec J Measuring method A Use two 1 litre Pyrex beakers with a diameter of approximately of 12cm...

Страница 12: ...0 C Power supply Voltage Rated voltage Water load 1000 g Initial temperature 10 2 C Heating time 60 sec P 70xAT Measuring condition I Container The water container must be a cylindrical borosilicate glass vessel having a maximum material thickness of 3 mm and an outside diameter of approximately 190 mm 2 Temperature of the oven and vessel The oven and the empty vessel are at ambient temperature pr...

Страница 13: ...Stir the water to equalize temperature throughout the vessel 6 Measure the final water temperature Example The final temperature T2 21 C 7 Caluculate the microwave power output p in watts from above formula ue A T of Initial temperature Tl 11 C Temperature after 60 2 62 sec T2 21 C Temperature difference Cold Warm AT1 10 C Measured output power The equation is P 70 x AT P 70 x 10 C 700 Watts JUDGM...

Страница 14: ...nt CARRY OUT 3D CHECKS Disconnect the leads to the primary winding of the power transformer Disconnect the filament and secondary winding connections from the rest of the HV circuitry Using an ohmmeter set on a low range it is possible to check the continuity of all three windings The following readings should be obtained a Primary winding I 96 ohms approximately b Secondary winding 97 2 ohms appr...

Страница 15: ...c rectifier is probably faultly and must be replaced with the high voltage rectifier When the asymmetric rectifier is defective check whether magnetron high voltage rectifier high voltage wire or fila ment winding of the power transformer is shorted CARRY OUT 4J CHECKS NOTE FOR MEASUREMENT OF THE RESISTANCE OF THE RECTIFIER OF THE MEASURING INSTRUMENT MUST HAVE A VOLTAGE AT BECAUSE OTHERWISE AN IN...

Страница 16: ... of Indication of ON condition OFF condition ohmmeter Parts Name closed circuit open circuit When room Cl C temperature is approx 20 C Temp fuse 150 C This is not resetable Above 150 C Closed circuit MG type Temp fuse This is not resetable Above 115 C Closed circuit 115Oc type Temp fuse 150 C This is not resetable Above 150 C Closed circuit OVEN type If incorrect readings are obtained replace the ...

Страница 17: ...nected to the supply and should only be used if the relevant cold checks for the motor un der test are inconclusive 1 CARRY OUT 3D CHECKS 2 Disconnect the leads from the primary of the power transformer Make sure that the leads remain isolated from other oven components and chassis Use insulation tape if necessary 3 Connect a voltmeter set to 250V AC across the motor terminals Refer to the relevan...

Страница 18: ...CKS 1 If the fuse M6 3A is blown there could be a shorts or ground in electrical parts or wire har ness Check them and replace the defective parts or repair the wire harness 2 If the fuse M6 3A is blown when the door is opened check the 1st latch switch 2nd latch switch monitor switch and monitor resistor If the fuse M6 3A is blown by incorrect door switching replace the defective switch s and the...

Страница 19: ... e Wrong figure appears f A certain group of indicators do not light up g The figure of all digits flicker 2 3 Other possible troubles caused by defective control unit a Buzzer does not sound or continues to sound b Clock does not operate properly c Cooking is not possible d Proper temperature measurement is not obtained M PROCEDURES TO BE TAKEN WHEN THE FOIL PATTERN ON THE PRINTED WIRING BOARD PW...

Страница 20: ...lication VDD 12v LSI ICI ACL circuit VREF VP al v LSI ICI Fluorescent display tube Grid and anode voltage VFI 3V P P Fib ent of fluorescent display VF2 VFI to VF2 voltage 3 Synchronizing Signal Circuit The power source synchronizing signal is available in order to compose a basic standard time in the clock circuit It accompanies a very small error because it works on commercial frequency 4 ACL Cir...

Страница 21: ...ommercial source frequencv 50Hz This is the basic timing for time processing of LSI PIN NO 1 6 1 SIGNAL 1 CNVSS Power source voltage input terminal Connected to GND I I O 1 IN PIN NO 7 10 1 SIGNAL FO F3 I I O 1 OUT Segment data sionals Refer to the touch control panel circuit for the relationship between signals and indicators Normally one pulse is output in every synchronized signal period and in...

Страница 22: ... signal Signal similar to FO Key strobe signal Signal applied to touch key section A pulse signal is input to K4 K7 terminal while one of D 3 line keys on key matrix is touched I PIN NO 17 1 SIGNAL LS6 __ _ ___ _ _ I I O 1 OUT Segment data signal Signal similar to FO Key strobe sianal Signal applied to touch key section A pulse signal is input to K4 K7 terminal while one of D 2 line keys on key ma...

Страница 23: ...gnal Square Waveform 50Hz To turn on and off the control relay The pulse signal 50Hz is delivered to the control relay driving circuit and cook relay control circuit PIN NO 1 34 Auto clear terminal 1 SIGNAL 1 RESET I l O IN Signal is input to reset the LSI to the initial state when power is supplied Temporarily set to H level the moment power is supplied at this time the LSI is set Thereafter set ...

Страница 24: ... in accordance with the model in operation is applied to set up its function PIN NO 1 40 1 SIGNAL j K2 I l O IN Input sianal which communicates the door open close information to LSI Door closed H level signal Door opened L level signal PIN NO 1 41 Terminal not used 1 SIGNAL j Kl I I O IN PIN NO 1 42 1 SIGNAL j KO Terminal to change cooking constant I O IN 23 ...

Страница 25: ...keeping it in contact with the oven proper B On some models on the other hand the power supply cord between the touch control panel and the oven proper is so long that they may be separated from each other For those mod els therefore it is allowed to check and repair the controls of the touch control panel while keeping it apart from the oven proper in this case you must short both ends of the sto...

Страница 26: ...ithout the RF gasket Magnetron 2 If the wave guide or oven cavity are not intact Do not operate the oven if any of the following con ditions exist 3 If the door is not closed 4 If the outer case cabinet is not fitted Please refer to OVEN PARTS CABINET PARTS DOOR PARTS when carrying out any of the following removal procedures OUTER CASE REMOVAL To remove the outer case proceed as follows 1 Disconne...

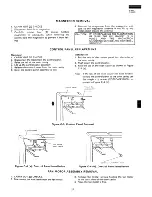
Страница 27: ...capacitor 1O Now high voltage capacitor and H V rectifier are free CAUTION WHEN REPLACING HIGH VOLTAGE RECTIFIER ASSEMBLY ENSURE THAT THE CATHODE EARTH CONNECTION IS SECURELY FI ED TO THE CAPACITOR HOLDER WITH AN EARTHING SCREW holder to the bottom plate Bottom plate Tab A Figure C l H V C Cover Removal High Voltage wire A ower transformer Figure C Z Wiring of H V Wire A CAUTION When replacing hig...

Страница 28: ...ssembly is free Installation 1 Put the tabs of the control panel into the holes of the oven cavity 2 Push down the control panel 3 Fold the tab of the oven cavity as shown in Figure C 4 a Note If the tab of the oven cavity has been broken to hold the control panel to the oven cavity use the single 1 screw XOTSD40P12000 as shown in Figure C 4 b Control panel Control panel Tab of the Tab of the I ov...

Страница 29: ...e C 6 Re install the single 1 washer to the turntable motor Re install the turntable motor with the O ring and washer to the oven cavity with the single 1 screw Re connect the wire leads to the turntable mo tor 5 6 7 8 9 Remove the turntable tom plate Disconnect the wire motor Remove the single motor cover from the bot leads from the turntable 1 screw holding the turntable motor to the oven cavity...

Страница 30: ...holding the green yellow wire of the power supply cord to the oven cavity 5 Remove the single 1 screw holding the cord anchorage to the oven cavity 6 Remove the power supply cord from the oven Re install 1 Insert the power supply cord into the cord anchorages 2 Connect the brown wire of the power supply cord to the fuse holder 3 Install the green yellow wire of the power supply cord to the oven ca...

Страница 31: ...isgram And tighten the screws 3 Insert the earth wire of power supply cord into the earth angle and tighten the screw holding the earth angle 4 Tighten the single I screw holding the cord anchorages 5 CARRY OUT 4iJ CHECKS Noise filter Cord anchorage Cord connector Brown wire Green Yellow wire Earth angle Figure C 9 Power Supply Cord Replacement For New Zealand Model Terminal Positive lock connecto...

Страница 32: ...latch hook should be placed where the stop switch and moni tor switch have activated with the door closed The vertical position of the latch hook should be placed where the 1st and 2nd latch switches have activated with the door closed 4 Secure the screws with washers firmly 5 Make sure of the 1st latch switch 2nd latch switch stop switch and monitor switch operation If those switches have not act...

Страница 33: ...e DOOR ADJUSTMENT When removing and or loosening hinges such as in door replacement the following adjustment criteria are taken Door is adjusted to meet the following three conditions by keeping screws of hinge loose I Adjust door latch heads at a position where they smoothly catch the latch hook through the latch holes Refer to latch switch adjustments 2 Deviation of the door alignment from horiz...

Страница 34: ...dard for microwave ovens must be used for testing Recommended instruments are NARDA 8100 NARDA 8200 HOLADAY HI 1500 SIMPSON 380M 2 Place the oven tray into the oven cavity 3 Place the load of 275 l 5ml of water initially at 20 5 C in the centre of the oven tray The water container should be a low form of 600 ml beaker with inside diameter of approx 8 5cm and made of an electrically non conductive ...

Страница 35: ...nitor resistor R 0 8Q 2OW Power transformer T Filament winding 1R Secondary winding Approx 97 2Q Primary winding Approx 1 96fi TEST POINTS ON CONTROL UNIT In Out put terminal Input Supply Input Stop switch Output Oven lamp Fan motor Turntable motor Output Power transformer Output Earth Test point Al A3 Bl 82 Al A5 Al A7 B2 Chassis Volt 240V 240V 240V Resistance Disconnect the power plug and door i...

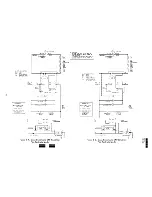
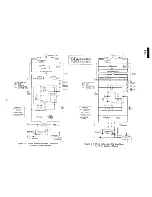
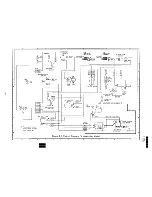
Страница 36: ...FF Condition For Australia Model CAUTION The temp fuse 15OC m is used for the oven which its serial nu er is from 9012XxXxX The thermal cut out143 E Is used for the oven which its serial number is till 9011xxxxx SCHEMATIC NOTE CONDITION OF OVEN 3 DOOR CLOSED 2 COOKING TIME PROGRAMMED 3 START KEY TOUCHED m TFl ELiO MG TF3 FEE 15OC OVEN L T v t v 1 I SW3 MONITOR R MONITOR SWITCH FEET I ASYMaTRIC REC...

Страница 37: ...TEW FUSE 15oc OVEN1 TF2 zs FUSE TFJ TEEP FUSE 150 c OVEN TF2 z FUSE SW IST LATCH SWITCH IST LATCH SWITCH SW2 ZCH SWITCH SCHEMATIC NOTE JN lX ON CCNTROL UJIT _ _ SW2 2la LATCH SWITCH SCHEMATIC NOTE CONDITION r l OF OVEN l DOOR CLOSED 1 I73014 CLOSED 2 COOKING TIMED PROGRAMMED 3 START KEY 2 CLOCK APPEARS ON DISPLAY I RMONITOFI SWITCH Fx l SW3 MONITOR R MONITOR SWITCH F F k r I I I H V RECTIFIER L J ...

Страница 38: ...n m I 0 W R MONITOR RESISTOR TTM TURNTABLE SWi 1ST LATCH HIGH VOLTAGE Positive Lock NO Case Type See page 30 H V RECTIFIER I Figure S l Pictrial Diagram For Australian Model I I til I 11 I m I u I 0 I W I D ...

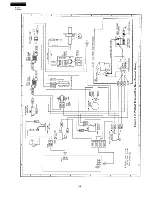
Страница 39: ...R 3A53 R 3A53B d k is oG X0 ILWUY l l d pk w5 I 1 zg r waai I fk f I 8 a FT E r 0 ii 22 j a i h z z z E 2 ii N 3 1 k LL F it n Yi I L 5 n io 2 z I It 1 2 3 4 5 6 38 ...

Страница 40: ...R 3A53 R 3A53B I 1 2 3 4 5 6 i I L J 0 i E B u B s I2 r 6 w I 5 5 8 8 m z P 4 I I __A I VXWET gL mr j I 5 1 is E _ i i r 7 is s 3 ci m 3 ci V CI z i3 Ii 5 n lo z E 0 i v z g IA 39 ...

Страница 41: ...R 3A53 R 3A536 I A B C 1 D EI F GI H 1 2 3 4 I 5 6 I I m BFA 26 1 2 Figure S 4 Printed Wiring Board 3 4 I I 5 6 40 ...

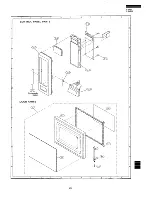
Страница 42: ...AF AF 2 1 2 1 z l 2 l 3 2 2 2 2 2 3 2 4 2 5 FFTASAO35WRKO Oven lamp access cover assembly R 3A53 FFTASA051WRKO Oven lamp access cover assembly R 3A53B PCUSGA306WRPO Cushion PSLDPAOOSWRPO Lamp reflector GCABUA306WRPO Outer case cabinet R 3A53 GCABUA347WRPO Outer case cabinet R 3A53B FDAI A135WRWO Bottom plate FHNG AO96WRTO Lower oven hinge GLEGPA023WREO Foot AN AN AA AD BC BD AW AK AB CONTROL PANEL...

Страница 43: ...3A53 DUNTKA480WRKO Key unit assembly R 3A53B GMADIA054WRFO Display window JBTN A680WRFO Open button R 3A53 JBTN A677WRFO Open button R 3A53B MSPRDA014WREO Open button spring XEPSD30PlOXSO Screw Control unit mtg OVEN PARTS 4 1 4 2 I j 4 5 FROLPA050WRKO Roller stay NTNT A034WRFO Turntable PPACGA054WREO Cushion MLEVPA171WRFO Switch lever PHOK A062WRFO Latch hook 4 6 I 4 8 l 4 8 2 4 8 3 4 8 4 4 9 4 10...

Страница 44: ... 230 TCAUHAOSSWRRO Caution label TCADCA323WRRO Cookbook TGAN A002WRRO Guarantee card For New Zealand TCAUH0123WRRO Micro caution For New Zealand 1 1 1 1 1 1 1 1 1 1 1 AK AY AY AG AG AG AH AL AF AS 1 I AB 1 AE SCREWS AND WASHER 7 1 XOTSD40P12000 Screw M4 x 12 zinc plated steel 5 7 2 XHTSD40P08RVO Screw M4 x 8 zinc plated steel 3 7 3 XHSSE40P08000 Screw M4 x 8 R 3A53 7 3 XHSSF40P08000 Screw M4 x 8 R...

Страница 45: ...R 3A53 R 3A53B A5 I I For Austraha I I I I 1 2 3 4 5 6 ...

Страница 46: ...ANEL PARTS 0 6 3 ForAuss DOOR PARTS r I I I I I I I I I I I I I I I I I I I I I I I I I I I I I I I I I I I I I I I I I I I I I I I I I I I I I I I I I I I I I I I I I I I I I I I I I I I I I I I I I I I I I 45 ...

Страница 47: ...ABLE TRAY E Fi 3A53B Australia ROLLER STAY F DOOR PROTECTION SHEET SPADPA204WREO MICROWAVE OVEN G SHRINK FILM SHEET H Not Aepkxable items SPAKCB767WREO R3A53 Austraha SPAKCB775WREO R3A53B Australia SPAKCB774WREO R3A53 New Zealand 1 2 I 3 4 5 6 91 0 SHARP CORP 7K0 93E Printed in Australia 46 ...

Отзывы: