background image

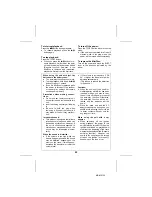
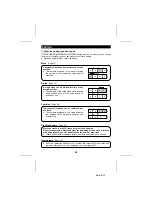
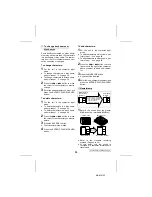
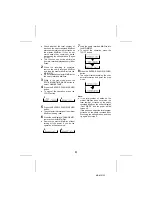
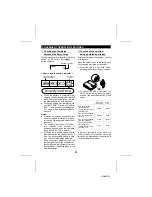
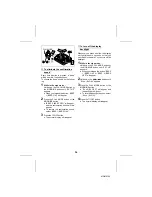
A MiniDisc is a disc inside a protective
cartridge. You can handle it freely without
worrying about dust, fingerprints, etc.
However, if dust enters the opening of the
cartridge, or there is excessive dirt on the
cartridge, or the cartridge becomes
warped, you may experience malfunc-
tions. Please note the following.

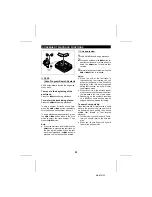
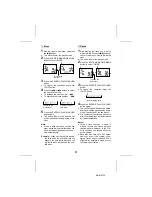
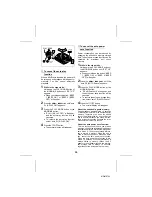
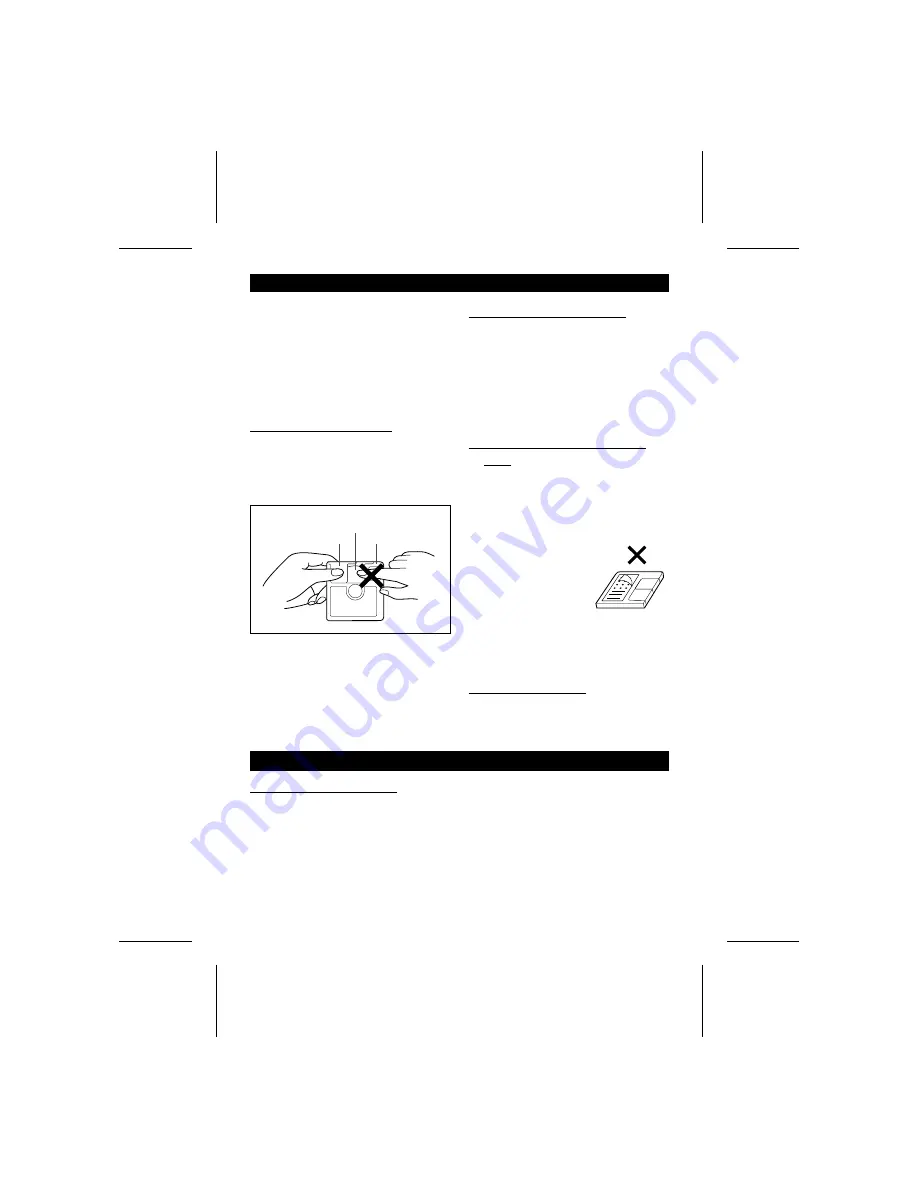
  Handling the MiniDisc

Do not touch the disc directly! 

Do not open the shutter or touch the disc
directly. 
If the shutter is forced open, it may break.


Never disassemble a MiniDisc.

  Where not to store discs

Do not store discs in places with high
temperatures or humidity. Specifically, do
not leave discs in places exposed to direct
sunlight or in cars with the doors and win-
dows closed. 
Do not leave discs in places where sand
can get into the cartridge easily (e.g.,
beaches).

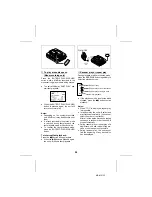
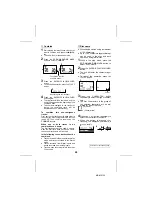
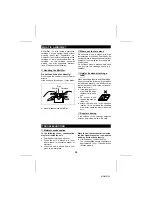
Helpful tip when attaching a
label

When attaching a label to an MD cartridge,
be sure to note the following. If the label is
not attached properly, the MiniDisc may
jam inside the unit and it may not be pos-
sible to remove it.

If the label peels off
or partially lifts away,
replace it with a new
one.

Do not put a new
label on top of an ex-
isting one.

Attach the label only in the specified
location. (If it is not within the specified
area, it may cause the disc to jam in the
unit.)

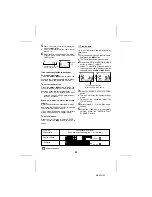
 Regular cleaning 

If the surface of the cartridge becomes
dusty or dirty, clean it with a dry cloth.

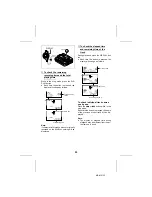
Shutter

Disc

Cartridge

  Moisture condensation

In the following cases, condensation
may form inside the unit. 

Shortly after turning on a heater.

When the unit is placed in a room
where there is excessive steam or
moisture.

When the unit is moved from a cool
place to a warm place.

When the unit has condensation inside,
the disc signals cannot be read, and the
unit may not function properly. 

If this happens, remove the disc. 
The condensation should evaporate in
approximately 1 hour. The unit will then
function properly.

WHAT IS A MINIDISC?

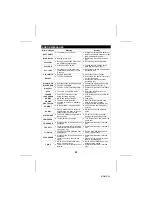
TROUBLESHOOTING

36

MD-MS702

Содержание MD-MS702

Страница 1: ...MD MS702 MD R2 PORTABLE MINIDISC RECORDER MODEL MD MS702 OPERATION MANUAL ...

Страница 2: ... 15 18 ABOUT TRACK NUMBERS 19 Page ABOUT THE TOC 20 PLAYING A MINIDISC 21 22 CONVENIENT PLAYBACK FUNCTIONS 23 25 EDITING 26 31 USING WITH OTHER EQUIPMENT 32 CONVENIENT OPERATION FEATURES 33 35 WHAT IS A MINIDISC 36 TROUBLESHOOTING 36 37 MINIDISC SYSTEM LIMITATIONS 38 ERROR MESSAGES 39 MAINTENANCE 40 SPECIFICATIONS 40 41 LIMITED WARRANTY Back cover Headphones x 1 RPHoH0168AFZZ Remote Control Unit x...

Страница 3: ...o Part 15 of the FCC Rules These limits are designed to provide reasonable protection against harmful interference in a residential installation This equipment generates uses and can radiate radio frequency energy and if not installed and used in accordance with the instructions may cause harmful interference to radio communications However there is no guarantee that interference will not occur in...

Страница 4: ... using or leaving the unit in the following places Places exposed to direct sunlight for many hours especially in cars with the doors and windows closed or near heaters The cabinet may deform change color or malfunction Places exposed to water Places exposed to excessive dust Places where temperatures are exces sively high or low Places bathrooms where the humidity is extremely high Places with st...

Страница 5: ...y hot and will damage the battery Do not dip the battery in water do not dispose of it in a fire and do not take it apart To avoid damaging the battery and shor tening its service life please note the fol lowing Do not drop or subject the battery to shock Do not insert objects metal etc into the battery compartment of this product or into the rechargeable battery Do not get the terminals dirty If ...

Страница 6: ...e Select Buttons 18 Display Lowercase Characters But ton 19 Character Button 20 Stop Power Off Charge Button OFF 21 Play Pause Button 06 22 Fast Reverse Fast Forward Record ing Level Control Cursor Buttons 5 4 23 Enter Fast Play Synchro Button 24 Edit Auto Mark Time Mark Button 25 Eject Lever 26 Bass Delete Button 27 Mode Insert Button 28 Microphone Input Jack 29 Hold Switch 30 Rechargeable Lithiu...

Страница 7: ...ing is com plete will go out AC 120V 60 Hz To an AC outlet POWER SOURCE Notes After charging is complete the AC adaptor may be left connected For ex ample when charging at night The battery will not be charged when ever the power to the main unit is turned on If the AC adaptor is removed from the main unit or from the AC outlet while charging will not disappear for about 1 minute This is normal Do...

Страница 8: ...ine battery power Use of the optionally available alkaline bat tery case combined with the rechargeable battery will result in extended playback times Use two commercially available alkaline batteries LR6 AA size 1 Insert the batteries into the battery case 1 Open the case cover 2 Insert the batteries according to the polarity marked on the inside of the battery case Then close the case cover 2 At...

Страница 9: ...ilable op tionally BEFORE RECORDING DIGITAL OUT OPTICAL OUT OPTICAL LINE IN Digital cable AD M2DC available optionally To the optical output jack round shaped jack on an MD player etc To the optical output jack square shaped jack on a stereo etc Digital cable AD M1DC available optionally Playback side Recording side To the OPTICAL LINE IN jack Playback side R L OPTICAL LINE IN AUDIO OUT RIGHT LEFT...

Страница 10: ...s the power source will switch over to the rechargeable battery automatically When using the rechargeable battery or the alkaline batteries if the head phones volume level is set to 0 the battery consumption will be less than when listening to the recording while it is being made Insert each plug firmly If the connec tions are poor the recording may not be made properly Always keep the plugs clean...

Страница 11: ...mum sound volume from the source makes the reading swing some where between 4 dB and 0 dB To record from a CD first adjust the recording level Then put the equip ment connected to this unit into the playback stand by mode 5 Press the ENTER F PLAY SYNCHRO button 6 Begin playback on the source equip ment Recording will begin automatically To interrupt recording When the source equipment is stopped t...

Страница 12: ...rallel to the main unit If any resistance is felt do not try to force the MiniDisc into the unit It may cause more problems If resis tance is felt remove the MiniDisc and try reloading it Notes Whenever any button is pressed the remote control display will light for about 4 seconds The REC button does not light 1 Put the unit in the recording stand by mode Perform steps 1 4 in the Synchro recordin...

Страница 13: ...ally recorded on a MiniDisc MiniDiscs are designed so that only first generation digital copies can made further digital copies are prevented by the SCMS Serial Copy Management System Before starting a synchro recording perform the following steps on the equipment connected to this unit 1 First put it in the playback mode 2 Next put it in the pause mode 3 Finally position it at the beginning of th...

Страница 14: ...on marks can be created while recording Page 15 4 Press the 5or 4button to adjust the recording level Adjust the recording level so that the maximum sound volume from the source makes the reading swing be tween 4 dB and 0 dB When the recording level display is changed from MIC H to MIC L the sound will be interrupted momen tarily This is normal 5 Press the ENTER F PLAY SYNCHRO button to select the...

Страница 15: ... the unit in the recording stand by mode Perform steps 1 4 in the Mic synchro recording section 2 Press the 06 button Recording will start To interrupt a recording Press the 06 button while recording The unit will enter the recording stand by mode To resume recording press the 06 button again The track number will be increased by one each time you interrupt a record ing To stop recording Press the...

Страница 16: ...reated by the timed auto mark function Example when the setting is for 5 minutes 2 minutes 5 minutes 1 minute 5 minutes 5 minutes 5 minutes 5 minutes A timed auto mark will be created every 5 minutes CONVENIENT RECORDING FUNCTION No marks are created A mark is created every 10 minutes A mark is created every 3 minutes A mark is created every 5 minutes Track number 1 Track number 2 Track number 3 T...

Страница 17: ...portion of a track that has been already recorded and make a new recording Warning All of the tracks that follow the newly recorded track will be erased 1 During playback press the 06 button at the point where you want to begin re recording 2 Press the REC button To cancel the operation press the OFF button 3 Press the ENTER F PLAY SYNCHRO button All of the tracks and track names will be erased fo...

Страница 18: ...ong play mode recordings will be approximately twice as long as the recording time avail able for a stereo recording The monaural long play mode is very useful for recording conferences or lectures Press the MODE INS button while the recording is paused Each time this button is pressed the display will switch between the stereo mode and the monaural long play mode Notes If input is from a stereo s...

Страница 19: ...IME MARK button to select ALL ERASE ALL ERASE can also be selected by holding down the EDIT A MARK TIME MARK button for at least 2 seconds 2 Press the ENTER F PLAY SYNCHRO button To cancel the operation press the OFF button 3 Press the ENTER F PLAY SYNCHRO button again All of the track numbers track names and disc names will be erased Notes Once a track has been erased it can not be recovered Doub...

Страница 20: ...isc Synchro marker function The track numbers on the playback side may not match the track numbers recorded on the MiniDisc When recording if a programmed playback is performed by the source or playback is performed by selecting tracks manually the MiniDisc track numbers may not be the same as on the source The track numbers can also be changed after recording Track numbers may not be created even...

Страница 21: ...y of the following Do not jar or bump the main unit Do not unplug the AC adaptor Do not remove the rechargeable bat tery or battery case If you do the changes in the recorded or edited contents will be lost if the TOC information is not recorded properly If the AC adaptor is unplugged or a power failure occurs while recording before the TOC information has been written on the disc the new recordin...

Страница 22: ...ng cases the auto play func tion will not work When the recordable MiniDisc write protection tab is closed page 9 When the auto play function has been canceled page 35 4 Press the button to increase the volume and the button to decrease the volume 5 Adjust the bass level Each time the BASS DEL button is pressed the tone will be switched as follows When recording it is impossible to ad just the bas...

Страница 23: ...errupted sound This product is designed to eliminate interruptions in the sound which can be caused by vibrations However if the unit is continuously exposed to vibrations or mechanical shock the sound may be interrupted momen tarily When the sound is distorted If the volume is too high while the bass is being emphasized the sound may be distorted depending on the music on the track If this happen...

Страница 24: ...button for audible fast forward or press and hold down the 5 button for audible fast reverse 3 Normal playback will resume when the 5 or 4 button is released Notes When the end of the last track is reached during fast forward the unit will enter the pause mode When the beginning of the first track is reached during fast reverse the unit will enter the playback mode When the unit is in the all trac...

Страница 25: ...button is pressed again the unit will resume fast playback Random play or repeat play During playback or while in the stop mode press the MODE INS button repeatedly to select the playback mode If the playback mode is selected while stopped press the 06 button to start playback Notes When TOC is displayed repeat play is impossible In random play the unit will select and play tracks automatically Yo...

Страница 26: ...playback press the DISPLAY but ton Each time the button is pressed the display will change as follows To check individual track names one by one Press the 5or 4button while in the stop mode Each time the button is pressed the name of the previous or next track will be dis played Note The display of elapsed time during playback may be different from the ac tual time on a clock DISPLAY DISPLAY Total...

Страница 27: ... 28 1 2 3 1 2 3 4 C A B C C A B A single track can be divided into two at any desired position The numbers of the tracks which come after the newly divided track will be automatically in creased by one Divide Page 27 1 2 3 1 2 3 4 A B C D A B C D A designated track can be moved to any desired position The numbers assigned to the tracks following the track which is moved will be adjusted auto matic...

Страница 28: ...you want to divide into two Press the 06button at the point where you want to divide the track The unit will enter the pause mode 2 Press the EDIT A MARK TIME MARK button to select DIVIDE 3 Press the ENTER F PLAY SYNCHRO button To cancel the operation press the OFF button 4 Press the ENTER F PLAY SYNCHRO button again The track will be divided into two tracks and the unit will be paused at the begi...

Страница 29: ...e used In the following cases tracks cannot be combined Tracks recorded in the monaural long play mode and tracks recorded in the stereo mode Tracks recorded from digital inputs and tracks recorded from analog inputs Tracks whose recording time is less than 12 seconds Disc name Discs can be named using a maximum of 100 characters Up to 1 700 characters approximately can be used in the disc and tra...

Страница 30: ... changed back to capital letters To enter a space Press the or button to select SPACE Then press the 4 button to enter a space Track name Up to 100 characters can be entered for each name 1 Play the track which you want to name and press the 06 button The unit will enter the pause mode 2 Press the EDIT A MARK TIME MARK button to select Tr NAME When Tr NAME is selected while in the stop mode track ...

Страница 31: ...r to the character you want to delete 3 Press the BASS DEL button The character will be erased 4 Press the ENTER F PLAY SYNCHRO button To add characters 1 Put the unit in the character input mode To add characters to a disc name per form steps 1 2 on page 28 To add characters to a track name per form steps 1 3 on page 29 2 Press the 5or 4button to move the cursor to the right of the character wher...

Страница 32: ...F button 5 Press the ENTER F PLAY SYNCHRO button The character information of the master MiniDisc is being read 6 When the unit displays CHANGE MD remove the master MiniDisc Remove the master MiniDisc without turning off the power If you do the operation will be canceled 7 Load the newly recorded MiniDisc into the MD MS702 To cancel the operation press the OFF button 8 Press the ENTER F PLAY SYNCH...

Страница 33: ...ones used Headphones can be connected directly to the main unit USING WITH OTHER EQUIPMENT To the left L White To the jack Cords included with this unit To the line input jacks To the right R Red To the jack With a 1 8 3 5 mm diameter stereo mini plug Before connecting any other equipment turn off the power to all units Connect the plugs securely Improper connections may cause noise or malfunction...

Страница 34: ...mount of the particular bat tery being used the number of bars will increase when the unit switches to the alkaline batteries To prevent the unit from being operated by mistake To prevent accidental operation use the hold function Move the HOLD switch to the safety posi tion direction indicated by the arrow When the unit is in the hold mode pressing the buttons will have no effect To cancel the ho...

Страница 35: ...the OFF button The normal display will reappear To turn off the display backlight Whenever you press a button the display will light for about 4 seconds so that you can read it in the dark You can turn off the backlight 1 While in the stop mode Hold down the PLAY MODE button or the MODE INS button until SET UP appears When you release the button BEEP 1 BEEP ON or BEEP 0 BEEP OFF will appear 2 Hold...

Страница 36: ...until the auto PS AUTO Psave appears 3 Press the PLAY MODE button or the MODE INS button PS off Psave off will appear and the auto power save function will be canceled To restore the auto power save func tion select auto PS AUTO Psave 4 Press the OFF button The normal display will reappear About the sound skip guard memory During playback approximately 10 seconds of information is stored in the se...

Страница 37: ... be sure to note the following If the label is not attached properly the MiniDisc may jam inside the unit and it may not be pos sible to remove it If the label peels off or partially lifts away replace it with a new one Do not put a new label on top of an ex isting one Attach the label only in the specified location If it is not within the specified area it may cause the disc to jam in the unit Re...

Страница 38: ... Is the AC adaptor disconnected Is the battery exhausted Is the unit in the safety mode Has condensation formed inside the unit Is the unit being influenced by mechanical shock or by static electricity No sound is heard from the headphones Is the volume set too low Is the remote control unit or the headphones plugged in Are you trying to play a MiniDisc with data on it instead of a MiniDisc contai...

Страница 39: ...f the recorded time and time remaining on a disc may not add up to the maximum possible recording time A cluster about 2 seconds is normally the minimum unit of recording So even if a track is less than 2 seconds long it will use about 2 seconds of space on the disc Therefore the time actually available for recording may be less than the remaining time displayed If there are scratches on discs tho...

Страница 40: ...s not been loaded Load a disc PB DISC PROTECTED The disc is write protected You tried to record on a playback only disc Move the write protection knob back to its original position Replace it with a recordable disc POWER Improper power is being supplied Use one of the specified power sources SORRY Since a track number is currently being located or written to the unit cannot accept your command Wai...

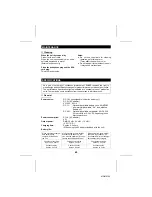
Страница 41: ... included with the unit Battery life Cleaning When the unit becomes dirty Clean it with a soft cloth When the unit is excessively dirty use a soft cloth dampened in water External surfaces only Clean the headphone plug and the RCA cord plug This will prevent noise Notes Do not use chemicals for cleaning gasoline paint thinner etc It may affect the quality or color Do not apply oil to the inside of...

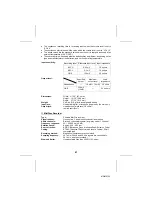
Страница 42: ...ones impedance 19 ohms remote control unit MiniDisc Recorder Type Portable MiniDisc recorder Signal readout Non contact 3 beam semi conductor laser pick up Audio channels Stereo 2 channels monaural long play mode 1 channel Frequency response 20 20 000 Hz 3 dB Rotation speed Approx 400 900 rpm Error correction ACIRC Advanced Cross Interleave Reed Solomon Code Coding ATRAC Adaptive TRansformed Acous...

Страница 43: ...MEMO ...
Страница 44: ...ve shall be the sole and exclusive warranties granted by Sharp and shall be the sole and exclusive remedy available to the purchaser Correction of defects in the manner and for the period of time described herein shall constitute complete fulfillment of all liabilities and responsibilities of Sharp to the purchaser with respect to the Product and shall constitute full satisfaction of all claims wh...

Отзывы: