PC-UM10M
LL-T1820-H/B OUTLINE OF THE PRODUCT, NOMENCLATURE AND FUNCTION
1 – 3
Power management
The monitor is based on the VESA DPMS*
1
and the DVI DMPM*
2
stan-
dards.
To activate the monitor's Power Management function, both the video
card and the computer must conform to the VESA DPMS standard and
the DVI DMPM standard.
*1 DPMS: Display Power Management Signalling
*2 DMPM: Digital Monitor Power Management
DDC (Plug & Play)
This monitor supports the VESA DDC (Display Data Channel) standard.
DDC is a signal standard for carrying out Plug & Play functions on the
monitor or PC. It transfers information such as degree of resolution
between the monitor and PC. You can use this function if your PC is
DDC compliant and if it is set so that it can detect the Plug & Play mon-
itor.
There are many varieties of DDC due to the differences between sys-
tems. This monitor works with DDC2B.
2. TECHNICAL SPECIFICATIONS
*
Specifications and a part of the appearance are subject to change without notice.
PRODUCT DESCRIPTION
DPMS mode
Screen
Power
consumption
H-sync
V-sync
ON
Display on
51W
Yes
Yes
STANDBY
Display off
2.9W
No
Yes
SUSPEND
Yes
No
OFF
No
No
DPMS mode
Screen
Power consumption
ON
Display on
51W (USB OFF)/57W (USB ON)
OFF
Display off
2.9W
Item
MIN
TYP
MAX
Unit
Power supply voltage
AC
90
100
110
V
Working temperature range
+5
.
+35
°C
Storing temperature range
-20
.
+60
°C
Humidity range
20
.
85
%RH
Visual angle range
Vertical (CR
u
10)
m
70
m
85
.
Temperature
Horizontal (CR
u
10)
m
70
m
85
.
Temperature
Contrast ratio(CR)
(
θ
= 0°)
.
400
.
.
Response speed
Leading (
τ
r)
.
20
.
ms
Trailing (
τ
d)
.
5
.
ms
Screen white chromaticity
(X)
0.278
0.308
0.333
.
(Y)
0.290
0.320
0.350
.
White surface luminance
(Y
L
)
180
220
.
cd/m
2
Module model number
LQ181E1LZ30
1
2
3
4
5
6
7
9
11
12
10
13
8
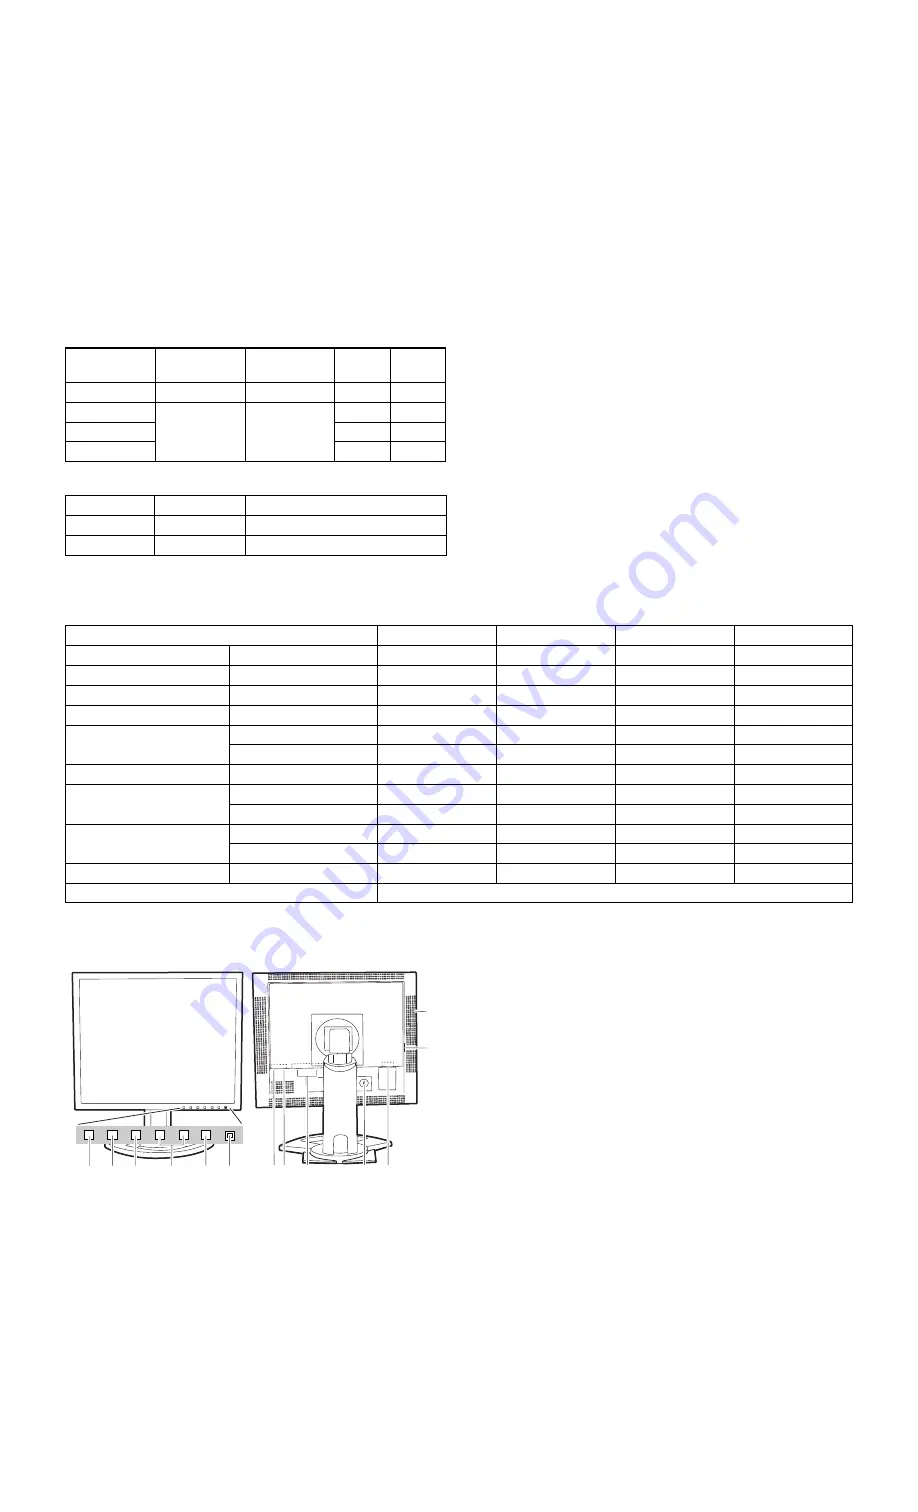
1. INPUT button:
To switch between the signals input termi-
nals. (Input terminal 1
0
Input terminal 2)
2. MENU button:
This button is used to pop-up, select and
close the OSD (On Screen Display) Menu.
3. SELECT button:
This button is used to select menu options
when the OSD Menu is displayed.
4.
e d
buttons:
When the OSD Menu is displayed:
These buttons are used to increase or
decrease the value of a selected option.
When the OSD Menu is not displayed:
These buttons are used to adjust backlight
brightness .
5. Power button
6. Power LED:
This LED is lit green when in use and orange
when in power-saving mode.
7. USB port (downstream: 2 ports)


