


LL-T15S3
CONNECTION, ADJUSTMENT, OPERATION, AND FUNCTIONS
2 – 1
CHAPTER 2. CONNECTION, ADJUSTMENT, OPERATION, AND FUNCTIONS
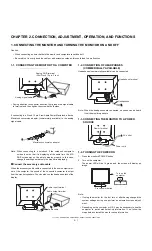
1. CONNECTING THE MONITOR AND TURNING THE MONITOR ON AND OFF
Caution:
• When connecting, ensure that both the monitor and computer are switched off.
• Be careful not to overly bend the cable or add extension cords as this could lead to a malfunction.
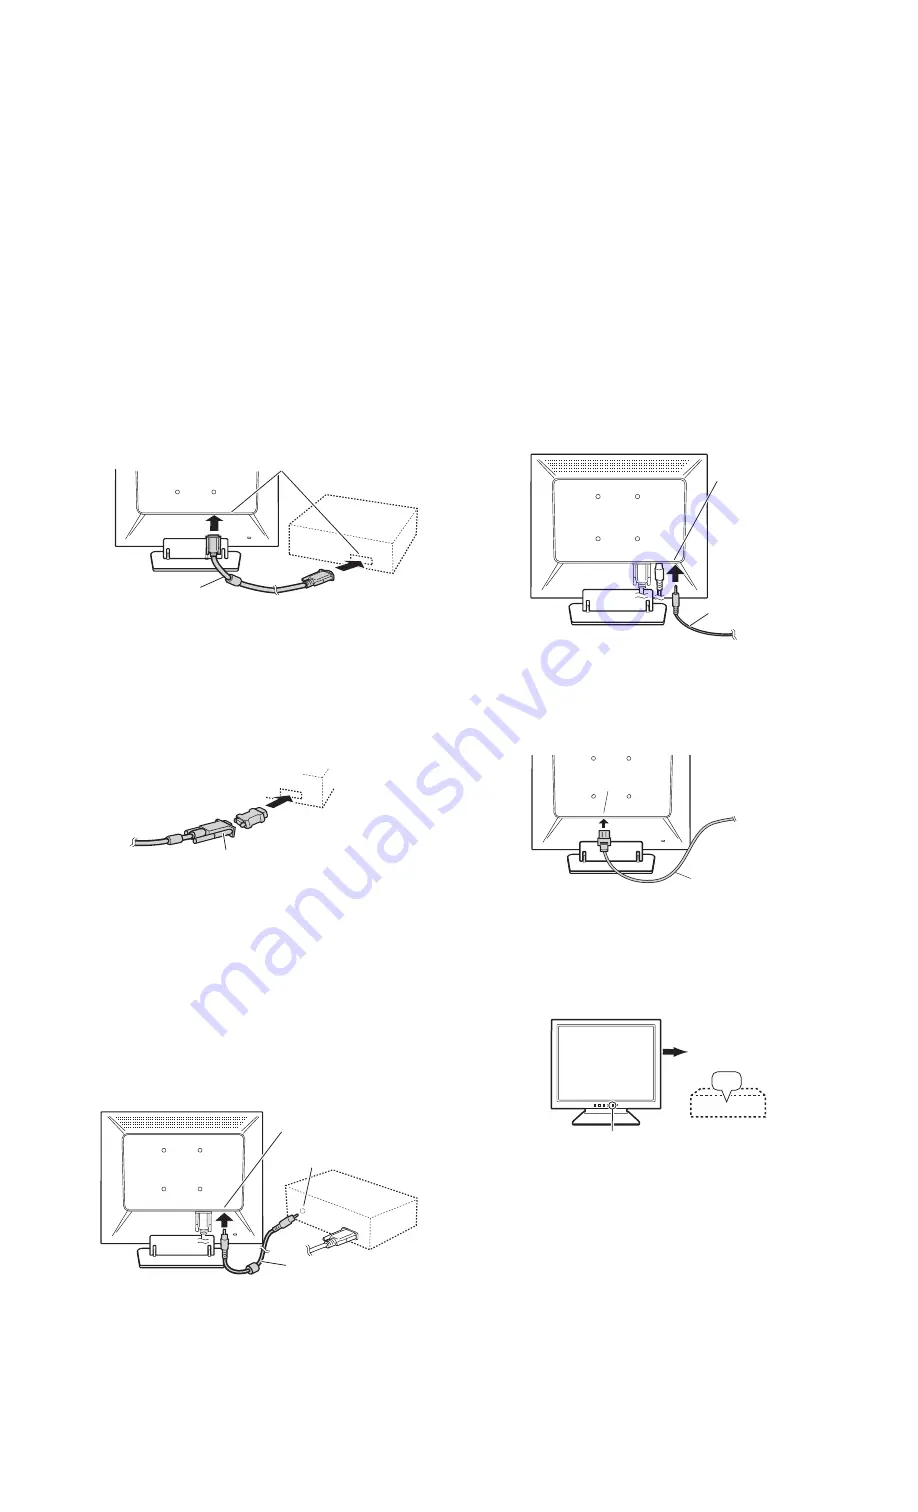
1-1. CONNECTING THE MONITOR TO A COMPUTER
• Paying attention to connector direction, firmly insert the signal cable
to terminal, and then tighten the screws at both sides.
If connecting to a D-sub 15 pin 2 row Apple Power Macintosh, attach a
Macintosh conversion adapter (commercially available) to the analog
signal cable.
Note: When connecting to a notebook, if the notebook computer's
screen is set so that it is displaying at the same time, the MS-
DOS screen may not be able to display properly. In this case,
change the settings so that only the monitor is displaying.
■
■
■
■
Connect the accessory audio cable
When the accessory audio cable is connected to the audio output termi-
nal of the computer, the sound of the connected computer is output
from the monitor speakers. You can also use the headphone jack of the
display.
1-2. CONNECTION OF HEADPHONES
(COMMERCIALLY AVAILABLE)
Headphones (commercially available) can be connected.
Note: When the headphones are connected, no sound can be heard
from the monitor speakers.
1-3. CONNECTING THE MONITOR TO A POWER
SOURCE
1-4. TURNING THE POWER ON
1. Press the monitor's POWER button.
2. Turn on the computer.
The power LED will be lit green, and the screen will display an
image.
Note:
• If using the monitor for the first time or after having changed the
system settings during use, perform an automatic screen adjust-
ment.
• Depending on the computer or OS, it may be necessary to use the
computer to install monitor set-up information. If so, follow the
steps below to install the monitor set-up information.
Analog RGB terminal
(Mini D-sub 15 pin, 3 row)
Analog signal cable
Macintosh conversion adapter
Audio input terminal
Audio output terminal
Audio cable
Headphone terminal
Headphones
Power terminal
o
AC outlet
Power cord
ON
Turn on the
computer
Press power button
Содержание LL-T15S3
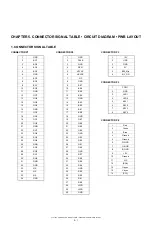
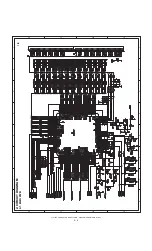
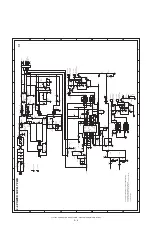
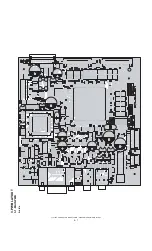
Страница 18: ...LL T15S3 CONNECTOR SIGNAL TABLE CIRCUIT DIAGRAM PWB LAYOUT 5 7 3 PWB LAYOUT 3 1 MAIN PWB A side ...
Страница 19: ...LL T15S3 CONNECTOR SIGNAL TABLE CIRCUIT DIAGRAM PWB LAYOUT 5 8 B side ...
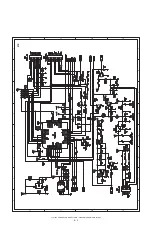
Страница 20: ...LL T15S3 CONNECTOR SIGNAL TABLE CIRCUIT DIAGRAM PWB LAYOUT 5 9 3 2 POWER SUPPLY PWB ...