background image

-12-

1. Press 

MENU 

button to display the MENU screen, 

and then press 


 buttons to select "PICTURE".

2. Press 

 buttons to select the following picture 

options and then press 

OK

.

3. Press 


 buttons to adjust each option’s 

setting.

4. Press 

MENU

 button to return to the previous 

menu.

5. Press 

EXIT

 button to exit the menu.

•  Picture Mode

There are 4 picture modes: Standard, Mild, User 

and Dynamic. You can only adjust the picture 

effect when “User” mode is selected.

Note:

 Tint is available in NTSC system only.

•  Color Temperature 

There are 4 color temperature modes: Cool, 

Medium, Warm and User. You can only adjust the 

color components when “User” mode is selected.

•  Aspect Ratio  

Selects the aspect ratio: Auto/Full/4:3.

•  Noise Reduction 

Selects the noise reduction level: Off / Low / 

Middle / High.

•  Screen (VGA mode)

Screen is available in VGA mode only. You can 

adjust horizontal position, vertical position, size 

and phase here.

•  Energy Saving 

There are 5 energy saving modes: Off / Low /

Standard / Middle / High.

•  Dynamic Enhance Level 

Press 

OK

 button to select dynamic enhance level: 

Off / Low / Middle / High. 

Note:

Press 

RED

 button to store the channels after 

manual tuning.

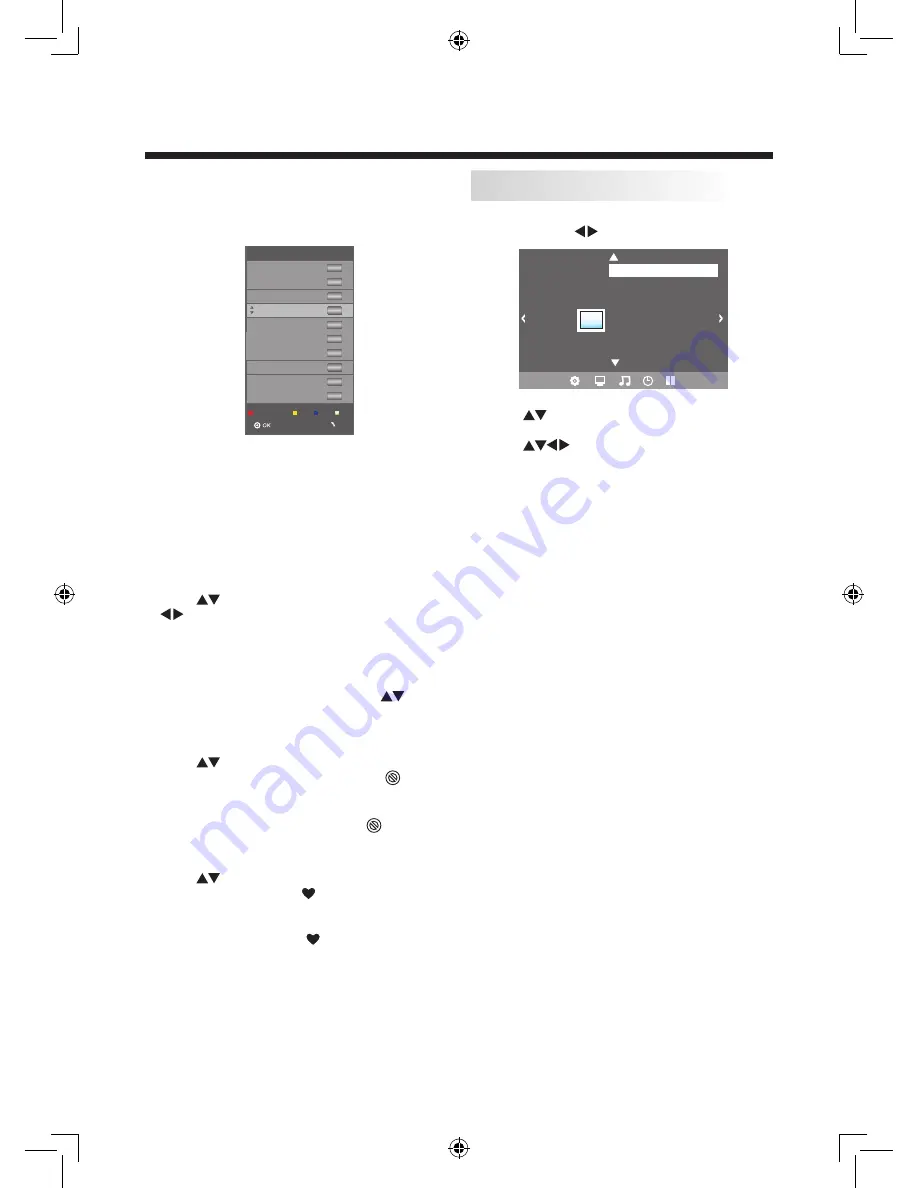
•  Program Edit

You can delete, rename, skip or assign any 

programs as your favorite channels. 

RED (Delete)

Press 

RED

 button, the highlighted channel will be 

deleted. 

GREEN (Rename)

Only ATV channels can be renamed. Move the 

cursor to the channel, press 

GREEN

 button to 

rename the channel.

Press 

 buttons to choose the character. Press 


 buttons to move the cursor. Press 

MENU


button to exit edit. Press 

EXIT

 button to exit menu. 

Note:

 ATV channels name can only contain 5 

characters. 

YELLOW (Move)

Press 

YELLOW

 button and then press 


buttons

 to move to the selected channel. Press 

YELLOW

 button to confirm. 

BLUE (Skip)

Press 

 buttons to choose the channels, press 

BLUE

 button to skip this channel. The “   ” will 

show on the right side of the channel.

Choose the skipped channel, press 

BLUE

 button 

again, you can cancel the skip, the “   ” will 

disappear. 

FAVORITE

Press 

 buttons to choose the channel, press 

FAV

 button, it will show “   ” on the right side of 

the channel. 

Choose the FAV channel, press 

FAV

 button again, 

you can cancel the FAV, “   ” will disappear. 

Once your favorite group is created, you can press 

FAV

 button to quickly access your favorite channel 

list.

•  Signal Information 

Press 

OK 

button to view the signal information (for 

DTV mode only).

OPERATION

Picture Mode Standard

Color Temperature
Aspect Ratio Full
Noise Reduction Middle
Screen
Energy Saving
Dynamic Enhance Level Off

PICTURE

Picture Setting

Programme Edit

Delete

Skip

Move

Fav

MENU

11 Home

12 Asia

13 Classic

15 CCTV - 1

16 World

17 SZTV

81 Jade

82 J2

83 iNews

84 Pearl

DTV

DTV

DTV

DTV

DTV

DTV

DTV

DTV

DTV

DTV

LC-40LE433H (SHARP香港 SY13050) 說明書英文R5.indd   12

2013-4-3   9:43:25

Содержание LC-40LE433H

Страница 1: ...Safety and Warnings 2 3 Introduction 4 Installation 5 8 Remote Control 9 10 Operation 11 18 Trouble Shooting 19 Dimensional Drawings 20 Specifications 21 LC 40LE433H SHARP香港 SY13050 說明書英文R5 indd 1 2013 4 3 9 43 02 ...

Страница 2: ...nto the apparatus or the apparatus has been exposed to rain or moisture does not operate normally or has been dropped 14 Main plug is used as a disconnect device the disconnect device shall remain readily operable 15 The ventilation openings should not be covered by items such as newspapers table cloth curtains etc 16 No naked flame sources such as lighted candles should be placed on the apparatus...

Страница 3: ...k cover Adequate ventilation is essential to prevent failure of electrical components Do not trap the power supply cord under the television Never stand on lean on or suddenly push the television or its stand You should pay special attention to children Serious injury may result if the television overturns Caution Do not place your television on an unstable cart stand shelf or table Serious injury...

Страница 4: ...rm locations to prevent possible damage to the cabinet or premature component failure Do not cover the ventilation openings when using the television Trademarks Main parameter Model LC 40LE433H Size 40 inch TV System PAL B G I D K SECAM B G D K NTSC M Video Signal System PAL NTSC SECAM Input Power Voltage AC 110 240V 50Hz Power Consumption Standby 95W 0 6W Audio Output Power 2 x 6W Input Terminals...

Страница 5: ...ED Indicator BLUE POWER ON RED STANDBY Side Terminals Rear Terminals All the input terminals are from left to right 1 DIGITAL AUDIO OUTPUT 2 AV1 COMPONENT AUDIO IN 3 HDMI 3 4 AV2 IN 5 USB 2 All the input terminals are from left to right 1 USB1 2 HDMI 1 3 HDMI 2 4 PC IN ANALOG RGB 5 COMPONENT 6 ANT 7 PC AUDIO MPX INPUT WIDE P MODE S MODE MADE IN CHINA 845 051 02B13 USB 1 5V 500mA HDMI 1 HDMI 2 ANT ...

Страница 6: ...he television fasten the screws by using a cross head screwdriver Not supplied Show in diagram 3 INSTALLATION 1 2 3 6pcs screws 4pcs screws CAUTION Do not push too hard or apply excessive pressure to the stand neck to avoid any damages when you turn the television for the most comfortable viewing angle ANTENNA ANT 75Ω Note Aerial connections IEC female Input impendance 75Ω unbalanced An outdoor an...

Страница 7: ...r Terminals Resolution V Freq Hz H Freq Hz 1 640 x 480 60 31 47 2 800 x 600 60 37 88 3 1024 x 768 60 48 36 4 1280 x 1024 60 63 98 5 1360 x 768 60 47 70 6 1920 x 1080 60 66 64 HDMI Compatible Signal Format 480i 480p 576i 576p 720p 50Hz 720p 60Hz 1080i 50Hz 1080i 60Hz 1080p 24Hz 1080p 50Hz 1080p 60Hz INSTALLATION PC Compatibility Chart USB 1 5V 500mA HDMI 1 HDMI 2 ANT PC AUDIO nd se LC 40LE433H SHAR...

Страница 8: ...r video game console or stereo system etc Component terminals can support these video formats 480i 480p 576i 576p 720p 50Hz 720p 60Hz 1080i 50Hz 1080i 60Hz 1080p 24Hz 1080p 50Hz 1080p 60Hz Note AV1 and component terminals share the same audio input terminal Y Pb Pr L R Y Pb Pr L R L R Video Audio L R Video HDMI VIDEO EQUIPMENT To video output terminal To audio output terminal Audio L R Video equip...

Страница 9: ...btitles in DTV mode 10 CURSOR To move within the menu 11 MENU To display TV menu 12 TEXT MHEG5 function key 13 DTV ATV To switch between ATV Analog TV and DTV Digital TV 14 Play or pause in media play mode 15 Stop in media play mode 16 To record the current program 17 To start the Time Shift function 18 FREEZE RED To freeze the picture 19 REPEAT GREEN To select between different repeat mode 20 MUT...

Страница 10: ...the batteries cover 2 Insert 2 x AAA 1 5V batteries make sure the polarity or of the batteries matches the polarity marks inside the unit 3 Mount the battery cover Replace with new batteries when the television set begins to show the following symptoms Operation is unsteady or erratic Sometimes the television set does not function with remote control unit Remark 1 Alkaline battery is recommended 2...

Страница 11: ...e following channel options and then press OK 3 Press buttons to adjust each option s setting 4 Press MENU button to return to the previous menu 5 Press EXIT button to exit the menu Auto Tuning Search all the channels automatically Press OK button Note It will start the DTV tuning firstly if you want to skip the DTV tuning press MENU button to interrupt the tuning and go to ATV tuning All the stor...

Страница 12: ...annel will be deleted GREEN Rename Only ATV channels can be renamed Move the cursor to the channel press GREEN button to rename the channel Press buttons to choose the character Press buttons to move the cursor Press MENU button to exit edit Press EXIT button to exit menu Note ATV channels name can only contain 5 characters YELLOW Move Press YELLOW button and then press buttons to move to the sele...

Страница 13: ...s MENU button to return to the previous menu 5 Press EXIT button to exit the menu Clock The clock time will be set automatically after the DTV channels are tuned Off Time Set the time to turn off the television automatically On Time Set the time to turn on the television automatically Sleep Timer Selects a period of time after which the television automatically switches to standby mode Off 10 20 1...

Страница 14: ...vice is deleted after format has done Restore Factory Default Restore all settings to the factory defaults OSD Time Out Displays time of the on screen menu Off 10s 20s 80s 90s Blue Screen Press OK button to turn on off blue screen 1 Switch off the television before connecting any USB storage device 2 Connect your USB storage device to the USB terminal of your television and then switch on the tele...

Страница 15: ... then press OK 5 Press buttons to select the specified music a preview window will pop up 6 Press button to start to play 7 Press OK button or INFO button to display the function bar Press buttons and then OK button to select the function Pause FB FF Prev Next Stop All MUTE Playlist Info Goto Time Press button or EXIT button to exit the control bar Supported music formats MP3 files with the extens...

Страница 16: ...Bytes Animal world avi Bird avi Pause FB FF Prev Next Stop All Set A 00 00 55 00 04 57 AB Viewing Text 1 Press INPUT button on the television or INPUT button on the remote control then press buttons to select the USB mode and then press OK buttons to enter multimedia center 2 Press buttons to select TEXT and then press OK 3 Press buttons to select your storage device and then press OK All the conn...

Страница 17: ...s BLUE button to display the Reminder Setting screen Press buttons to set up the reminder time The screen will play the selected program in the reminder automatically Press OK button to save the reminder Press BLUE button to return to EPG menu PROGRAMME GUIDE TIME 01 Mar 16 15 11 Home 12 Asia 13 Classic 15 CCTV 1 16 World 17 SZTV 81 Jade 82 J2 Q A Lessons C Wealth Blog C I Q 100 C TV Deama ERKY PE...

Страница 18: ...ion of the selected program if available INDEX Press INDEX button to select the category type Program Channel Time 2 Press buttons to select the recorded program that you want to play and then press button to view Recorded List Program My Sassy Wife Xu XI Delete Info INDEX My Sassy Wife Xu XI My Sassy Wife Xu XI Play from a USB storage device 1 Press INPUT button on the television or INPUT button ...

Страница 19: ... cord is not inserted Contrast and brightness volume setup No colour Normal audio Colour control Picture breaking up Normal audio or weak Retune channel No colour Noise Check if the TV system is correct The LCD TV panel is produced with very high precision technology giving you fine picture details in vibrant color Occasionally a few non active pixels may appear on the screen as a fixed point of r...

Страница 20: ... 20 50 680 617 104 257 557 387 Units mm DIMENSIONAL DRAWINGS LC 40LE433H SHARP香港 SY13050 說明書英文R5 indd 20 2013 4 3 9 43 45 ...

Страница 21: ...z 1080i 60Hz 1080p 24Hz 1080p 50Hz 1080p 60Hz HDMI 480i 480p 576i 576p 720p 50Hz 720p 60Hz 1080i 50Hz 1080i 60Hz 1080p 24Hz 1080p 50Hz 1080p 60Hz Power Requirement AC 110 240V 50Hz Power Consumption Standby 95W 0 6W Audio Outout Power 2 x 6W Operating Temperature 0 C 40 C Weight Without stand 14 5kg With stand 16 5kg Accessory Operation Manual Remote Control Battery AAA x 2 Quick Start Guide Screw...

Страница 22: ...LC 40LE433H SHARP香港 SY13050 說明書英文R5 indd 22 2013 4 3 9 43 46 ...

Страница 23: ...LC 40LE433H SHARP香港 SY13050 說明書英文R5 indd 23 2013 4 3 9 43 46 ...

Страница 24: ...002 K08 SHARP LC 40LE433H SHARP香港 SY13050 說明書英文R5 indd 24 2013 4 3 9 43 46 ...

Отзывы: