background image


34

Troubleshooting

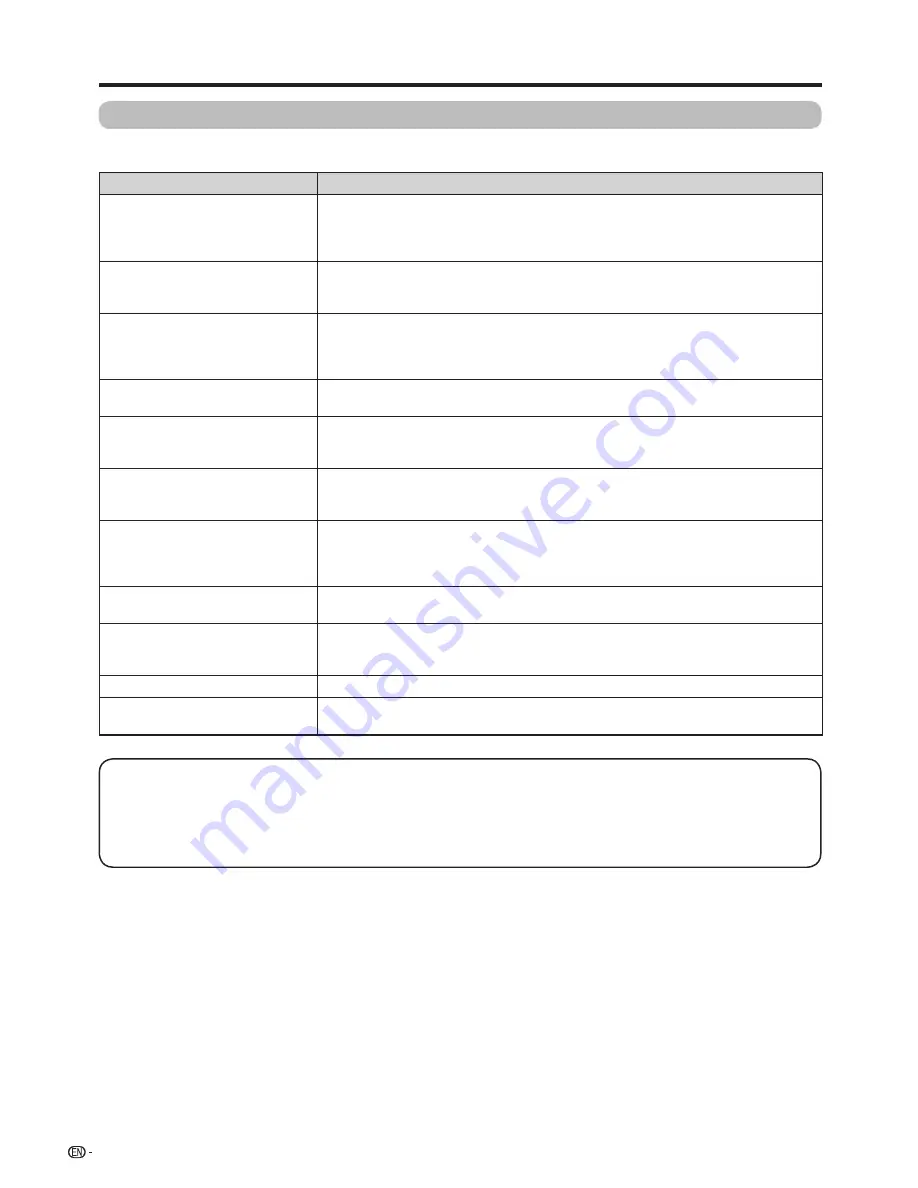
The problems described below are not always caused by malfunctions. Check the TV again before having the TV 

serviced.

Problem

Possible solution

•  No power.

•  Is the AC cord disconnected? (See page 12.)

•  Has the power been turned on? (See page 16.)

•  When the power switch does not work, remove the power plug and insert it again, 

and press 

POWER

 on the TV after waiting more than five seconds.

•  Unit cannot be operated.

•  External influences such as lightning, static electricity, etc., may cause  improper 

operation. In this case, operate the unit after first turning the power off the TV or 

unplugging the AC cord and re-plugging it in after 1 or 2 minutes.

•  Remote control unit does not 

operate.

•  Are batteries inserted with polarity (

e

f

) aligned? (See page 15.)

•  Are batteries worn out? (Replace with new batteries.)

•  Are you using it under strong or fluorescent lighting?

•  Is a fluorescent light shining on the remote control sensor? 

•  Picture is cut off.

•  Are screen mode adjustments such as picture size made correctly? (See pages 19 

and 21.)

•  Strange colour, light colour, or 

dark, or colour misalignment.

•  Adjust the picture tint. (See page 19.)

•  Is the room too bright? The picture may look dark in a room that is too bright.

•  Check the colour system setting. (See pages 22 and 23.)

•  Power is suddenly turned off.

•  The unit's internal temperature has increased.

    Remove any objects blocking the vent or clean.

•  Is the sleep timer, no signal power off ? (See page 18.) 

•  No picture.

•  Is the connection to external equipment correct? (See pages 13,14 and 30.)

•  Is the correct input selected? (See pages 11,and 28.)

•  Is the picture adjustment correct? (See page 19.)

•  Is the antenna connected properly? (See page 12.)

•  No sound.

•  Is the volume too low? (See page 11.)

•  Make sure that headphones are not connected. (See page 10.)

•  The TV sometimes makes a 

cracking noise.

•  This is not a malfunction. This happens when the cabinet slightly expands and 

contracts according to changes in temperature. This does not affect the TV's 

performance.

•  Cannot select the desired channel. •  Switch between Digital TV and Analogue TV modes. (See page 11.)
•  Cannot connect to the Network

•  Is the LAN cable connected correct. (See pages 26 and 27.)

•  Check the “LAN setting”.

Appendix

Cautions regarding use in high and low temperature environments

•  When the unit is used in a low temperature space (e.g. room, office), the picture may leave trails or appear slightly delayed. 

This is not a malfunction, and the unit will recover when the temperature returns to normal.

•  Do not leave the unit in a hot or cold location. Also, do not leave the unit in a location exposed to direct sunlight or near a 

heater, as this may cause the cabinet to deform and the LCD panel to malfunction.

  Storage temperature: 

f

20°C to 

e

60°C.

Содержание LC-40A1H

Страница 1: ... 11 Before turning on the power 12 Connecting external devices 13 Inserting a SD SDHC memory card commercially available 14 Connecting a USB memory device 14 Connecting to the Network 14 Inserting the batteries 15 Using the remote control unit 15 Cautions regarding the remote control unit 15 Turning the TV on off 16 Running the TV for the first time 16 Turning off the TV 16 User Guide 17 Watching ...

Страница 2: ...etwork function Connecting to the Network 26 Wired installation 26 Wireless installation 26 Network setting 27 Ethernet network connection 27 Wireless network connection 27 Add network 27 Smart function Local Apps 28 Multimedia 28 Browser 28 Input 28 Store 28 Installing Apps 28 Apps 28 Text input 29 Other useful features Connecting a USB memory device 30 Playing back files on a USB memory device 3...

Страница 3: ...omes into contact with some substances Therefore keep it away from volatile substances such as insecticide In addition do not let it come into contact with objects made of rubber resin etc for a long time Maintenance of the LCD panel Before cleaning the LCD panel be sure to turn off the TV set and unplug the power cord from the outlet When cleaning the LCD panel use a dry and soft cloth made of co...

Страница 4: ...ing products including amplifiers To prevent fire never place any type of candle or naked flames on the top or near the TV set To prevent fire or shock hazard do not place the AC power cord under the TV set or other heavy items Do not place heavy objects on this product or stand on it Doing so could cause injury if the product overturns Take special care near children and pets The LCD panel is a v...

Страница 5: ...t or services available via this device SHARP is not responsible nor liable for customer service related issues related to the third party content or services Any questions comments or service related inquiries relating to the third party content or service should be made directly to the applicable content or service provider You may not be able to access content or services from the device for a ...

Страница 6: ...lamps g2 Make sure the following accessories are provided with the product Remote control unit AAA size alkaline battery g2 Conversion cable Operation manual Page 13 Used with batteries inserted Page 11 Page 15 Stand unit Stand base cover Page 7 Page 8 Yellow ...

Страница 7: ...the stand unit NOTE When installing the stand unit you need to put your TV on a flat surface Before that put a soft cushion on the surface To detach the stand unit perform the steps in reverse order The angle of the stand unit is not adjustable A screwdriver is not supplied with this product During installation please be careful to avoid getting your hand trapped between the TV bottom and the floo...

Страница 8: ...th the bracket before beginning work NOTE Before mounting the TV to a wall please insert the supplied stand cover into the holes on the bottom of the TV If you want to mount the TV on the wall use the screws provided with the wall mount bracket to affix the bracket to the rear of the TV Preparation Stand unit Screws commercially available Protection against overturning There is a danger of the pro...

Страница 9: ...oses and may vary slightly from the actual operations The illustrations used throughout this operation manual are based on LC 40A1H TV Side Front 1 POWER On Off button 2 MENU button 3 INPUT button 4 CH r s Channel up down buttons 5 VOL k l Volume up down buttons 6 Power indicator 7 Remote control sensor 1 2 3 4 5 67 ...

Страница 10: ...m the jack when they are not in use The speakers do not output volume when headphones are plugged in The Audio menu cannot be operated when headphones are plugged in Volume display when headphones are plugged in 30 Antenna terminal ATV DTV Headphone AUDIO L R terminal HDMI 1 HDMI 1 MHL terminal 1 USB 2 terminal USB 1 terminal SD SDHC COMPONENT input terminal LAN terminal HDMI 2 terminal HDMI 3 ter...

Страница 11: ...ge 22 14 INFO DTV only Display the programme information 15 GUIDE Display the channel list of DTV and ATV See page 25 16 EPG DTV only To display EPG Electronic Programme Guide screen See page 24 17 DELETE Delete the characters Press it continually to delete characters quickly 18 DISPLAY Display the channel or input information 19 INPUT Select an input source ATV DTV HDMI1 HDMI2 HDMI3 Component AV ...

Страница 12: ...of time TV rear view Connecting the antenna cable To enjoy a clearer picture use an outdoor antenna The following is a brief explanation of the types of connections that are used for coaxial cable Standard DIN45325 plug IEC169 2 75 ohm coaxial cable round cable Room antenna terminal 75 ohm type Antenna cable commercially available Connecting external devices See page 13 for connecting external equ...

Страница 13: ...s select the input source from on the remote control unit or INPUT on the TV w When using component cable commercially available w When using composite cable commercially available w When using HDMI cable commercially available Digital TV STB VCR Game console Camcorder DVD Player PC Digital TV STB VCR Game console Camcorder DVD Player Digital TV STB VCR Game console Camcorder DVD Player NOTE When ...

Страница 14: ... the figure The SD slot supports SD and SDHC memory cards However some memory cards may not be supported This product supports memory cards with a maximum storage of 32 GB We recommend that you use a memory card with at least a speed of Class 4 for a higher read write speed thus guaranteeing the system performance Unplug the memory card after you have safely unloaded it or the TV has been turned o...

Страница 15: ...nding to the e and f indications in the battery compartment 2 Insert the two supplied AAA size alkaline batteries 3 Close the battery cover Use the remote control unit by pointing it towards the remote sensor window Objects between the remote control unit and sensor window may prevent proper operation Cautions regarding the remote control unit Do not subject the remote control unit to shock In add...

Страница 16: ...se turn off TV after closing all APPS Running the TV for the first time Turning off the TV w Power indicator After inserting the AC cord press POWER on the TV If the TV is switched on press POWER on the remote control If the TV is switched on press POWER on the TV The power indicator turns green TV is switched on After several seconds an image appears with sound You can switch the TV to standby by...

Страница 17: ...TER If you want to return to Language Setting press c d on the remote control to select Back and then press ENTER w Language Setting w Start Settings w Mode Setting 2 2 2 If you want to return to Start Settings press c d on the remote control to select Back and then press ENTER After the search press c d on the remote control to select Next and then press ENTER into Network Setting If you want to ...

Страница 18: ...ge listed on the screen 3 NOTE Only after restarted the TV the language of the system can be changed NOTE The initial installation of the TV is IQQI Chinese Pro If you use any other input method SHARP can not guarantee its compatibility with television system Default input method No signal power off Sleep timer In the Menu press a b to select General and then press ENTER In the Menu press a b to s...

Страница 19: ...N to save and exit 3 3 3 3 2 2 2 2 Press a b to select AV mode Press a b to select Colour temp Press a b to select Wide mode and then press ENTER Press a b to select the desired menu item and then press ENTER The AV mode function enables you to select appropriate settings for audio and video to account for the system environment Adjusts the colour temperature to give the best white image You can s...

Страница 20: ...ts commercial breaks The automatic volume control Auto volume reduces this problem by equalizing levels You can adjust the audio of the selected AV mode Reset all picture adjustment items to the factory preset Normal Zoom 14 9 Panorama Cinema 14 9 Cinema 16 9 Full NOTE Some picture sizes may not be displayable depending on the input signal Zoom 14 9 and Cinema 14 9 are only available for the DTV o...

Страница 21: ...Reset all audio adjustment items to the factory preset values Channel Auto search Digital setting Analogue setting You can run auto installation again even after setting up the preset channels You can set some DTV channel items manually You can set some ATV channel items manually Set the channel as you desired w Auto search w Auto search w Manual search w Manual search w Signal info w Antenna powe...

Страница 22: ...m current channel You can Search the next channel by pressing c d to adjust the frequency Fine Tune Tune the frequency of the stored channel to your desired position Maximum 8 alphanumerics can be input Labeling is only available for the ATV mode Network Option Apps Please see pages 26 to 27 For setting other items Please see pages 28 to 29 w Digital audio language w Subtitle w For hearing impaire...

Страница 23: ... output audio terminal audio signal NOTE Factory preset value is Auto If Auto is selected colour system for input signal is automatically set If an image does not display clearly select another colour system e g PAL NTSC 4 43 Colour system is selectable only when inputting a AV signal System You can view and set the info about the system In the Menu press a b to select System and then press ENTER ...

Страница 24: ...ss ENTER The programme of the selected channel displays 2 Press EPG to display EPG Electronic Programme Guide screen 1 The guide for EPG is displayed on the bottom of TV screen The operation for the relative colour key is as follows G View detailed information of the present channel Press G again to exit Y Display the schedule list Press a b to select a programme in schedule list Press R to delete...

Страница 25: ...the mode switches as follows In the NICAM TV broadcasts In the TV mode of A2 TV broadcasts Signal Mode switch When receiving a stereo signal STEREO MONO When receiving a bilingual signal CH A CH B CH AB When receiving a monaural signal MONO GUIDE Display the channel list of DTV and ATV Press GUIDE and then display the Channel List of DTV and ATV on the screen 1 Press a b to select the desired chan...

Страница 26: ...ion program from the Wi Fi Alliance A wireless LAN connection and performance cannot be guaranteed for all residential environments In the following cases the wireless LAN signal may be poor or drop or the connection speed may become slower When used in buildings made with concrete reinforced steel or metal When placed near objects that obstruct the signal When used with other wireless devices tha...

Страница 27: ... adjust Ethernet to On Press c d to adjust Wi Fi to On it displays the nearly wireless network Enter the information about the unbroadcast wireless network and then select Connect Now the TV is connected to the unbroadcasted wireless network Ethernet network connection Wireless network connection Add network w DHCP w Manual connection Press a b to select DHCP Press c d to select On System will att...

Страница 28: ...smart home Select Local Apps and then press ENTER Select the desired App and press ENTER to enjoy it Press SMART into smart home Select Store and then press ENTER NOTE SHARP is not responsible for the service of third party Some Apps can be improved operation experience by connecting a usb mouse Press MENU 1 2 3 Press a b to select Apps and then press ENTER w Internal storage w SD card storage Fro...

Страница 29: ...es virtual keyboard input mode In the process you can choose character by moving cursor and press ENTER to complete character input At the same time you can change the input mode from virtual keyboard NOTE If you format SD card the content storaged in the SD card will be deleted completely and the content is unrecoverable Please operate it carefully NOTE Do not unplug the memory card while data is...

Страница 30: ...USB memory device contains many files or folders External subtitles for some video files may not be supported You can connect a USB memory device or a USB hard disk drive HDD to the TV to enjoy viewing pictures listening to music and watching videos Insert the USB memory device with recorded photos music or videos into the USB 1 or USB2 terminal on the TV CAUTION Do not use the USB extension cable...

Страница 31: ...gle repeat and Order cycle 3 Loop from point A to B Press ENTER to set the current playback time starting point Press ENTER to set the loop end of the current playing time and start loop playback 3 Playlist Select a file from the playlist to start playback 3 3 Display file information 3 3 3 Go to time select Set a start point of playing 3 Rotate the photo by 90 degrees to the right 3 Rotate the ph...

Страница 32: ... AAC trp tp MPEG2 MP HL H 264 HP Up to Level 4 1 H 264 AVC MP L4 1 mpg vob mpeg MPEG2 MP HL Dolby Digital DTS LPCM dat MPEG1 2 wmv asf Advanced Profile Level 3 Simple Profile and Main Profile mov MPEG4 SP MPEG4 ASP Level 5 H 264 HP Up to Level 4 1 H 264 AVC MP L4 1 m jpeg Dolby Digital mp4 MPEG4 SP MPEG4 ASP Level 5 H 264 HP Up to Level 4 1 H 264 AVC MP L4 1 H 264 AVC BP L3 1 H 263 Dolby Digital M...

Страница 33: ...ou to connect a smartphone that supports Mobile High Definition Link MHL to the TV using a MHL compatible cable To connect your MHL compatible smartphone to the TV be sure to use a MHL compatible cable Commercially available Connect the device to the HDMI 1 Press on the remote control unit select HDMI 1 source and then press ENTER MHL compatible cable Commercially available HDMI 1 HDMI 1 MHL termi...

Страница 34: ...nd 23 Power is suddenly turned off The unit s internal temperature has increased Remove any objects blocking the vent or clean Is the sleep timer no signal power off See page 18 No picture Is the connection to external equipment correct See pages 13 14 and 30 Is the correct input selected See pages 11 and 28 Is the picture adjustment correct See page 19 Is the antenna connected properly See page 1...

Страница 35: ...ENNA UHF VHF 75 Ω Din type AV INPUT VIDEO in AUDIO in Below LAN ETHERNET 10 100 Network connector HDMI 2 HDMI HDMI input 480I 576I 480P 576P 720P 50Hz 720P 60Hz 1080I 50Hz 1080I 60Hz 1080P 50Hz 1080P 60Hz 1080P 24Hz HDMI 3 HDMI HDMI input 480I 576I 480P 576P 720P 50Hz 720P 60Hz 1080I 50Hz 1080I 60Hz 1080P 50Hz 1080P 60Hz 1080P 24Hz AUDIO INPUT Ø 3 5 mm jack The HDMI 3 terminals share the same audi...

Страница 36: ...36 Dimensional drawings Unit mm LC 40A1H 1 Active area 2 Thinnest part Appendix LC 50A1H ...

Отзывы: