background image

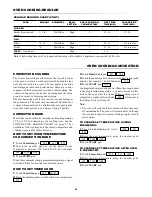
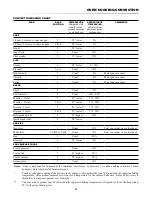
beFOre yOu Call FOr serviCe

prObleM

pOssible Cause

sOlutiOn

14

  Lower  oven  will  not 

open.

• Lower oven door is locked.

• See page 31 to unlock oven door.

• See 18 below.

15

 Poor baking results.

•  Oven controls improperly set.

•  Rack position is incorrect.

•  Incorrect cookware is used.

•  Pan warped.

•  Oven thermostat needs adjustment.

•  Range not level.

•  Oven door opened too frequently.

•  Check if the controls have been properly 

set. See page 24.

•  See page 23.

•  use cookware suggested in recipe.

•  Do  not  use  pans  that  are  dented  or 

warped.

•  See page 31. 

•  Place a marked glass measuring cup filled 

with water on the center of the oven rack. 

If the water level is uneven, refer to the 

Installation Manual for leveling the range.

•  Open  oven  door  only  after  shortest 

recommended  baking  time.  use 

Oven 

Light

 pad to see the food in the oven.

16

 Food  does  not  broil 

properly  or  smokes 

excessively.

•  Oven controls improperly set.

•  Improper rack position being used.

•  Aluminum foil was incorrectly used.

•  Oven door was closed during broiling.

•  Check if the controls have been properly 

set. See page 25-26.

•  See page 25-26.

•  See page 23.

•  Leave  the  door  open  to  broil  stop 

position.

17

 Self-cleaning cycle does 

not work.

•  The oven temperature is too high to set a 

self-cleaning cycle.

•  Oven controls improperly set.

•  Allow the oven to cool and reset the con-

trols.

•  Check if the controls have been properly 

set. See page 30.

18

 Oven door does not open 

after a clean cycle.

•  Oven too hot.

•  Allow  the  oven  to  cool  below  locking 

temperature.

19

 Strong  odor  or  light 

smoke  when  range  is 

turned on.

•  This is normal for a new range.

•  Excessive food soils on the oven bottom.

•  It will disappear after a few uses. ventilate 

the room to remove odors more quickly.

•  use a self-cleaning cycle. See page 30.

20

 Display flashes.

•  Power failure.

•  Press 

Clear

 pad and reset the clock. If the 

oven was in use, you must reset the cooking 

function.

21

 Steam from the vent.  

•  When using the bake or microwave feature, 

it is normal to see steam from the food 

coming out of the vent. 

Содержание KB-3401L

Страница 1: ...xposure to Excessive Microwave Energy 3 CONSUMER LIMITED warranty 4 important safety instructions 5 7 Unpacking and Examining Your Range 7 PARTS name 8 11 before operating 12 Cooktop Use 13 14 MICROWAVE DRAWER cooking 15 22 OVEN cooking regular 23 26 OVEN cooking convection 26 29 Other Features 30 31 cleaning and care 32 34 before you call for service 35 36 Notes 37 38 auto touch guide 39 BACK COV...

Страница 2: ...Micro warm 21 Auto start 21 Timer 21 Multiple sequence cooking 22 Minute plus 22 Audible signal elimination 22 End of cooking reminder 22 HELP 22 OVEN cooking regular 23 26 Information YOU NEED TO KNOW 23 Before using oven 23 24 How to set Oven Temperature for regular bake 24 How to Proof 24 how to set timed cook 24 how to set delay start 24 25 How to set regular Broil 25 26 OVEN cooking Convectio...

Страница 3: ...ing address including zip code your daytime telephone number including area code and description of the problem TO ACCESS INTERNET www sharpusa com PRECAUTIONS TO AVOID POSSIBLE EXPOSURE TO EXCESSIVE MICROWAVE ENERGY a Do not attempt to operate this oven with the door open since open door operation can result in harmful exposure to microwave energy It is important not to defeat or tamper with the ...

Страница 4: ... Sharp and shall be the sole and exclusive remedy available to the purchaser Correction of defects in the manner and for the period of time described herein shall con stitute complete fulfillment of all liabilities and responsibilities of Sharp to the purchaser with respect to the Product and shall constitute full satisfaction of all claims whether based on contract negligence strict liability or ...

Страница 5: ... qualified technician 7 Do not store flammable materials in an oven Microwave Drawer or near surface units Do not store or use combustible materials gasoline or other flammable vapors and liquids in the vicinity of this appliance 8 Do not use water on grease fires Smother a flame or use a dry chemical or foam type extinguisher Flaming grease outside a pan can be put out by covering it with baking ...

Страница 6: ...urns electric shock fire injury to persons or exposure to excessive microwave energy 1 Read all instructions before using the appliance 2 Read and follow the specific PRECAUTIONS TO AVOID POSSIBLE EXPOSURE TO EXCESSIVE MICROWAVE ENERGY on page 3 3 This appliance must be properly grounded See Installation Instructions for grounding instructions 4 Install or locate this appliance only in accordance ...

Страница 7: ... follow the manufacturer s directions 8 Pulling out the rack to the stop lock is a convenience in lifting heavy foods It is also a precaution against burns from touching hot surfaces of the door or oven walls 9 Do not use the oven to dry newspapers If overheated they can catch fire 10 Do not use the oven for a storage area Items stored in oven can ignite 11 Do not leave paper products cooking uten...

Страница 8: ... Waveguide cover DO NOT REMOVE 8 Drawer sealing surfaces 9 Microwave Drawer guides Electric RANGE with Microwave Drawer 10 Oven 11 Gasket 12 Backsplash 13 Glass ceramic cooktop 14 Control knobs 15 Drawer light 16 Microwave Drawer Menu Label 17 Microwave Drawer 18 Rack supports 19 Oven door 7 4 10 6 9 1 11 13 14 15 16 18 19 17 12 9 8 2 3 2 5 ...

Страница 9: ...28 24 26 20 Top heating element 21 Oven door lock 22 Oven light 23 Convection fan cover 24 Rear heater 25 Bottom heating element 26 Roast Broil rack 27 Broiler pan grid 28 Broiler pan 29 Standard rack 2 30 EZ Pull oven rack 30 23 10 ...

Страница 10: ... a lower position IMPORTANT Do not leave the EZ Pull Oven Rack in oven during self cleaning cycle Rack Ball bearing steel slides Base support rack Insert and snap into position in the oven Figure 2 Figure 1 Figure 3 Shelf shown in extended position IMPORTANT Base support rack remains snapped in position inside the oven DO NOT extend base support rack beyond oven opening during use as shown in Figu...

Страница 11: ...re descriptions and usage information When you wish to use both the Microwave Drawer and the Oven complete one setting and touch START before programming the other setting 30 14 24 14 22 30 31 20 18 21 21 18 17 22 12 21 12 22 14 Control Knobs Control Knobs 30 Parts Name CONTROL PANEL HOT SURFACE INDICATOR LIGHTS RADIANT SURFACE UNIT 14 WARM zone 26 29 RADIANT SURFACE UNIT RADIANT SURFACE UNIT RADI...

Страница 12: ...ed with the drawer open except for Start Minute Plus The Oven can be started with the door open except for self cleaning Timers Your Insight Range features two separate independent Kitchen Timers The timer on the Oven side left of the control panel is labeled Timer Hold to Clear 3 Min Plus The maximum length of this timer is 9 hours 99 minutes You set this timer in hours and minutes For example on...

Страница 13: ...tems melt or soften plastics or increase pressure in closed containers causing them to burst Don t store heavy items above the cooktop as they can cause damage if they drop on to the cooktop Never cook directly on the cooktop Always use cookware ABOUT COOKING UTENSILS For best results and energy conservation choose cooking utensils as below Bottom of pan Pans should have flat bottoms that make goo...

Страница 14: ...le turn the units off and allow foods to finish cooking with the retained heat It may be necessary to remove the pan from the unit to prevent further cooking also Suggested heat settings Setting Type of cooking High Bring liquid to a boil Always reduce setting to a lower heat when liquids begin to boil or foods begin to cook Medium High Brown meat heat oil for deep fat frying or to continue a rapi...

Страница 15: ...e Drawer at power levels below 100 you may hear the magnetron cycling on and off It is normal for the exterior of the Microwave Drawer to be warm to the touch when cooking or reheating Condensation is a normal part of microwave cooking Room humidity and the moisture in food will influence the amount of moisture that condenses in the Microwave Drawer Generally covered foods will not cause as much c...

Страница 16: ... thick or dense area away from fat or bone Never leave the thermometer in the food during cooking unless it is approved for microwave use ALWAYS use potholders to prevent burns when handling utensils that are in contact with hot food Enough heat from the food can transfer through utensils to cause skin burns Avoid steam burns by directing steam away from the face and hands Slowly lift the farthest...

Страница 17: ...ettings 1 After the range is plugged in wait 2 minutes before using any sensor setting 2 Be sure the exterior of the cooking container and the interior of the Microwave Drawer are dry Wipe off any moisture with a dry cloth or paper towel 3 The sensor works with foods at normal storage temperature For example popcorn would be at room temperature 4 Any sensor selection can be programmed with More or...

Страница 18: ...Cauliflower flowerets Cauliflower whole Spinach Zucchini Baked apples 25 2 0 lb 25 2 0 lb 25 2 0 lb 25 2 0 lb 1 med 25 1 0 lb 25 2 0 lb 2 4 med Wash and place in casserole Add no water if vegetables have just been washed Cover with lid for tender vegetables Use plastic wrap for tender crisp vegetables After cooking stir if possible Let stand covered for 2 to 5 minutes Covering Foods Some foods wor...

Страница 19: ...wel lined Microwave Drawer After cooking remove from microwave wrap in aluminum foil and let stand 5 to 10 minutes 6 Ground meat 25 2 0 lb Use this setting to cook ground beef or turkey as patties or in a casserole to be added to other ingredients Place patties on a microwave safe rack and cover with wax paper Place ground meat in a casserole and cover with wax paper or plastic wrap When microwave...

Страница 20: ...nal if there are warm or thawed portions rearrange or remove Let stand covered for 10 to 20 minutes 4 Bone in poultry 5 3 0 lb After each audible signal rearrange pieces or remove portions should they become warm or thawed Let stand covered for 10 to 20 minutes 5 Casserole soup 1 6 cups After each audible signal break apart and remove any defrosted part At end stir well and let stand covered for 5...

Страница 21: ...wed on the REHEAT CHART heat manually More or less time adjustment Should you discover that you like any of the Sensor or Defrost settings slightly more done touch the Power Level pad once after touching your selection The display will show MORE For slightly less done touch the Power Level pad twice after touching your selection The display will show LESS Micro warm Micro Warm allows you to keep f...

Страница 22: ... the Power Level pad the power level will be displayed Minute plus Minute Plus allows you to cook for a minute at 100 by simply touching the Minute Plus pad You can also extend cooking time in multiples of 1 minute by repeatedly touching the Minute Plus pad during manual cooking Note To use Minute Plus touch pad within 3 minutes after cooking closing the Microwave Drawer or touching the Stop Clear...

Страница 23: ...rack so one is not directly above the other For best air circulation and baking results allow 2 4 inches around the cookware and be sure pans and cookware do not touch each other the oven door sides or back of the oven cavity The hot air must circulate around the pans and cookware in the oven for even heat to reach around the food Aluminum Foil Do not place aluminum foil on the oven bottom It is n...

Страница 24: ...perature for yeast When the oven cools the oven display will change to PUSH START Simply touch the START pad and the oven will maintain 90 100 F for proofing How to set timed cook The oven will turn on immediately and cook for a selected length of time At the end of the cooking time the oven will turn off automatically BAKE 1 Touch Bake pad 000 SET TEMP 2 Touch the number pads to set the desired o...

Страница 25: ...oiling times Increase or decrease broiling times or move the broiling pan to a different rack position to achieve desired doneness High broil is used for most broiling Use Medium or Low broil to cook foods such as thick cuts of meat thoroughly without excessive browning Broil will automatically turn off after 5 hours if it was accidentally left on This feature can be cancelled See 12 HOUR SHUT OFF...

Страница 26: ...Convection pad 000 SET TEMP 2 Touch the number pads to set the desired oven temperature 375 3 Touch Timed Cook pad SET TIME 4 Touch the number pads to enter cooking time in hours and minutes For example 1 hour 45 minutes 1 45 5 Touch START pad START Cooking time begins counting down When the oven preheats to the programmed temperature a signal will sound Place food in the oven after the signal Whe...

Страница 27: ...r 7 10 Refrigerated pizza 3 50 higher 10 Quick bread loaf 2 50 lower Cookies One level 3 Usual 15 Low or no sides on cookie sheet Multi level 1 2 4 or 2 4 Usual 15 Low or no sides on cookie sheets Bar 3 Usual 20 Brownie 3 25 lower 5 Convenience Foods Frozen potatoes 2 Usual 10 Frozen fish 3 25 higher 20 Frozen chicken 3 50 higher 20 Frozen pizza 3 Usual 15 Notes Always check food for doneness at t...

Страница 28: ...utes 1 45 5 Touch START pad START When cooking time is completed a signal will sound and END will appear in the display Oven will turn off Note The oven will cook for the set amount of time then turn off automatically The oven will remain hot even though the oven has turned off so remove food promptly to avoid overcooking How to set delay start The oven will turn on at the time of day you set cook...

Страница 29: ...CONVECTION convection BROILING chart FOOD rack position broiling time after preheat Bacon 3 3 5 min Chicken broiler halves quarters or pieces 1 14 20 min Chicken breast boneless 3 9 12 min Frankfurters 3 5 7 min Hamburgers 1 8 10 min Ham slice fully cooked 3 10 12 min Sausage 1 8 10 min Toast 3 1 1 4 min turnover 1 min more Note The broiling times may be longer and browning may be lighter if appli...

Страница 30: ...t wiped up before the self cleaning cycle they may flame and cause more smoke and odor than usual This is normal and safe and should not cause alarm The glass ceramic cooktop and the Microwave Drawer can be used while the oven is self cleaning OVEN LIGHT The oven light automatically comes on when the door is opened When the door is closed press Oven Light pad on the control panel to turn the light...

Страница 31: ...3 Touch desired number pad Repeat touching the number pad to increase or decrease 5 degrees TOUCH START 4 Touch START pad 12 HOUR SHUT OFF Oven will automatically turn off after 12 hours of operation for baking or after 5 hours for broil if it is accidentally left on This feature can be deactivated if desired Default is 12 Hour Automatic Shut off ON To deactivate 12 hour shut off 1 Touch Setup Cus...

Страница 32: ...to the cooking surface do not apply cleaning cream to the glass surface when it is hot We recommend that you avoid wiping any surface unit areas until they have cooled and the hot surface indicator light has gone off Sugar spills are the exception to this 1 Apply a few drops of cleaner cream to the cooktop that is not hot 2 Dampen clean paper towel and clean top 3 Wipe off with another clean damp ...

Страница 33: ...up glass measuring cup Boil for several minutes using 100 power Allow to set in the Microwave Drawer until cool Wipe interior with a soft cloth OVEN CAUTION Before cleaning any part of the oven be sure the oven is turned off If not press Stop Clear Allow the oven to cool before cleaning Inside of the door You do not need to clean the area inside the gasket by hand since the area is cleaned during ...

Страница 34: ...ft cloth The broiler pan grid and roast broil rack can be washed in the dishwasher Note Do not leave in oven during self cleaning cycle Oven light replacement CAUTION Be sure the oven is unplugged and all parts are COOL before replacing the oven lightbulb Do not turn the oven light on during the self cleaning cycle The high temperature will reduce lamp life The interior oven light will turn on aut...

Страница 35: ...ommended cleaning procedure See page 32 Use smooth flat bottomed cookware 6 Areas of discoloration on the cooktop Food spillovers not cleaned before next use Use the recommended cleaning procedure See page 32 7 Metalmarks on cooktop Sliding or scraping of metal pans on top Do not slide metal pans When cool clean with cooktop cleaning cream to remove the marks 8 Brown streaks or specks on cooktop g...

Страница 36: ...mproper rack position being used Aluminum foil was incorrectly used Oven door was closed during broiling Check if the controls have been properly set See page 25 26 See page 25 26 See page 23 Leave the door open to broil stop position 17 Self cleaning cycle does not work The oven temperature is too high to set a self cleaning cycle Oven controls improperly set Allow the oven to cool and reset the ...

Страница 37: ...37 NOTES ...

Страница 38: ...NOTES 38 ...

Страница 39: ...imer Clock pad again To cancel timer touch STOP Clear Reheat Reheat automatically computes the correct warming time and microwave power level for foods shown on the Menu Label 1 Touch Reheat pad once SEE LABEL SELECT FOOD NUMBER 2 See Menu Label Select desired food by touching the number pad Ex Touch 2 for frozen rolls or muffins FROZEN ROLLS ENTER NUMBER 3 Touch the number pad to select quantity ...

Страница 40: ...LOW SELF CLEAN 1 Touch Self Clean pad once for Normal 3 1 2 hours or twice for Light 2 hours NORM 2 Touch START pad When self cleaning time is completed a signal will sound and END will appear in the display Timer 1 Touch Timer Hold to Clear 3 Min Plus pad SET TIME 2 Touch the number pads to enter time in hours and minutes For 30 minutes enter 3 0 30 PUSH TIMER 3 Touch Timer Hold to Clear 3 Min Pl...

Отзывы: