background image

LC-80LE632U

5 – 16

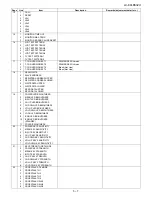
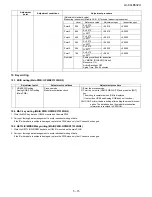
11. Factory setting

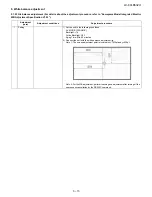
After completing the factory setting, pull out the AC cord to complete the setting.

CAUTION: Do not turn on the power after completing the factory setting. If the power is turned on, configure the factory setting again.

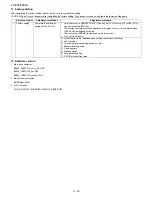
12. Software version

1. Main microcomputer

BSMK_LE632-732_xxx_CHK.USB

BSMK_LE632-732_xxx.DAT

BSMK_LE632-732_xxxxxxx.PCC

2. Monitor microcomputer

BMSDMxxx.SMB

3. LCD Controller

CLOVER_20110210CB027001_WSRC_E618DE.ROM

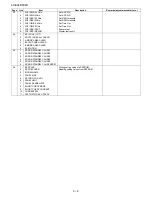
Adjustment point

Adjustment conditions

Adjustment procedure

1

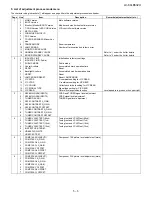
Factory setting

Complete the setting by 
pulling out the AC cord.

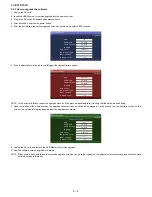
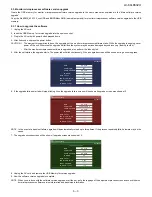
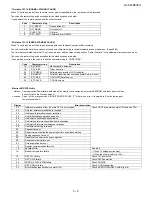
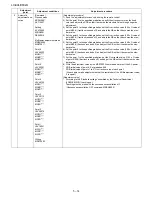
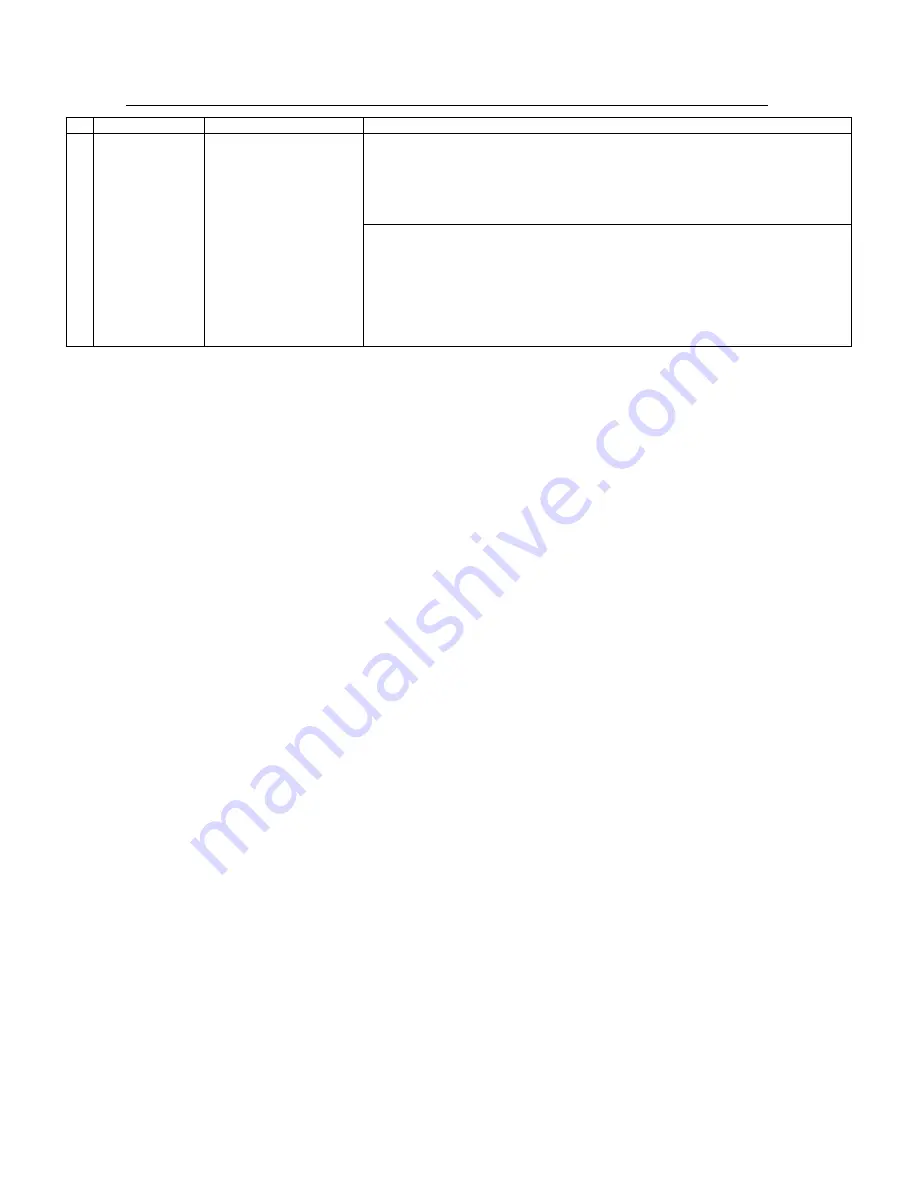
• Point the cursor to [INDUSTRY INIT (+Cause)], set to “ON” using [+]/[-] of the [VOL] 

key, and press the [ENT] key.
The version confirmation screen appears on the green screen. It is completed when 
[SUCCESS] is displayed at the top.
(If error occurs, [ERROR] is displayed on the red screen.)

• Turn off the AC power.
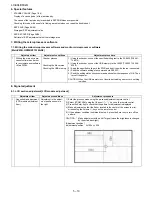
The following items are initialized when configuring the factory setting.
1) User set value
2) Channel data (broadcasting frequency, etc.)
3) Password setting value
4) Operating time
5) Standby Cause
6) Auto installation flag
7) V-CHIP block setting value

Содержание AQUOS LC-80LE632U

Страница 1: ...RATION MANUAL 1 OPERATION MANUAL 2 1 CHAPTER 3 DIMENSIONS 1 DIMENSIONS 3 1 CHAPTER 4 REMOVING OF MAJOR PARTS 1 REMOVING OF MAJOR PARTS 4 1 2 The location putting on the heat measure sheet 4 9 3 Precautions for assembly 4 10 CHAPTER 5 ADJUSTMENT 1 ADJUSTMENT PROCEDURE 5 1 CHAPTER 6 OVERALL WIRING DIAGRAM 1 OVERALL WIRING DIAGRAM 6 1 Parts Guide TopPage CONTENTS LC 80LE632U MODEL LCD COLOR TELEVISIO...

Страница 2: ... DUNTKF494FM01 No Changed N ICON Unit DUNTKF770FM02 No Changed N KEY Unit DUNTKF800FM51 DUNTKF800FM50 D Changed N WiFi Unit RUNTKA810WJQZ No Changed N POWER DRIVE Unit RUNTKA857WJQZ RUNTKA903WJQZ D Chanded N LCD Control Unit DUNTKF778FM04 DUNTKF778FM12 D Chanded LCD Panel Module N LCD Panel Module Unit R1LK695D3GW30Z R1LK800D3GW10Z D Chanded CABINET AND MECHANICAL PARTS Please refer to a Parts Gui...

Страница 3: ...DRIVE Unit N DUNTKF778FM12 LCD Control Unit Ref No Parts No Description N R1LK800D3GW10Z 80 LCD Panel Module Unit LK800D3GW10Z Ref No Parts No Description Q ty IC2001 RH iXD241WJNBQ IC R5F21368CNFP Monitor Microcomputer 1 Ref No Parts No Description Q ty N QCNW C222WJQZ Connecting Cord L 1000mm 80pins LCD Control Unit to LCD Panel Unit 2 N QCNW F676WJQZ Connecting Cord L 1000mm 41pins Main to LCD ...

Страница 4: ... AC voltage drop across the resistor All checks must be repeated with the AC cord plug connection reversed If necessary a nonpolarized adaptor plug must be used only for the purpose of completing these checks Any reading of 0 75 Vrms this corresponds to 0 5 mA rms AC or more is excessive and indicates a potential shock hazard which must be corrected before returning the monitor to the owner SAFETY...

Страница 5: ...e et de compartiment les réseaux de résistancecapacité les isolateurs mécaniques etc S assurer qu il n y ait pas de danger d électrocution en vérifiant la fuite de courant de la facon suivante Brancher le cordon d alimentation directem ent à une prise de cou rant de 120V Ne pas utiliser de transformateur d isolation pour cet essai A l aide de deux fils à pinces brancher une résistance de 1 5 kΩ 10...

Страница 6: ...solder by 40 C and as it has poor solder wettability you may be apt to keep the soldering bit in contact with the PWB for extended period of time However Since the land may be peeled off or the maximum heat resistance temperature of parts may be exceeded remove the bit from the PWB as soon as you confirm the steady soldering condition Lead free solder contains more tin and the end of the soldering...

Страница 7: ...al ETHERNET Network connector USB 2 Photo Music Video mode Software update OSD language English French Spanish Power Requirement AC 120 V 60 Hz Power Consumption 307 W 0 1 W Standby with AC 120 V Weight TV stand 131 2 lbs 59 5 kg TV only 122 4 lbs 55 5 kg Dimension 2 W x H x D TV stand 73 5 16 x 45 3 32 x 17 3 32 inch TV only 73 5 16 x 43 25 32 x 3 29 32 inch Operating temperature 32 F to 104 F 0 ...

Страница 8: ...me buttons VOL 1 TV Rear RS 232C terminal Antenna Cable in AC INPUT terminal COMPONENT terminals DIGITAL AUDIO OUTPUT terminal HDMI 3 terminal HDMI 4 terminal HDMI 1 terminal ARC Audio Return Channel VIDEO 2 terminals VIDEO 1 terminals AUDIO OUT terminal USB 1 terminal USB 2 terminal ETHERNET terminal HDMI 2 terminal PC IN terminal 2 2 1 2 AUDIO IN terminal shared for PC IN and HDMI 1 3 1 Connecti...

Страница 9: ... 16 FAVORITE CH Set the favorite channels 17 A B C D Select 4 preset favorite channels in 4 different categories While watching you can toggle the selected channels by pressingA B C and D 18 DISPLAY Display the channel information 19 POWER SOURCE Turns the power of the external equipment on and off 20 FREEZE Set the still image Press again to return to normal screen 21 POWER SAVING Select Power Sa...

Страница 10: ...e post 3 Insert and tighten the 8 screws into the 8 holes on the bottom of the base Hold the stand unit securely with one hand and then tighten the screws FRONT 2 1 1 1 2 Long screws ˇ Building the Work Table 3 Insert each of the cushioning materials in the respective directions shown in the figure Insert TOP L and TOP R into the left and right sides of the case respectively Insert TOP C to fit be...

Страница 11: ...s 29 1 32 737 17 3 32 434 39 15 64 996 30 1 69 47 64 1771 20 1 73 5 16 1862 45 3 32 1145 43 25 32 1112 23 63 64 609 15 3 4 400 7 7 8 200 23 5 8 600 13 15 64 336 16 37 64 421 7 1 16 179 2 31 64 63 2 3 29 32 99 3 1 2 89 1 Active area Área activa Zone active 2 Thinnest part Parte más delgada Partie la plus mince ...

Страница 12: ...etach the Rear Cabinet Ass y How to separate the Rear Cabinet Cover Remove the 3 lock screws and 8 lock screws and detach the Rear Cabinet Cover Precautions when mounting and removing the rear cabinet Therefore it does not come away completely but only one side can come off 2 Stand Unit Rear Cabinet Ass y 8 7 Rear Cabinet Cover 1 3 4 4 6 4 Tighten together with the Rear Cabinet Ass y Fix with the ...

Страница 13: ...s as 1 Please grasp the swelling of a speaker and pull back with pushing down Remove one hook under an operation 2 Put a hand in terminal area and pulls back and the other hand holds top side of TV set Remove all right hand side hook 2WV C JCPF DGVYGGP VGTOKPCN CPING CPF 4GCT CDKPGV UU CPF RWNNU VJGO DCEM ...

Страница 14: ...om cover and Rear Cabinet Ass y And pull Rear Cabinet Ass y Remove all left hand side hook 4 Two persons stand on the both sides of TV SET and have a Front Cabinet Ass y and a Rear Cabinet Ass y by each hand Two persons pull a Rear Cabinet Ass y horizontally back simultaneously and remove it ...

Страница 15: ...ush Push Push Push Push CAUTION Set it so that there may not be a clearance between Front Cabinet Ass y and Rear Cabinet Ass y There is a gap without the fingernail fitting in completely only when covering with Rear Cabinet Ass y The fingernail is surely fixed when Rear cabinet Ass y is firmly pushed and the gap disappears ...

Страница 16: ...y 5 Disconnect the KM wire 6 Remove the 2 lock screws and detach the Key Button from Key Button Cover 7 Detach the KEY Unit from Key Button How to remove KEY Unit Ass y 1 When you remove KEY Unit Ass y please be sure to remove harness from WH and to hold the bottom of KEY Unit Ass y 7 5 4 8 6 Key Button KEY Unit KEY Unit Ass y Key Button Cover SP KM SP RC MAIN Unit 3 1 Speaker R 2 1 Speaker L ...

Страница 17: ...wing connectors from the POWER DRIVE Unit L1 L2 PD 3 Disconnect the following connectors from the LCD Control Unit PL LW 4 Remove the 27 Hooks and detach the 80 LCD Panel Module Unit Ass y 5 Detach the 2 Bottom cover PD UB CI LV MAIN Unit LCD Control Unit POWER DRIVE Unit Hock Hock Hock Hock L1 L2 PD PL LW 1 80 LCD Panel Module Unit Ass y MAIN Unit 2 Bottom cover ...

Страница 18: ...nd Terminal Angle Bottom 4 Remove the 6 lock screws and detach the POWER DRIVE Unit 5 Remove the 12 lock screws and detach the 2 Stand Angles 6 Remove the 16 lock screws and detach the 4 VESA Angle Ass ys 80 LCD Panel Module Unit 11 10 1 FFC 2 Ferrite Core LCD Control Unit 12 3 13 12 POWER DRIVE Unit Stand Angle 13 Stand Angle 8 5 4 Terminal Angle Bottoom 7 Shield MAIN Unit 6 MAIN Unit 9 14 15 VES...

Страница 19: ...Unit ICON Unit WiFi Unit 1 Detach the R C OPC Unit 2 Disconnect the RC wire 3 Detach the ICON Unit 4 Disconnect the CI wire 5 Detach the WiFi Unit 6 Disconnect the UB wire Front Cabinet Ass y 3 ICON Unit 2 WiFi Unit 1 R C OPE Unit RA UB CI ...

Страница 20: ...LC 80LE632U 4 9 2 The location putting on the heat measure sheet 1 MAIN PWB Unit PSPAZC741WJKZ ...

Страница 21: ...om the access holes The EMI prevention parts conductive nonwoven fabric gaskets must be seen from the access holes Countermeasure Attach the conductive nonwoven fabric gaskets on the shielded case on the main PWB State where the main PWB and shielded case are assembled PMLT A678WJQZ x 2 pcs PMLT A679WJQZ PSPAZC740WJZZ Attach the conductive nonwoven fabric gasket on the RF terminal angle PMLT A680W...

Страница 22: ...owing is a drawing mounting the main PWB Ass y on the backlight chassis The parts indicated by are the access holes for confirmation Main PWB Ass y State where the shielded case and RF terminal angle are mounted on the main PWB ...

Страница 23: ...ease use a software version after BMSDMxxx SMB The main software monitor microprocessor software can be upgraded by using a general purpose USB Memory The followings are the procedures for upgrading explained separately for the main software monitor microprocessor software 2 2 Main software version upgrade 2 2 1 Get ready before you start USB Memory of 128MB or higher capacity PC running on Window...

Страница 24: ...ion information appears after the upgrade is complete 8 Unplug the AC cord and remove the USB Memory for version upgrade 9 Now the software version upgrade is complete NOTE When you are done with the software version upgrade start the set go to the top page of the adjustment process screen and check the main software version information MAIN SUB MICOM PANEL EEPROM IR MICOM MAIN Version SUB MICOM V...

Страница 25: ...nor upgrade 6 If the upgrade fails power led will stop blinking Also the upgrade failure screen will be shown if upgrade screen was shown at 5 NOTE In the event of a transient failure upgrade will be automatically retried up to three times If the process repeatedly fails hardware may be the cause 7 The upgrade success screen will be shown if upgrade screen was shown at 5 8 Unplug the AC cord and r...

Страница 26: ...settings are tampered in this mode unrecoverable system damage may result 4 Remote controller key operation and description of display in adjustment process mode 1 Key operation Input mode is switched automatically when relevant adjustment is started so far as the necessary input signal is available 2 Description of display Remote controller key Main unit key Function CH CH Moving an item line by ...

Страница 27: ...etting for VIC READ 10 VIC YPOS Y coordinate setting for VIC READ 11 VIC COLOR Collected color data setting for VIC READ 12 VIC SIGNAL TYPE Signal type setting for VIC READ 13 VIC READ Picture level acquisition function Level appears in green on the upper right 3 1 N358 MAIN ADJ INPUT2 CVBS and TUNER signal level adjustment 2 N358 MAIN ADJ INPUT2 CVBS signal level adjustment 3 TUNER DAC ADJ TUNER ...

Страница 28: ...lue 11 MG3B WB adjustment Point 3 B adjustment value 12 MG3Y WB adjustment Point 3 Y adjustment value 11 1 MG4R WB adjustment Point 4 R adjustment value Parameter for six point adjustment 2 MG4G WB adjustment Point 4 G adjustment value 3 MG4B WB adjustment Point 4 B adjustment value 4 MG4Y WB adjustment Point 4 Y adjustment value 5 MG5R WB adjustment Point 5 R adjustment value 6 MG5G WB adjustment...

Страница 29: ...WER LED BRIGHTNESS 2 MENU LED BRIGHTNESS 3 INPUT LED BRIGHTNESS 4 CH UP LED BRIGHTNESS 5 CH DOWN LED BRIGHTNESS 6 VOL UP LED BRIGHTNESS 7 VOL DOWN LED BRIGHTNESS 8 LOGO LED BRIGHTNESS 9 ICON LED BRIGHTNESS 10 ICON LED BRIGHTNESS STANDBY 11 3D LED BRIGHTNESS 20 1 POWER KEY SENSITIVITY 2 MENU KEY SENSITIVITY 3 INPUT KEY SENSITIVITY 4 CH UP KEY SENSITIVITY 5 CH DOWN KEY SENSITIVITY 6 VOL UP KEY SENSI...

Страница 30: ... 3 A MODE AREA CLEAR 4 BACKUP AREA CLEAR 5 B MODE AREA CLEAR 6 EXECUTION 25 1 ERROR STANDBY CAUSE1 2 ERROR STANDBY CAUSE2 3 ERROR STANDBY CAUSE3 4 ERROR STANDBY CAUSE4 5 ERROR STANDBY CAUSE5 6 ERROR STANDBY CAUSE RESET 26 1 EEP SAVE Writing setting values to EEPROM 2 EEP RECOVER Reading setting values from EEPROM 3 MODEL NAME 4 PANEL SIZE 5 SETTING FOR ADJ 6 PANEL LIMIT 7 PANEL RANGE LIMIT 8 SHORT...

Страница 31: ...error 54 E_TCON_E T CON hung up Monitor ERR STBY table Outline Communication Power failure detected by the monitor microcomputer is stored in EEPROM and last 4 abnormal can be confirmed in the Process mode A Location Page 1 of the process mode A MONITOR ERR CAUSE 0 if there is no error It is cleared to 0 on the last page of the process mode A Display Error description 02 Initial communication from...

Страница 32: ...nect the USB memory to the J9502 TL9503 TL9506 9508 3 Apply the specified voltage to the PWB and boot it up with the tool connected 4 Send the software writing start command via RS232C 5 Send the writing status check command and confirm the response of OK Then turn off the power CAUTION When the USB memory is not inserted or reading error occurs nothing is written Adjustment item Adjustment condit...

Страница 33: ...e Enter the process adjustment mode using the process adjustment remote control Adjustment point Adjustment conditions Adjustment procedure 1 Setting N358 signal US 10ch Send the N358 color bar color saturation 75 signal to the composite input Send the in house signal use US 10ch to TUNER 2 Automatic adjustment exe cution Point the cursor to N358 ALL ADJ INPUT2 and press the Enter key The adjustme...

Страница 34: ...x768 60Hz SYNC HV separate Send the 100 color bar signal to the PC input 2 Automatic adjustment exe cution Point the cursor to ANALOG RGB ADJ and press the Enter key The adjustment is complete when ANALOG RGB ADJ OK is displayed Adjustment point Adjustment conditions Adjustment procedure 1 Setting NTSC RF signal US 7 AIR ch Send the NTSC signal to the RF antenna input 2 Automatic adjustment exe cu...

Страница 35: ...nt conditions Adjustment procedure 1 Setting 1 Set the unit to the following conditions AV MODE DYNAMIC Backlight 16 Active Backlight OFF Aging Time Min 60 minutes 2 Connect the unit with the white balance adjustment jig Note 1 The screen adjustment point is located in x 1034pt and y 539pt Note 2 For the WB adjustment perform teaching and adjustment after turning off the unevenness cancellation by...

Страница 36: ...t the RB so that it becomes the stan dard value 5 Set the point 3 to the specified gradation set the G correction value 448 x G value of point 6 928 fractions rounded off and adjust the RB so that it becomes the stan dard value 6 Set the point 2 to the specified gradation set the G correction value 296 x G value of point 6 928 fractions rounded off and adjust the RB so that it becomes the stan dar...

Страница 37: ...A 210 Technical measuring instrument Level Reference value Adjustment spec Inspection spec Point 6 928 X 0 272 0 0010 0 0020 y 0 277 Point 5 804 X 0 272 0 0010 0 0020 y 0 277 Point 4 600 X 0 272 0 0015 0 0030 y 0 277 Point 3 448 X 0 272 0 0020 0 0040 y 0 277 Point 2 296 X 0 272 0 0030 0 0060 y 0 277 Point 1 164 X 0 272 0 004 0 0080 y 0 277 Remarks Setting conditions for inspection AV MODE DYNAMIC ...

Страница 38: ...DE ROM Adjustment point Adjustment conditions Adjustment procedure 1 Factory setting Complete the setting by pulling out the AC cord Point the cursor to INDUSTRY INIT Cause set to ON using of the VOL key and press the ENT key The version confirmation screen appears on the green screen It is completed when SUCCESS is displayed at the top If error occurs ERROR is displayed on the red screen Turn off...

Страница 39: ...0FM02 Rch㧦 RSP ZA539WJQZ KEY UNIT DUNTKF800FM50 ޣ UB 1 6 WiFi Unit RUNTKA810WJQZ ޣ RA 1 5 R C OPC Unit DUNTKF494FM01 MAIN Unit DKEYMF733FM49 ޣ RC ޤ 1 1 1 5 ޣ SP ޤ TUNER HDMI HDMI 1 6 ޣ UB ޤ HDMI 1 24 ޣ PD ޤ ޣ LV ޤ 1 4 1 3 ޣ CI ޤ HDMI USB US B ETHER NET Lch 㧦 RSP ZA538WJQZ ޣ KY ޤ 1 4 ޣ LW ޤ 1 80 1 80 1 41 1 4 ޣ PL ޤ T CON Unit DUNTKF778FM12 ޣ PD ޤ POWER LED DRIVE Unit RUNTKA903WJQZ 1 3 ޣ AC ޤ 24 1 ...

Страница 40: ...LC 80LE632U 6 2 M E M O ...

Страница 41: ... set This document has been published to be used for after sales service only The contents are subject to change without notice LC 80LE632U PartsGuide 1 PRINTED WIRING BOARD ASSEMBLIES 2 LCD PANEL MODULE UNIT 3 CABINET PARTS 4 LCD PANEL MODULE UNIT 5 SUPPLIED ACCESSORIES PACKING PARTS 6 SERVICE JIGS USE FOR SERVICING CONTENTS LC 80LE632U MODEL LCD COLOR TELEVISION No S91T680LE632U ...

Страница 42: ...N DKEYMF733FM49 X MAIN Unit N DUNTKF494FM01 AG X R C OPC Unit N DUNTKF770FM02 AE X ICON Unit N DUNTKF800FM50 AF X KEY Unit N DUNTKF778FM12 N X LCD CONTROL Unit N RUNTKA810WJQZ AZ X WIFI Unit N RUNTKA903WJQZ N X POWER DRIVE Unit 2 LCD PANEL MODULE UNIT N R1LK800D3GW10Z N X 80 LCD Panel Module Unit LK800D3GW10Z ...

Страница 43: ...8 41 14 1 7 1 6 1 1 18 28 33 23 20 24 21 20 10 22 25 18 31 32 39 3 1 3 3 2 3 2 3 1 3 2 3 1 3 2 3 1 18 12 11 14 11 14 13 34 27 16 C D SP J L2 L1 F POWER DRIVE Unit PD G MAIN Unit PD SP CI UB PD LW J KM RA KM KEY Unit RA UB CI R C OPC Unit WiFi Unit ICON Unit E PL LW FF FF H LCD CONTROL Unit 80 LCD Panel Module Unit C D G H F E L2 L1 PL ...

Страница 44: ...JSA N X Model Label 8 JBTN A937WJ3A X Key Button 9 LANGKD290WJ3W X Stand Angle x2 10 LANGKD292WJ3W X Terminal Angle Bottom 11 LHLDWA124WJKZ AC X Wire Holder x4 12 LHLDWA138WJKZ AC X Wire Holder x3 13 LHLDWA151WJKZ AB X Wire Holder x2 14 LHLDWA175WJUZ AC X Wire Holder x3 16 LHLDWA176WJUZ AC X Wire Holder x2 18 LX BZA207WJF7 AA X Screw x20 19 LX EZA069WJF7 AB X Screw x2 20 PMLT A678WJQZ X Gasket x2 ...

Страница 45: ...2 32 32 32 32 32 32 32 32 32 32 32 32 32 32 32 32 32 32 32 32 32 32 32 32 32 32 32 32 32 33 33 33 33 33 33 33 33 33 33 33 33 33 33 33 33 33 33 33 33 33 33 33 33 33 33 33 33 33 33 33 33 33 33 33 33 32 33 Insert PUSH RIVET PUSH RIVET Insert SUPPORT PIN SUPPORT PIN 36 locations 105 locations Fasten LED PWBs with PUSH RIVETs x 45 Insert it well to the depths Not being float In the insertion place 45pl...

Страница 46: ...EZA028WJF9 X Screw x26 13 QCNWN2811TPZA X SG FFC 14 QCNWN2811TPZB X SG FFC 15 LX BZ2564TPZZ X Screw x32 16 KSETM1033TPZZ X Panel 19 CCHSM0360TP01 X BL Chassis Unit Ass y 20 POFMA1311TPZZ X Lens Sheet 21 PSLDK3625TPZZ X Microlens Sheet 22 PSLDK3626TPZZ X Diffusion Plate 23 PREFL3374TPZZ X Reflection Sheet Left 24 PREFL3375TPZZ X Reflection Sheet Right 25 QCNWN2810TPZZ X LED PWB Connection Harness 2...

Страница 47: ... X7 S12 S7 S8 S14 S14 S12 S11 S11 S9 S13 S12 S11 X4 Remote control unit x1 X9 AAA size battery x2 X1 X2 X3 Stand support Ass y x2 Stand Base Ass y x1 Stand Screw Ass y x1 X7 X8 X5 Enquete card X6 Guarantee card Operation manual x1 Connection guide x1 S6 S12 S12 S6 S6 S6 S5 S5 S5 X10 AC Cord X10 ...

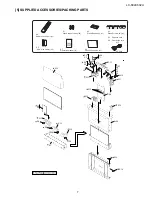
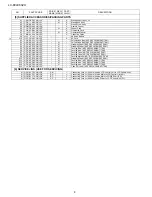
Страница 48: ...SPAKAA694WJZZ N Packing Add NOT REPLACEMENT ITEM S6 SPAKAA695WJZZ N Packing Add NOT REPLACEMENT ITEM S7 SPAKCG509WJZZ N Packing Case NOT REPLACEMENT ITEM S8 SPAKCG566WJZZ N Packing Case NOT REPLACEMENT ITEM S9 SPAKFC163WJZZ N Packing Material NOT REPLACEMENT ITEM S10 SPAKPB788WJZZ N Wrapping Paper NOT REPLACEMENT ITEM S11 SPAKXD498WJZZ N Packing Add NOT REPLACEMENT ITEM S12 SPAKXD499WJZZ N Packing...

Страница 49: ...LC 80LE632U ...
Страница 50: ... may be reproduced stored in a retrieval system or transmitted in any from or by any means electronic mechanical photocopying recording or otherwise without prior written permission of the publisher SHARP CORPORATION AV Systems Group CS Promotion Center Yaita Tochigi 329 2193 Japan Sep 2011 SH DS ...

Отзывы: