Press
MENU
and the MENU screen displays.
1
Press
c
/
d
to select “Picture”.
2
Press
a
/
b
to select “Advanced”, and then
press
ENTER
.
3
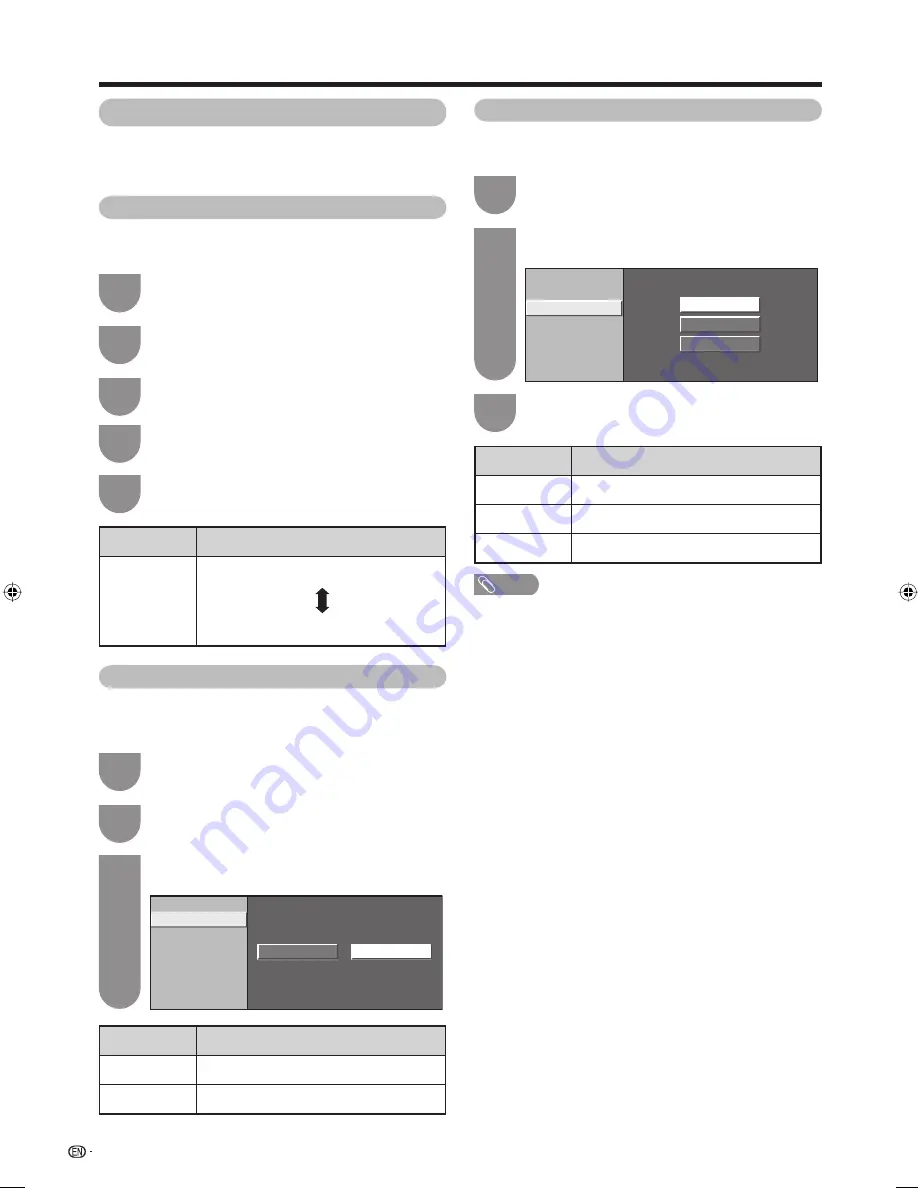
Colour temperature
Adjusts the colour temperature to give the best white
image.
Black
For easier viewing, change the viewing depth by
selecting a level for automatically adjusting the dark
portion of an image.
Repeat steps 1 to 3 in
Colour temperature
.
1
Press
a
/
b
to select “Black”, and then press
ENTER
.
2
Press
c
/
d
to select “On”, and then press
ENTER
.
3
Colour Temp.
Black
3D - Y/C
Monochrome
Film Mode
Range of OPC
On
Off
28
Advanced
Advanced setting enables you to set the picture
adjustment in more detail. There are six options you
can choose from.
Basic adjustment settings
Selected item
On
Off
Description
For high detail in black portions
No adjustment
Press
a
/
b
to select the desired level, and
then press
ENTER
.
5
Press
a
/
b
to select “Colour Temp.”, and then
press
ENTER
.
4
Selected item
High
Mid-High
Middle
Mid-Low
Low
Description
White with bluish tone
White with reddish tone
3D-Y/C
Provides high quality images with minimal dot crawl
and cross colour noise.
Press
a
/
b
to select “3D-Y/C”, and then press
ENTER
.
2
Repeat steps 1 to 3 in
Colour temperature
.
1
Press
a
/
b
to select the desired level, and
then press
ENTER
.
3
Colour Temp.
Black
3D – Y/C
Monochrome
Film Mode
Range of OPC
Standard
Fast
Slow
NOTE
• 3D-Y/C is not selectable depending on the input signal
type.
• 3D-Y/C may not operate depending on the input signal
type or noisy input signal.
Selected item
Standard
Fast
Slow
Description
Normal adjustment
For movie image
For still image
42G7H_en_d.indd 28
42G7H_en_d.indd 28
2006/12/08 13:11:50
2006/12/08 13:11:50


