background image

19

WIDE MODE

You can select the picture size. Selectable picture size
varies with the type of signal received.

Normal:

 For 4:3 “standard” pictures. A side bar appears

on each side.

Zoom 14:9:

 For 14:9 letterbox pictures. A thin side bar

appears on each side, and you may see bars on the
top and bottom with some programmes.

Panorama:

 In this mode the picture is progressively

stretched toward each side of the screen.

Full:

 For 16:9 squeeze pictures.

Cinema 16:9:

 For 16:9 letterbox pictures. Bars may

appear on the top and bottom with some programmes.

Cinema 14:9:

 For 14:9 letterbox pictures. Bars may

appear on the top and bottom with some programmes.

Full: 

Display with the Overscan image. Crop all sides of

screen.

Useful features

WIDE MODE

You can select the picture size.

1

Press 

f

.

• The WIDE MODE menu displays.

2

Press 

f

 or 

a

/

b

 to select a desired item on the

menu.

NOTE

• Can also be adjustable when the HDMI-PC input (See

page 1) is selected.

• Connect the PC before making adjustments. (See page

9.)

• Selectable picture (Normal or Full, Full or Dot by Dot, Full

only) size may vary with input signal type.

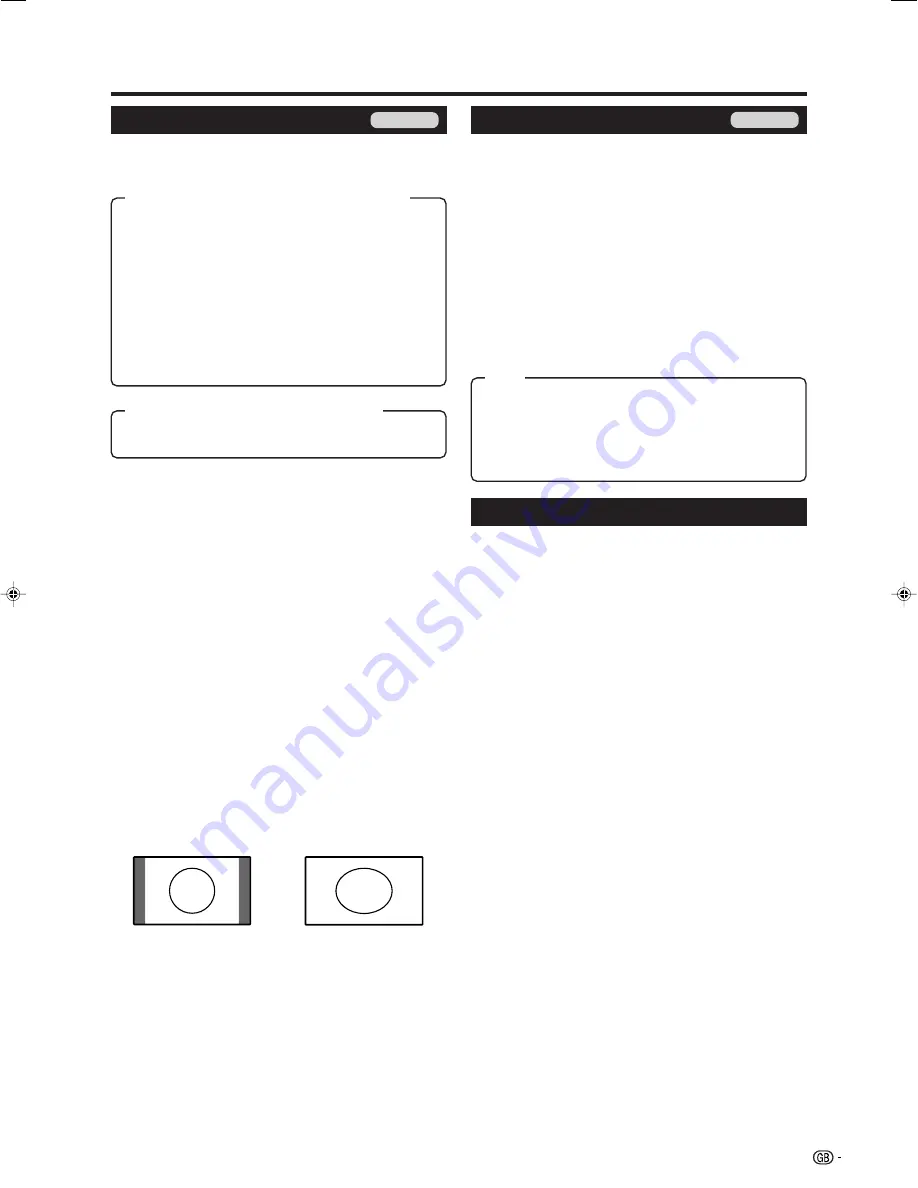
Normal:

 Keeps the original aspect ratio by filling the

screen up to the top and bottom.

Full:

 An image fully fills the screen.

Dot by Dot:

 Detects the resolution of the signal and

displays an image with the same number of pixels on
the screen.

TV/AV only

PC only

4:3 Mode set to “Normal”

NOTE

• If the signal contains no WSS information, Auto Selection

will not function even when the WSS option is enabled.

4:3 Mode set to “Panorama”

Manual Selection

1

Press 

f

.

• The WIDE MODE menu displays.
• The menu lists the wide mode options selectable

for the type of video signal currently received.

2

Press 

f

 or 

a

/

b

 while the WIDE MODE menu

displays on the screen.

• As you toggle down the options, each is immediately

reflected on the screen. No need to press 

OK

.

Auto Selection

If you set WSS and 4:3 Mode in the Setup menu on
page 17, the optimum WIDE MODE is automatically
chosen for every broadcast, VCR or DVD containing
the WSS information.

WSS menu

To enable Auto Selection, set WSS in the Setup menu
to “On”. (See page 17.)

4:3 Mode menu

To set the type of the wide screen, select “Normal” or
“Panorama” in the 4:3 Mode menu. (See page 17.)

Freezing the image while watching

Allows you to capture and freeze one frame from a
moving image that you are watching.

1

Press 

Z

.

• Captures one frame from a moving image.

2

Press 

Z

 again (or press 

RETURN

)

 to cancel the

function.

NOTE

• The still image automatically goes out after 30 minutes.

Item (for SD (Standard-Definition) signal)

Item (for HD (High-Definition) signal)

Item

LC-19A1E_GB_b

07.9.14, 0:57 PM

19

Содержание Aquos LC-19A1E

Страница 1: ...LEVISIE TELEVISIÓN EN COLOR LCD OPERATION MANUAL BEDIENUNGSANLEITUNG MODE D EMPLOI MANUALE DI ISTRUZIONI GEBRUIKSAANWIJZING MANUAL DE MANEJO LC19A1E OPERATION MANUAL BEDIENUNGSANLEITUNG MODE D EMPLOI MANUALE DI ISTRUZIONI GEBRUIKSAANWIJZING MANUAL DE MANEJO LC 19A1E D218WJZZ 1 ENGLISH FRANÇAIS DEUTSCH ITALIANO NEDERLANDS ESPAÑOL ...

Страница 2: ......

Страница 3: ...C Setup 17 Input signal 17 Auto Sync 17 Fine Sync 17 HDMI Audio Select 17 HDMI Auto View 17 WSS Wide Screen Signalling 17 4 3 Mode 17 Rotate 18 Language 18 Option menu 18 DNR Digital Noise Reduction 18 Input Select 18 Audio Only 18 Colour System 18 Useful features 19 WIDE MODE 19 Freezing the image while watching 19 AV Mode 20 Teletext function 20 Appendix 21 Troubleshooting 21 RS 232C port specif...

Страница 4: ... installation do not place the product in an enclosed place such as a bookcase or rack unless proper ventilation is provided or the manufacturer s instructions are followed The LCD panel used in this product is made of glass Therefore it can break when the product is dropped or impact applied If the LCD panel is broken be careful not to be injured by broken glass Heat sources Keep the product away...

Страница 5: ...ch the stand perform the above steps in reverse order Before performing work spread cushioning over the base area to lay theTV on making sure the area is completely flat This will prevent it from being damaged Setting the TV Standard DIN45325 plug IEC 169 2 75 ohm coaxial cable Ferrite Core The Ferrite Core should be permanently attached and never removed from the AC cord Alignment protrusions Sof...

Страница 6: ...nding to the e and f indications in the battery compartment 3 Insert the smaller tab of the battery cover into the opening 1 and press down on the cover until it clicks in place 2 Inserting the batteries Before using the TV for the first time insert two AA size batteries supplied When the batteries become depleted and the remote control unit fails to operate replace the batteries with new AA size ...

Страница 7: ... Yellow Blue See page 20 m Teletext See page 20 0 9 Set the channel in TV mode Set the page in Teletext mode A Flashback Press to return to the previous image in normal viewing mode f WIDE MODE Select the wide mode See page 19 B Standby On Enter standby mode or turn on the power See page 7 2 Sound mode Select the sound multiplex mode See below Z Freeze Freeze a motion picture on the screen See pag...

Страница 8: ...inal EXT 3 Component terminals EXT4 HDMI AUDIO terminals EXT 1 RGB terminal EXT5 terminals AC INPUT terminal Regarding the headphone jack Use headphones with a stereo mini plug Ø 3 5 mm Be sure to unplug headphones from the jack when they are not in use The speakers do not output volume when headphones are plugged in You can set the volume to different levels for each input source Volume display w...

Страница 9: ...wing order Programme auto search Auto labelling Auto sorting You do not need to do anything during the auto search NOTE The initial auto installation functions only once If the initial auto installation is not completed ex When menu screen disappeared by not operating for a few minutes when the power shut down etc try Auto Installation from the Setup menu See page 14 The initial auto installation ...

Страница 10: ...omponent cable EXT3 A game console camcorder and some other audiovisual equipment are conveniently connected using the EXT 2 terminals When using composite cable or S video cable EXT2 NOTE EXT 2 The S VIDEO terminal has priority over the VIDEO terminals Connecting a game console or camcorder Game console Camcorder or S video cable Composite video cable AUDIO cable Y P B P R L AUDIO R COMPONENT DVD...

Страница 11: ...terminals to connect a PC PC ø 3 5 mm stereo minijack cable RGB cable PC RGB DVI conversion cable ø 3 5 mm stereo minijack cable EXT 5 EXT 5 Connecting a decoder You can use the EXT 1 terminal when connecting a decoder and other audiovisual equipment NOTE In cases when the decoder needs to receive signal from the TV make sure to set Decoder to EXT1 in the Programme Setup Manual Adjust menu See pag...

Страница 12: ...emote control unit to operate the menu MENU Press to open or close the menu screen a b c d Press to select a desired item on the screen or adjust a selected item OK Press to go to the next step or complete the setting RETURN Press to return to the previous step END Press to exit the menu item E Using the control panel of the TV You can also operate the Menu using the control panel of the TV Button...

Страница 13: ...ing are three examples of basic menu operations Please operate the menu by using the following three patterns as a reference Menu Operation A Menu Operation C 1 Press MENU and the MENU screen displays 2 Press c d to select the desired menu 3 Press a b to select the desired menu item and then press OK Example Advanced etc 4 Press a b to select the desired menu item and then press OK Example Colour ...

Страница 14: ...or On Display Backlight cannot be adjusted during this time Advanced Menu Operation B or C page 11 This TV provides various advanced functions for optimising the picture quality MENU Picture Advanced DYNAMIC C M S Hue C M S Saturation C M S Value Colour Temp Film Mode 3D Y C Monochrome I P Setting R Y G C B M Reset 0 0 0 0 0 0 Item Picture adjustments Menu Operation B page 11 Adjustment items c bu...

Страница 15: ...A page 11 This feature can increase the spread of the sound Colour Temp Adjust the colour temperature to give the best white image High White with bluish tone Mid High Intermediate tone between High and Middle Middle Natural tone Mid Low Intermediate tone between Middle and Low Low White with reddish tone C M S Hue This is a standard to adjust the colour either more reddish or more bluish in tone ...

Страница 16: ... is no signal input for 15 minutes Five minutes before the TV enters standby mode the remaining time displays every minute NOTE When a TV programme finishes this function may not operate Disable is the factory preset value MENU Power Control Audio Power Control No Signal Off No Operation Off Power Management No Operation Off Menu Operation A page 11 When you select the desired time the TV will aut...

Страница 17: ... page 16 for setting PIN When Lock is set to On for a channel Child lock has been activated displays and the image and sound of the channel are blocked When pressing OK while Child lock has been activated displays PIN input menu will display Inputting the correct PIN lifts the child lock temporarily until the power is turned off Colour sys Select the optimum colour systems to receive AUTO PAL SECA...

Страница 18: ...esired channels are erased Sort Channel positions can be sorted freely 1 Repeat steps 1 to 4 in Programme Setup 2 Press a b to select Yes and then press OK 3 Press a b c d to select the channel you want to move and then press OK 4 Press a b c d to move it to the desired position and then press OK 5 Repeat steps 3 and 4 until all desired channels are sorted Resetting the PIN Allow you to reset your...

Страница 19: ...ded to optimise the image PC only PC only PC only WSS Wide Screen Signalling Menu Operation A Page 11 WSS allows a television to switch automatically among the different screen formats NOTE Use WIDE MODE if an image does not switch to the correct screen format When the broadcast signal contains no WSS information the function will not work even if enabled See page 19 WSS signal 4 3 screen 4 3 mode...

Страница 20: ...T cable the TV may output an RGB signal even though you have designated CVBS for the respective terminal This happens due to the setting of your external equipment The signal type for EXT2 is automatically selected between an S VIDEO signal and a CVBS signal with S VIDEO given priority TV AV only Option menu MENU Option Option Audio Only DNR Input Select Colour System Audio Only Menu Operation A p...

Страница 21: ... image fully fills the screen Dot by Dot Detects the resolution of the signal and displays an image with the same number of pixels on the screen TV AV only PC only 4 3 Mode set to Normal NOTE If the signal contains no WSS information Auto Selection will not function even when the WSS option is enabled 4 3 Mode set to Panorama Manual Selection 1 Press f The WIDE MODE menu displays The menu lists th...

Страница 22: ...TE You can adjust the factory preset parameters given in STANDARD MOVIE GAME PC and DYNAMIC The parameters chosen affect each of the input sources For the items marked with a Enhanced Picture Contrast will activate when OPC is Off For the item marked with Enhanced Picture Contrast always activate Enhanced Picture Contrast technology detects the source video characteristics and smoothly adjusts the...

Страница 23: ... correct See pages 12 and 13 Is the antenna connected properly See page 3 Is On selected in Audio Only See page 18 Is the volume too low See pages 5 and 6 Make sure that headphones are not connected See page 6 Check if you pressed e on the remote control unit See page 5 This is not a malfunction This happens when the cabinet slightly expands and contracts according to change in temperature This do...

Страница 24: ...cated in brackets under CONTROL CONTENTS When is input for some commands the present setting value responds Baud rate 9 600 bps Data length 8 bits Parity bit None Response code format Normal response O K Stop bit 1 bit Flow control None Problem response communication error or incorrect command E R R Commands Return code 0DH Return code 0DH P I I I D C C I I I A A A A A A A A V H H V V C P W W W W ...

Страница 25: ...ish Power Requirement AC 220 240 V 50 Hz Power Consumption Weight Appendix 18 5o LCD COLOUR TV Model LC 19A1E 18 5o Colour active matrix LCD panel incorporating amorphas silicon TFT 4 7 kg Display only 5 2 kg Display with stand 36 W 0 6 W Standby Method IEC60107 Headphones Ø 3 5 mm jack Audio output EXT 1 SCART AV input Y C input RGB input TV output EXT 4 HDMI VGA 480P 576P 720P 50Hz 720P 60Hz 108...

Страница 26: ...ich could otherwise arise due to inappropriate waste handling 2 In other Countries outside the EU If you wish to discard this product please contact your local authorities and ask for the correct method of disposal For Switzerland Used electrical or electronic equipment can be returned free of charge to the dealer even if you don t purchase a new product Further collection facilities are listed on...

Страница 27: ...75 0 75 0 49 0 49 0 68 2 68 2 196 0 196 0 2 5 2 5 10 0 10 0 462 0 462 0 411 8 411 8 360 0 360 0 320 0 320 0 218 0 218 0 40 0 40 0 240 0 240 0 100 0 100 0 100 0 100 0 17 5 17 5 232 4 232 4 LC 19A1E mm ...

Страница 28: ...JZZ OPERATION MANUAL BEDIENUNGSANLEITUNG MODE D EMPLOI MANUALE DI ISTRUZIONI GEBRUIKSAANWIJZING MANUAL DE MANEJO D218WJZZ 1 07P09 SP NG PIN Printed on environmentally friendly paper Auf ökologischem Papier gedruckt Imprimé sur papier écologique Stampato su carta ecologica Afgedrukt op ecologisch papier Impreso en papel ecológico ...

Отзывы: