background image

26

How to Use the 

Online Manual

Printer Properties

Print

Print Status 

Window

Maintenance

Troubleshooting

Sharing Printer

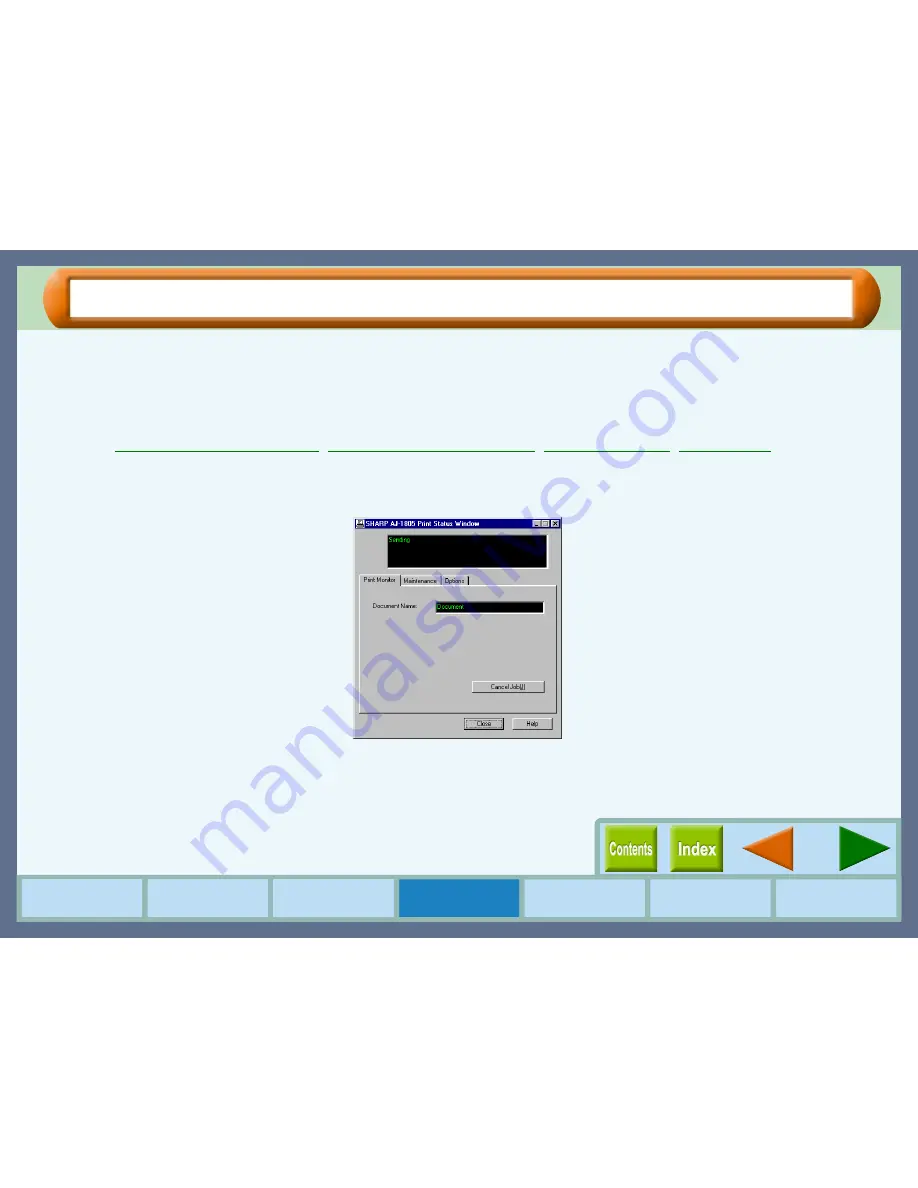
Print Status Window

Outline of the Print Status Window

What is the Print Status Window?

The print status window is a program designed to show the remaining ink levels and current printer status including the 
document name printing and error messages. It also controls head cleaning and head position adjustment.
The print status window contains status window and three tabs. The status window displays Normal, Warning and Fault 
type messages.

Reference:

Print Status Window Functions

Understanding Error Messages

"Maintenance" Tab

"Options" Tab

Starting the Print Status Window

The default setting of the print status window is to open automatically when printing starts. 

To open the print status window while the printer is not working, select "Advanced" tab from the printer driver properties 
dialog box, and then click the "Maintenance" button.

Содержание AJ-1805

Страница 1: ......

Страница 2: ... the Print Status Window Print Status Window Functions 27 Understanding Error Messages 28 Understanding the Status and Program Icon Maintenance Tab 29 Options Tab 30 Sharing the Printer using Windows Networking 31 Shared Printer Settings 32 Client Settings 33 Time to Change the Ink Tank 34 Changing the Ink Tank 35 Test Print Head 38 Cleaning the Print Head 39 Changing the Print Head 40 Aligning th...

Страница 3: ...sted items to display the header of that section Click this button to display the Table of Contents of the Online Manual From the Table of Contents you can jump to various pages Click this button to display the Index of the Online Manual From the Index you can jump to various pages Takes you back page by page To return to the previous link click the button on the menu bar of the Acrobat Reader Tak...

Страница 4: ...so that the printer can quickly and efficiently print out the data The five tabs of this printer driver are shown below By clicking the tabs displayed above you will jump to a detailed description The items shown below can be setup on each tab Tab Name Setup Items Main Orientation Copies Order N Up Printing Current Settings Paper Paper Selection Custom Paper Paper Size Fit To Paper Size Zoom Advan...

Страница 5: ...sing the Start Button 1 1 1 1 Click the Start button 2 2 2 2 Select Settings and click Printers 3 3 3 3 Click the SHARP AJ 1805 or SHARP AJ 2005 printer driver icon in the Printers window and from the File menu select Properties 4 4 4 4 Click the Setup tab The properties dialog box will appear The printer driver setup screen will appear when Printing Preferences of Windows 2000 or Document Default...

Страница 6: ... and then click WordPad Reference Starting the Printer Driver using the Start Button 1 1 1 1 Go to File menu in WordPad and select Print 2 2 2 2 Select SHARP AJ 1805 or SHARP AJ 2005 from the Printer Name drop down list 3 3 3 3 Click the Properties button to open the properties dialog box On Windows 2000 select SHARP AJ 1805 or SHARP AJ 2005 printer driver icon from Select Printer area You can set...

Страница 7: ...settings and exit the dialog box Cancel button Click this button to exit the dialog box without making any changes to the settings Apply button Click to save your settings without closing the dialog box Check box Click this option to activate deactivate each function Quit button Click this button to quit the properties dialog box Defaults button Returns settings to default mode of the tab Refer to...

Страница 8: ...er Size you cannot specify any value for Copies setting Allows you to set N Up Printing option Set the number of copies between 1 50 On the above screen click on options shown in the green boxes to make additional changes Select the orientation for your documents Displays important print settings Use the scroll bar to check these settings When multiple copies are printed this setting allows you to...

Страница 9: ...ments horizontally Order Allows you to change the print out order of your documents Collate When multiple copies are printed this setting places each copy in numerical order Reverse Order Check this box to print documents in reverse order For more detailed information refer to the table below Example When printing out two copies of a three page document If Com10 DL C6 or Invitation A2 is selected ...

Страница 10: ...r 4 Up for N Up Printing Select the document size specified through your application from Letter Legal Executive A4 A5 A6 B5 Index card 3 x 5 Index card 4 x 6 or Index card 5 x 8 The illustrations above assume that the Original Size is set to the same size as the document size of your application Orientation Portrait Landscape N Up Printing 4 Up 2 Up If Original Size is not set to the same size as...

Страница 11: ... Select the paper size for your document Select the paper source Allows you to customize the size of the paper Enlarges reduces the image to fit to the size of paper in the printer Allows you to reduce or enlarge the size of the print Returns all user modified settings back to default settings of this tab Paper Selection Tray Paper Size A4 or Letter Fit To Page Off Zoom 100 On the above screen cli...

Страница 12: ... the paper causing the machine to become internally dirty Ledger A3 or B4 sized paper can not be loaded in this printer The print image should be reduced by the Fit To Paper Size or Zoom setting N Up Printing Fit To Page and Zoom settings are not available when you select COM10 DL C6 Invitation A2 Japanese Hagaki Banner Letter or Banner A4 sized paper Size 8 5 x 11 8 5 x 14 7 25 x 10 5 210mm x 297...

Страница 13: ... the paper size specified for Paper Size setting to the size listed on the drop down options of Fit To Paper Size Example Print A4 on A6 Zoom Allows you to reduce or enlarge the size of the print from 25 to 200 in 1 increments 100 button Click to return to 100 default setting To utilise this option the Paper Size option must be set to Custom Paper sizes larger than 215 9mm x 355 6mm 8 5 x 14 canno...

Страница 14: ...ecify margins from your application to fit within the quality guaranteed area Quality guaranteed area Guaranteed area is inside 19mm from the top bottom edge of the paper and 10mm from the right left edge of the paper Printable area The void area of the printer driver is 3mm from the paper edges The print quality may be degraded outside the guaranteed area according to the contents of your documen...

Страница 15: ...using this screen Set printer output preferences to colour or greyscale Click to access maintenance options Returns all user modified settings back to default settings of this tab Output Type Colour Print Quality Normal Media Type Plain Customize printer output quality to suit your needs Open to set output quality and adjust colours On the above screen click on options shown in the green boxes to ...

Страница 16: ...lect this option when you want to print a document containing graphics or illustrations with high speed This option provides a lower print quality than Normal or Best This option offers you normal print quality with normal print speed Select this option when you want to get high print quality for photographs or images The print quality also depends on the specified loaded paper type Media Type Des...

Страница 17: ...0 Contrast 50 Saturation 50 Red Strength 50 Green Strength 50 Blue Strength 50 By selecting ICM both the Image and Colour Balance options become disabled The ICM setting is unavailable with Windows 95 or NT 4 0 To print a document containing text data make sure to keep the values of Red Strength Green Strength and Blue Strength above 50 When set under 50 background of characters in your document m...

Страница 18: ...e the scroll bar or enter a figure to set the font size of a watermark from 6 to 500 points Use the scroll bar to set the print angle of a watermark from 90 to 90 The angle can be set in 15 multiples Returns all user modified settings back to default settings of this tab Watermark None On First Page Only Off Move the location of the watermark using the scroll bar Click this button to centre a wate...

Страница 19: ... add new changes Delete button To remove your original watermark from the drop down list select it and click this button Edit Colour button For setting the colour of a watermark click this button to display the Color dialog box For more information on this dialog box click the button and then point and click on the item that you want information on Edit Fonts button To adjust the font style of a w...

Страница 20: ... Print Print Status Window Maintenance Troubleshooting Sharing Printer Version Tab Settings Information about the printer driver version is shown on this screen About button Click this button to display the About dialog box for information on the driver name and version ...

Страница 21: ...nting Exit printing Load paper Reference For loading paper refer to the LOADING PAPER in the Setup Guide and Operation Manual Open the printer driver setup screen and set the print preferences Reference Basic Printing Printing a Watermark Enlarge Reduce the Printed Image Printing Multiple Pages on One Page Printing a Photograph Ensure printing has been completed before turning the power off Do not...

Страница 22: ...tion s File menu Make sure that either of SHARP AJ 1805 or SHARP AJ 2005 is selected as the current printer and then click the Properties button The properties dialog box will open Reference See the Starting the Printer Driver through an Application for details on how to open the properties dialog box 3 3 3 3 Click the Paper tab and select A4 from the Paper Size drop down list Reference Paper Tab ...

Страница 23: ...rint a single copy of a document in portrait orientation confirm the Portrait option in the Orientation and 1 in the Copies box Reference See the Main Tab Settings for information on setting preferences 5 5 5 5 Click the OK button in the Print dialog box Printing starts according to your preferences On Windows 2000 setup the preferences on the Main tab and then click the Print button Printing star...

Страница 24: ...termark tab Reference See the Starting the Printer Driver through an Application for details on how to open the printer driver How to Print a Watermark From the Watermark drop down list select the watermark for example CONFIDENTIAL you wish to print on your document and click the OK button Reference See the Watermark Tab Settings for details on how to create your own watermarks On Windows 2000 cli...

Страница 25: ... option Automatic Zooming to the Loaded Paper This printer driver can adjust the zoom ratio for printing according to the paper loaded in the printer To use this function select the Paper tab from the properties dialog box of the printer driver check the Fit To Page selection box and then select the document Paper Size from the drop down list Set the currently loaded paper size as indicated under ...

Страница 26: ...n tab and then select the same paper size from the drop down list of Original Size setting that has been selected for the document size specified through your application Reference See the Main Tab Settings for details on the N Up Printing option 2 Up Printing 2 Up printing places two pages of the document stack onto a single printed page 4 Up Printing 4 Up printing places four pages of the docume...

Страница 27: ... Output Type option is set to Colour 2 2 2 2 In the Quality area set the Print Quality option to Best 3 3 3 3 In the Quality area set the Media Type option to Photo The result of setting the preferences as shown from Step 1 to Step 3 are displayed below When loading photo paper into the paper tray insert the glossy side face down When loading photo paper into the bypass tray insert the glossy side...

Страница 28: ...lso controls head cleaning and head position adjustment The print status window contains status window and three tabs The status window displays Normal Warning and Fault type messages Reference Print Status Window Functions Understanding Error Messages Maintenance Tab Options Tab Starting the Print Status Window The default setting of the print status window is to open automatically when printing ...

Страница 29: ...ask bar Quit button Click this button to quit the print status window Status window Provides details on the current status of the print job Document Name Displays the name of the active print job Help button Click this button to display help file for the print status window Status icon This icon informs you of the print status Reference Understanding Error Messages Tab Index which allows you to sw...

Страница 30: ...on on printer status Understanding the Status and Program Icon Refer to the table below for an explanation of the printer condition Program icon Status icon Condition None Normal Fault Printing has stopped because of a problem Follow the instruction on the status window to solve the problem immediately Warning A problem requires your attention Follow the instruction on the status window to solve t...

Страница 31: ...he Start button to initiate cleaning of the print head After the dialog box for selecting which print head to clean appears click the OK button Reference Cleaning the Print Head Test print head Click the Start button to print a test page which lets you check the print quality After the confirmation dialog box appears click the OK button Reference Test Print Head Print alignment patterns Click the ...

Страница 32: ...en printing The print status window will be displayed automatically at the start of the print job It will close automatically when the print job is finished Always display Print Status Window The print status window will be displayed all the time It will stay open even after the print job is finished Print Status Window Off The print status window will not be displayed even while printing if this ...

Страница 33: ...plain how to connect the printer using a Peer To Peer connection Our explanation shown below is based on the following assumptions there is an established network in place This works with Windows 95 98 Me NT 4 0 and 2000 With Peer To Peer connections the print server is a client to which a printer is directly connected and a Client is any computer which is connected to the same network Shared prin...

Страница 34: ... Right click the SHARP AJ 1805 or SHARP AJ 2005 printer driver icon and select Sharing from the pop up menu 8 8 8 8 Enable the check button for sharing input your preferences and click OK button You have completed the setup procedures for the shared printer Reference Client Settings If your operating system is Windows 95 98 Me start from step 1 to setup the network If your operating system is Wind...

Страница 35: ...select Properties from the pop up menu 3 3 3 3 Click the Details tab and click the Add Port button 4 4 4 4 Type the port name as shown below or click Browse button and double click Server s computer name and then click Sharp 5 5 5 5 Input your options and click the OK button This page provides steps for Windows 95 98 Me users only If your operating system is Windows 2000 or Windows NT 4 0 refer to...

Страница 36: ... and then immediately replace them with new ones If the error message indicates the colour of the empty ink tank see sample message below replace the ink tank indicated in the message Out of ink xxxx One of the ink colours including cyan yellow magenta and black is displayed as xxxx in this message The Ink low error message is displayed on the print status window When an ink tank is near empty the...

Страница 37: ...remove the ink tank During ink tank replacement if the front cover is left open for more than 8 minutes the carriage will automatically return to its home position Do not put your hands into the printer until the carriage stops at the centre position Doing so may hurt your hands Do not try to move the carriage manually by force you may damage the printer If the carriage does not move to the centre...

Страница 38: ... uncovered opening on the ink tank as ink will get on your hands Ensure that there are no pieces of tape remaining on the ink tank Example Removing the tape of the yellow ink tank Do not touch this area The printer may not print if it is dirty Please make sure that the numbers on the ink tanks match up to the numbers on the print heads If they are mis matched then print problems will be experience...

Страница 39: ...over and confirm that all the ink tanks are properly inserted 8 8 8 8 Print a test page to check if the unit prints properly Click the Start button of Test print head found in the Maintenance dialog box of the print status window to print out a test page If print quality is poor return to step 5 and follow the procedures once more During ink tank replacement if the front cover is left open for mor...

Страница 40: ...t print head 4 4 4 4 Click the OK button A test page will be printed 5 5 5 5 Check the result of the test page If the print quality is poor go to the next step 6 6 6 6 Click the Start button of Auto head cleaning to clean the print heads If you cannot get a good result printing a test page even after cleaning the print head five times change the print head Reference Cleaning the Print Head 7 7 7 7...

Страница 41: ...head cleaning 3 3 3 3 Click the OK button to clean both the black print head and the colour print head Cleaning the print head will begin 4 4 4 4 Click the Start button of Test print head and then click OK button on the confirmation dialog box to print a test page 5 5 5 5 Check if the test page was printed cleanly If print quality is poor return to step 2 and follow the procedures again Reference ...

Страница 42: ...he print head 1 1 1 1 Open the front cover The carriage will automatically move to the centre position 2 2 2 2 Raise the print head latch Raise the latch until it comes to a complete halt Do not put your hands into the printer until the carriage stops at the centre position Doing so may hurt your hands Do not try to move the carriage manually by force you may damage the printer If the carriage doe...

Страница 43: ...ink tank s still inserted Lift it straight up to remove 4 4 4 4 Remove the new print head from its protective case 5 5 5 5 Insert the new print head 6 6 6 6 Lower the print head latch Lower the latch until it is properly fixed into position Do not touch the metal portion of the print head Doing so may lead to improper printing Be careful not to damage the print head If any part is damaged the prin...

Страница 44: ...will return to its home position and the ink will be fed to the print head 9 9 9 9 To maintain print quality after changing the print head always align the print head Click the Start button of Print alignment patterns located in the Maintenance dialog box of the print status window to align the print head Reference Aligning the Print Head 10 10 10 10 Print a test page by clicking the Start button ...

Страница 45: ... Click the Advanced tab in the properties dialog box and then click Maintenance button 3 3 3 3 Click the Start button of Print alignment patterns 4 4 4 4 Click the OK button The Align print head dialog box will appear and a test chart will be printed 5 5 5 5 Check the test chart results and change the preferences to the best setting for each pattern 1 1 1 1 Select a pattern sample for Pattern A Lo...

Страница 46: ...d Pattern D respectively Look at the chart C and D on your test chart Select the numbers under the pattern samples which have the straightest lines 6 6 6 6 Click the OK button in the Align print head dialog box The print head will align itself 8 7 6 5 4 3 2 1 0 1 2 3 4 5 6 7 8 Example 6 8 B 6 5 4 3 2 1 0 1 2 3 4 5 6 6 Example 1 Straight line Cracked line C or D If you cannot find any satisfactory ...

Страница 47: ... the front cover 4 4 4 4 Check the inside of the printer If you find stains of splashed ink paper dust or dirt wipe them out with a soft cloth If the dirt is sticky and hard to remove wipe the dirt away with a firmly squeezed wet cloth after soaking it in water When wiping the surface of the printer keep the front cover closed Do not use cleaning agents containing ammonia benzene or thinner Cleani...

Страница 48: ...your problem after checking everything on the list please contact your authorised SHARP service centre Paper is not Fed into the Printer Failed to Install the Printer Driver USB Interface Characters or Graphics are not Printed in Correct Position Paper Jam Printer Inoperative Nothing Prints Uninstalling the Printer Driver Faint Uneven or Smeared Print Output Unit does not Print in Colour Printing ...

Страница 49: ... Device Manager tab The last item listed in the Device Manager should be Universal serial bus controller 3 3 3 3 Click the icon beside the Universal serial bus controller Two items will display your Controller chipset type and Root Hub If these items appear you can use USB port If the Universal serial bus controller shows a yellow exclamation point or does not appear you must check your computer m...

Страница 50: ...Fan the paper before loading into the printer CHECK3 Is the paper guide correctly adjusted to fit the paper If the width of the guide is set too narrow a paper supply problem will occur If the width of the guide is set too wide printout will be skewed Ensure that the guide is adjusted correctly to the paper CHECK4 Is the bypass tray and the paper knob set to the appropriate position for thick pape...

Страница 51: ...lems The use of new paper is recommended CHECK9 Did you fan the paper before placing into the paper tray Fan the paper and tap the edge against a flat surface to even the stack before loading into the printer CHECK10 Is the setting for printing cards or envelops correct When printing onto a card or envelope insert it in portrait direction and make sure the correct side will be printed When printin...

Страница 52: ... remove the jammed paper from the jam cover refer to the next step 2 2 2 2 Take off the output tray to remove the jammed paper 3 3 3 3 Close the jam cover insert the output tray and press the paper button Make sure the paper lamp is not blinking When paper is jammed the paper lamp will blink fast After removing the jammed paper be sure to align the paper guide to the paper in the paper tray If the...

Страница 53: ...orrectly After firmly plugging in the printer verify whether or not the power lamp has come on Reference For details on connecting the printer to an electrical outlet see CONNECTING THE POWER CORD in the Setup Guide and Operation Manual CHECK2 Is the printer plugged into a working electrical outlet Connect some other appliance to the electrical outlet to verify whether the power source is supplyin...

Страница 54: ...he connector pins are not bent Reference See CONNECTING THE INTERFACE CABLE in the Setup Guide and Operation Manual for more details on interface connection CHECK3 Are any other USB peripherals being connected along with the printer If other USB peripherals are connected through the same hub disconnect them to see if the problem still exists Check your printer CHECK4 Is the front cover properly cl...

Страница 55: ...dialog box CHECK10 Has the printer driver been installed properly Check if the printer driver has been installed following the steps listed below 1 1 1 1 Click the Start button select Settings and then click Printers 2 2 2 2 Check if the SHARP AJ 1805 or SHARP AJ 2005 printer driver icon is shown in the Printers window If you still cannot print after confirming the SHARP AJ 1805 or SHARP AJ 2005 p...

Страница 56: ...install the printer driver again Reference See INSTALLING THE PRINTER DRIVER in the Setup Guide and Operation Manual 1 1 1 1 Click the Start button select Settings and then click Printers 2 2 2 2 Right click the SHARP AJ 1805 or SHARP AJ 2005 printer driver icon and select Delete from the pop up menu 3 3 3 3 Click the Yes button in the confirmation dialog box You have successfully completed uninst...

Страница 57: ...operties dialog box set to Draft If the Print Quality setting in the Advanced tab is set to Draft you can print at higher speed but print quality may suffer as a result Specify another setting and then print again CHECK3 Did you get a clear result for your test page Print a test page to check the print quality To print a test page click the Start button of Test print head on the Maintenance tab of...

Страница 58: ...ientation option is set to your requirements CHECK3 Did you correctly select the desired value for N Up Printing Confirm the selected value for Original Size when 2 Up or 4 Up has been selected for N Up Printing If you have selected a smaller paper size than the document size of your application the image outside the printable area is not printed CHECK4 Is the paper loaded correctly If a document ...

Страница 59: ...uality setting in the printer driver Click the Advanced tab located in the properties dialog box and check if the Print Quality option is set to Sharp Special Normal or Best If you change the setting from Draft to any other option and printed lines are still poor go to step 2 Reference Advanced Tab Settings 2 2 2 2 Align the print head Click the Maintenance tab of the print status window and then ...

Страница 60: ...eck list below CHECK1 Is the printer driver set to the colour print option Click the Advanced tab in the properties dialog box and change the Output Type setting to Colour Reference Advanced Tab Settings CHECK2 Does the application you are using support colour printing Some applications may not support colour printing Use an application that supports colour printing For more information see your a...

Страница 61: ...ther applications to increase the amount of memory available for printing If printing is still excessively slow you may have to add more memory into your computer CHECK2 Is your hard disk fragmented When data is frequently stored deleted the hard disk may become fragmented causing a reduction in printing speed In this case it is recommended to defragment your hard disk You may use the Windows tool...

Страница 62: ...inter Clean 45 L Landscape 7 Length 11 M Main Tab Settings 6 Maintenance 34 Maintenance Tab 29 Media Type 14 millimetres 11 N N Up Printing 8 O Options Tab 30 Order 7 Orientation 7 Output Quality Settings 15 P Paper Jam 50 Paper Selection 10 Paper Size 10 Paper Tab Settings 9 Paper tray 10 Portrait 7 Print 19 Print alignment patterns 29 Print head Alignment 43 Changing 40 Cleaning 39 Print Quality...

Отзывы: