13
34N-WF5H
3) Address settings (selecting adjustment and setting items)
1
Using the numeric buttons (0 thru 9), type in an address from the highest digit (left) to the lowest digit
(right) one by one. Each time a digit is buttoned in, the cursor moves to the next entry position.
2
Using the INPUT button, enter the address. The cursor moves to the data display position and the se-
lected address status is displayed there.
3
To adjust the white balance cut-off level, it is necessary to keep the screen cut off. It is therefore impossi-
ble to keep adjusting it with the address being displayed on-screen. (For details, refer to the White Bal-
ance Adjustment.)
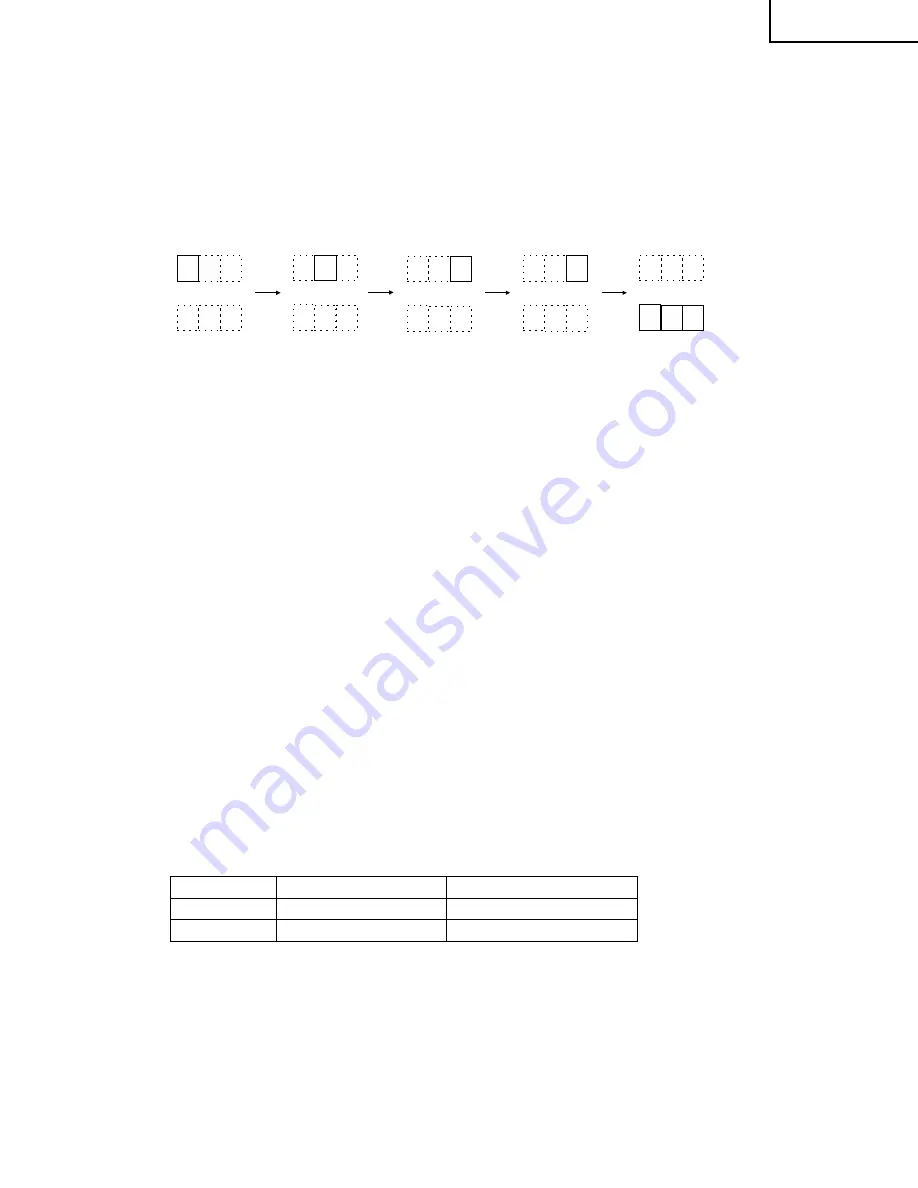
• Display change example
In selecting the address "100" (vertical linearity):
0 0 0
0 0
0 0
0 0
0
0 0
0
0
0
1
1
1
1
1 9
(Address)
(Data display)
Initial display
Button in for "1"
Button in for "0"
Button in for "0" Button in for "INPUT"
`
If the wrong address has been buttoned in, use the “100” key to clear the address display and get it
back to the initial one.
4) Data settings (adjusting and setting items)
1
Use the VOLUME UP/DOWN buttons to modify the data.
2
Use the INPUT button to enter the modified data (setting).
• For a function execute command address (factory-setting function and etc.), the INPUT button is used
to select and call the function. With the adjustment function selected, the button is employed to enter
the data of an item.
`
When the data has been modified in the adjustment function, the new data will be immediately
entered regardless of the INPUT button. Keep in mind, therefore, that the original data cannot be
held.
• Data range
Mode Setting Function: 0 or 1
Adjustment Function:
As per each adjustment item (separately discussed)
»
Initial factory settings
When the following services have been made, it is necessary to make the initial factory settings.
1) When the IC3102 (Memory IC) has been replaced:
This IC stores the video- and deflection-related data in memory. A replacement IC3102 does not have any
data written in (Adjustment 0). It is therefore required to make the initial settings 1 and 2 on it. Take the
following procedure.
1
Initial Factory Settings 1 (Initializing the IC)
2
Initial Factory Settings 2 (Making the software menu setting data to the factory-adjustment level)
3
Various Adjustments
2) When the channel selection IC3501 (Micro-processor) has been replaced:
1
Initial Factory Settings 2
When the micro-processor alone has been replaced, just make this adjustment, not any other ones.
ADDRESS
SETTING ITEM
DATA VARIABLE RANGE
001
Initial factory settings 1
0/1: Use "1"
002
Initial factory settings 2
0/1: Use "1"
Содержание 34N-WF5H
Страница 6: ...6 34N WF5H DIMENSIONS Units mm inches Top View Front View Side View ...
Страница 26: ...27 34N WF5H 26 12 11 10 9 8 7 6 5 4 3 2 1 A B C D E F G H CHASSIS LAYOUT ...
Страница 27: ...29 34N WF5H 28 12 11 10 9 8 7 6 5 4 3 2 1 A B C D E F G H BLOCK DIAGRAM 1 2 ...
Страница 28: ...31 34N WF5H 30 12 11 10 9 8 7 6 5 4 3 2 1 A B C D E F G H BLOCK DIAGRAM 2 2 ...
Страница 30: ...33 34N WF5H 17 16 19 18 15 14 13 12 11 10 6 5 4 3 2 1 A B C D E F G H SCHEMATIC DIAGRAM CRT Unit ...
Страница 31: ...35 34N WF5H 34 12 11 10 9 8 7 6 5 4 3 2 1 A B C D E F G H SCHEMATIC DIAGRAM SIGNAL Unit 1 5 ...
Страница 32: ...37 34N WF5H 36 12 11 10 9 8 7 6 5 4 3 2 1 A B C D E F G H SCHEMATIC DIAGRAM SIGNAL Unit 2 5 ...
Страница 33: ...39 34N WF5H 38 12 11 10 9 8 7 6 5 4 3 2 1 A B C D E F G H SCHEMATIC DIAGRAM SIGNAL Unit 3 5 ...
Страница 34: ...41 34N WF5H 40 12 11 10 9 8 7 6 5 4 3 2 1 A B C D E F G H SCHEMATIC DIAGRAM SIGNAL Unit 4 5 ...
Страница 35: ...43 34N WF5H 42 12 11 10 9 8 7 6 5 4 3 2 1 A B C D E F G H SCHEMATIC DIAGRAM SIGNAL Unit 5 5 ...
Страница 36: ...45 34N WF5H 44 12 11 10 9 8 7 6 5 4 3 2 1 A B C D E F G H SCHEMATIC DIAGRAM POWER Unit ...
Страница 37: ...47 34N WF5H 46 12 11 10 9 8 7 6 5 4 3 2 1 A B C D E F G H SCHEMATIC DIAGRAM TUNER Unit 1 2 ...
Страница 38: ...49 34N WF5H 48 12 11 10 9 8 7 6 5 4 3 2 1 A B C D E F G H SCHEMATIC DIAGRAM TUNER Unit 2 2 ...
Страница 39: ...51 34N WF5H 50 12 11 10 9 8 7 6 5 4 3 2 1 A B C D E F G H SCHEMATIC DIAGRAM YUV SW Unit ...
Страница 40: ...53 34N WF5H 52 12 11 10 9 8 7 6 5 4 3 2 1 A B C D E F G H SCHEMATIC DIAGRAM MICOM Unit ...
Страница 41: ...55 34N WF5H 54 12 11 10 9 8 7 6 5 4 3 2 1 A B C D E F G H SCHEMATIC DIAGRAM ZOOM Unit 1 3 ...
Страница 42: ...57 34N WF5H 56 12 11 10 9 8 7 6 5 4 3 2 1 A B C D E F G H SCHEMATIC DIAGRAM ZOOM Unit 2 3 ...
Страница 43: ...59 34N WF5H 58 12 11 10 9 8 7 6 5 4 3 2 1 A B C D E F G H SCHEMATIC DIAGRAM ZOOM Unit 3 3 ...
Страница 44: ...61 34N WF5H 60 12 11 10 9 8 7 6 5 4 3 2 1 A B C D E F G H SCHEMATIC DIAGRAM Y D 3D Unit ...
Страница 45: ...62 34N WF5H 6 5 4 3 2 1 A B C D E F G H SCHEMATIC DIAGRAM AC FILTER Unit AC FILTER ...
Страница 46: ...63 34N WF5H 6 5 4 3 2 1 A B C D E F G H SCHEMATIC DIAGRAM CONTROL Unit DUNTKA098DE01 ...
Страница 47: ...64 34N WF5H 6 5 4 3 2 1 A B C D E F G H SCHEMATIC DIAGRAM TERMINAL Unit ...
Страница 49: ...66 34N WF5H 6 5 4 3 2 1 A B C D E F G H PWB A SIGNAL Unit A Side ...
Страница 50: ...67 34N WF5H 6 5 4 3 2 1 A B C D E F G H PWB A SIGNAL Unit B Side ...
Страница 51: ...68 34N WF5H 6 5 4 3 2 1 A B C D E F G H PWB K ZOOM Unit A Side PWB K ZOOM Unit B Side ...
Страница 52: ...69 34N WF5H 6 5 4 3 2 1 A B C D E F G H PWB C POWER Unit Wiring Side ...
Страница 53: ...70 34N WF5H 6 5 4 3 2 1 A B C D E F G H PWB E TUNER Unit A Side PWB J MICOM Unit A Side ...
Страница 54: ...71 34N WF5H 6 5 4 3 2 1 A B C D E F G H PWB E TUNER Unit B Side PWB J MICOM Unit B Side ...
Страница 55: ...72 34N WF5H 6 5 4 3 2 1 A B C D E F G H PWB L Y C 3D Unit A Side PWB L Y C 3D Unit B Side ...
Страница 56: ...73 34N WF5H 6 5 4 3 2 1 A B C D E F G H PWB D AC FILTER Unit Wiring Side ...
Страница 57: ...74 34N WF5H 6 5 4 3 2 1 A B C D E F G H PWB H YUV SW Unit A Side PWB H YUV SW Unit B Side ...
Страница 58: ...75 34N WF5H 6 5 4 3 2 1 A B C D E F G H PWB F CONTROL Unit Wiring Side ...


