background image

- 16 -

Other  Features

Sound Mute

To cut off the sound from the TV press “ ” button. To restore

the sound press the “ ” button again or use the “

 +

” or “

-


” buttons, in this case the volume will start from minimum

setting.

Stereo / Bilingual

• If the TV channel you are watching broadcasts in two lan-

guages (e.g. Eurosport), you can select the dubbed or the
original language, pressing the “

I-II

” button.

•  When  the  stereo  broadcast  is  received  poorly,  you  can

change  from  stereo  to  mono  sound  so  that  you  can  hear
the broadcast more clearly and easily.

Information on Screen

First  pressing  the  “

”  button  displays  the  current  status

“

Programme  number

”,“

Station  name

”  and  “

Sound

mode

”.

To Display the Time

• While watching a TV programme with Teletext transmission

press “

“ button. The current time information, captured

from Teletext will be displayed at the upper right corner of
the screen.

•  If  the  programme  being  watched  does  not  have  Teletext

transmission, no time information will be displayed.

• The time information will disappear after pressing “

“ but-

ton again.

Flash back (

 )

This button is used to return to the previous viewed preset.

By pressing the "

" button repeatedly it is possible to tog-

gle between two presets.

Double-digit (- / - -)

This  OSD  is  displayed  when  the  "

-  /  -  -

"  button  pressed  in

place of the programme number indicator.

After then, in order to enter a programme it must be pressed
to two digit consecutively. When it is late to press any digit
button  this  function  will  be  ignored  and  the  display  will  be
erased. In the same way it must not be late to press any dig-
it  button  after  entering  the  first  digit.  The  limit  of  the  delay
time is 3 seconds.

Teletext

Teletext is an information system that displays text on your
TV  screen.  Using  the  Teletext  information  system  you  can
view a page of information on a subject that is available in the
list of contents (index).
No on screen display will be available in text mode.
No contrast, brightness or colour control, but volume control
is available in text mode.

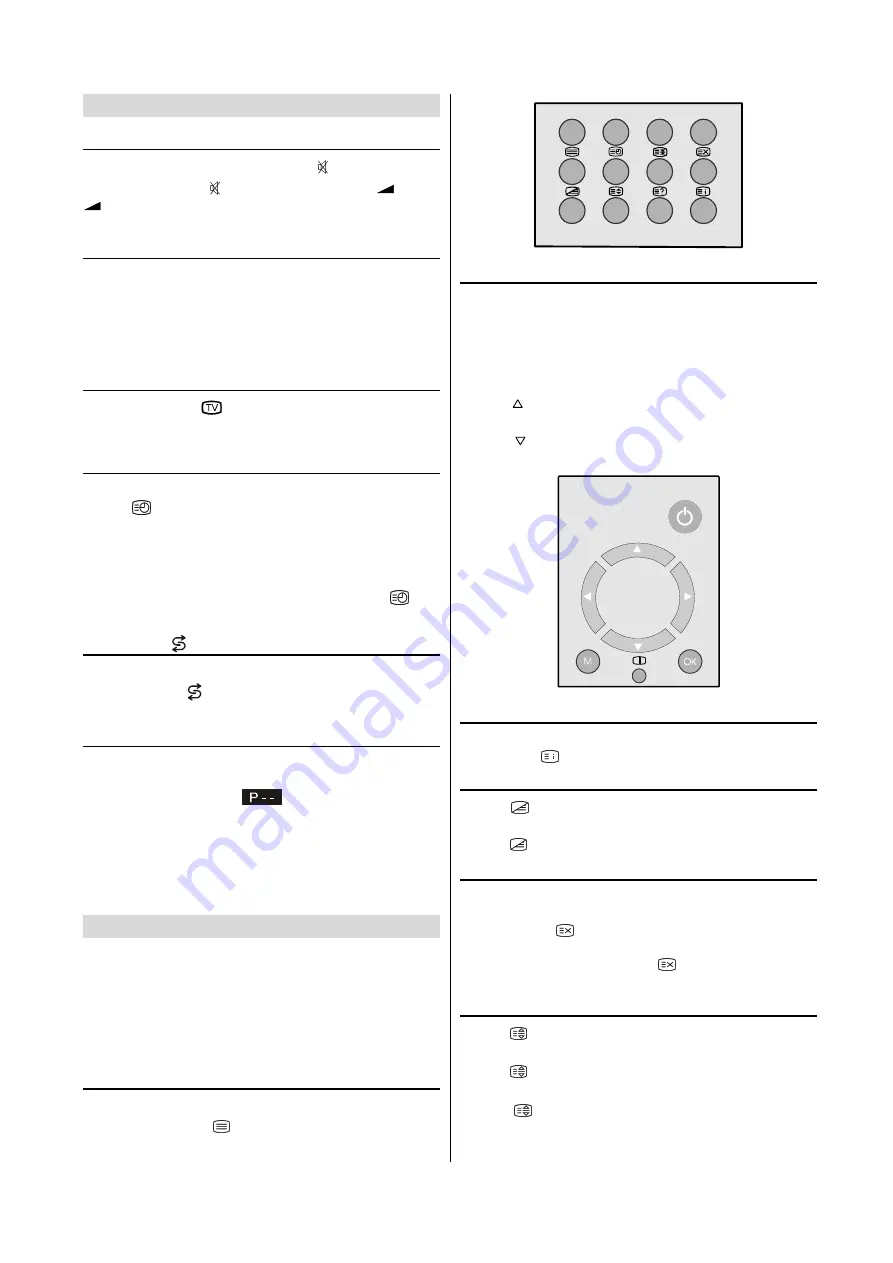
To operate Teletext

• Select a TV station on which Teletext is being transmitted.

• Press (TELETEXT) “

” button. Usually the list of contents

(index) is displayed on the screen.

To select a page of Teletext

• Press the appropriate digit buttons for the required Teletext

page number.

The selected page number is displayed at the top left corner
of the screen. The Teletext page counter searches until the
selected page number is located, so that the desired page is
displayed on the screen.

• Press “

” button  to move the Teletext screen forward one

page at a time.

•  Press  “

”  button    to  move  the Teletext  screen  backward

one page at a time.

To Select Index Page

•  To  select  the  page  number  of  the  index  (generally  page

100), press “

“ button.

To Select Teletext with a TV Programme

• Press “

“ button. The text is now superimposed over the

programme on the screen.

• Press “

“ button again to return to the Teletext page.

Searching for a page while watching TV

• To search for a specific page whilst viewing the TV picture,

whilst  viewing  teletext  enter  the  desired  Page  number,
then press the 

“ button will restore the TV picture. Once

the desired page is found the Header of this page will ap-
pear on the screen. Press the “

“ button to view the full

page.

To Select Double Height Text

• Press “

“ button for the top half of the information page to

be displayed in double height text.

• Press “

“ button again for the bottom half of the informa-

tion page to be displayed in double height text.

•  Press  “

“button  once  more  for  the  full  page  of  normal

height text.

Downloaded from: 

http://www.usersmanualguide.com/

Содержание 28LF-92H

Страница 1: ...R Please read this operation manual carefully before using the colour television 28LF 92H 32LF 92H COLOUR TELEVISION OPERATION MANUAL Downloaded from http www usersmanualguide com ...

Страница 2: ...k 16 Double digit 16 Teletext 16 To operate Teletext 16 To select a page of Teletext 16 To Select Index Page 16 To Select Teletext with a TV Programme 16 Searching for a page while watching TV 16 To Select Double Height Text 16 To Reveal concealed Information 17 To StopAutomatic Page Change 17 To Select a Subcode Page 17 Fastext 17 To exit Teletext 17 Connecting external equipment 17 Via the Euro ...

Страница 3: ...s guarantee does not apply to equipment used in the course of a business trade or profession 3 This guarantee does not cover any faults or defects caused by accident misuse fair wear and tear neglect tampering with the equipment or any attempt at adjustment or repair other than by an approved Service Facility 4 In the unlikely event of that your equipment should require repair please contact the d...

Страница 4: ...in cabinet Television equipment and cart combination should be moved with care Quick stops excessive force and uneven surfaces may cause the equipment and cart combination to overturn To prevent electrical shock do not subject the AC power cord to damage by bending or twisting it or by placing heavy items on top of it and do not place the AC power cord under the TV set If the AC power cord becomes...

Страница 5: ...ing kit approved by the manufacturer Do place the TV set onto an even stand table or track which size is bigger than the TV set If the TV set is put onto a smaller size or uneven stand table or track may cause the TV cabinet distort Do not put or in sert anything between TV set and the stand table or track The tube of your TV has a special coating Do not knock or rub on the tube face with sharp or...

Страница 6: ...Q PLQXWHV 5HIHU WR RXU RSHUDWLRQ PDQXD O IRU PRUH WLS V DQG DGYLFH I SUR EOHPV SHUVLVW FR QWDFW WKH 6 5 3 HOSOL QH RIIL FH KR XUV RQO RQ WHO R U L I WH OHSK RQLQ J IUR P UHODQ G DQG R U 6 7 Z Z Z VKDUS FR XN VX SSR UW LWWLQJ WKH EDW WHULHV LQWR WKH UHPRWH FRQWURO RQQHFWLQJ WKH DHULDO FDEOH 7XQLQJ W KH 79 FKDQQHOV HULDO FRQQHFWLRQ 79 VHW RQO HULD O 1 2 79 HULDO 1RW VXSSOLHG HULDO HDG 1RW V XSSOLHG ...

Страница 7: ... alert the user to the presence of important operating and maintenance servicing instructions in the literature accompanying the appliance Stand By Cursor Up Cursor Right OK OK Info Program Menu 0 9 Direct Program Double Digit Wide mode button P CH Program Volume TV Quit Menu 7 EXT button EXT 1 RGB EXT 2 F AV SVHS Yellow Feature Menu Blue Installation Menu Hold Update Index Page Reveal Expand Mix ...

Страница 8: ...ctions VIDEO AUDIO L L S G I Audio left AUDIO R R D D D Audio right Headphone 3 6 mm Ø Speakers left right Power On Off Volume CH Program S VIDEO 6 9 2 9 2 6 5 8 2 6 9 2 9 2 6 5 8 2 FRONT PANEL Downloaded from http www usersmanualguide com ...

Страница 9: ...external de vices too Remote Control Battery Installation Before using the TV set for the first time install the supplied dry batteries in the remote control 1 With your thumb nail pull up the slit as indicated by the arrow to remove the battery cover 2 Insert two batteries 1 5 V R03 AAA size Be sure to match the battery terminals with the marks inside the compartment 9 5 3 Replace the battery cov...

Страница 10: ...PROGRAM Programming menu on page 15 Press M or button to leave the PROGRAM menu Operating with the onset buttons Volume setting and programme selection can be made using the buttons on the right side of the TV Volume Setting Press button to decrease volume or button to increase volume so a volume level scale will be dis played on the screen Programme Selecting Press CH button to select next progra...

Страница 11: ...e Sound Settings When you connect headphones you can change the head phone sound settings by entering the headphone menu To do this select headphone using or button then enter headphone menu pressing or button 92 80 1 6281 02 6855281 3 21 9 48 5 0212 2 21 Setting Headphone Volume As you enter the Headphone sound menu Volume will be the first selected option Press button to increase the headphone v...

Страница 12: ...tons Factory Settings In the picture menu press the flashback button to revert to the original factory settings Setting Brightness You can change the Brightness setting only when manual picture mode is selected Using or button select Brightness Press button to increase Brightness Press button to decrease Brightness 5 71 66 21 75 67 2 285 6 5 31 66 7 7 3 785 02 2 285 7 03 0 18 125 0 Setting Contras...

Страница 13: ... 872 1250 220 1 0 220 6 8 When you select ZOOM 14 9 CINEMA or 16 9ZOOM S you can change the vertical scroll by pressing Auto mode VPS code The VPS signal is sent by some broadcasting stations with information of the original size When the TV is in AUTO mode and receives the VPS sig nal it changes the size automatically as indicated below When the TV is receiving VPS code 16 9 the TV selects CINEMA...

Страница 14: ...defined peri od Press or button to choose a period of time after selecting this item The timer can be programmed between Off and 120 minutes in steps of 10 minutes OFF 010 020 030 040 120 If sleep timer is activated at the end of the selected the time the TV goes automatically to stand by mode 6 3 7 0 5 2 1 8 7 28 7387 8 52 81 2 2 1 6 79 21 Child lock You can disable the control panel buttons exce...

Страница 15: ...EL again and press or button to select the channel number or enter the number with the digit buttons 5 If the picture is not clear or no colour appears change the colour system to display the picture normally Press or button to select COLOUR SYSTEM then press or button to choose the correct one In TV mode PAL SECAM In AV mode AUTO PAL SECAM NTSC 3 58 NTSC 4 43 6 If the channel reception is poor fi...

Страница 16: ...ormer ly in locations affected by this function To give a channel name NAME 1 Choose the channel you want to give a channel name 2 Press the RED button to enter the NAME mode 3 Press or button to choose the position and press or button to choose each character of channel name 4 Press the RED button to store the channel name To cancel the NAME mode press the BLUE button To delete a channel DELETE 1...

Страница 17: ...that displays text on your TV screen Using the Teletext information system you can view a page of information on a subject that is available in the list of contents index No on screen display will be available in text mode No contrast brightness or colour control but volume control is available in text mode To operate Teletext Select a TV station on which Teletext is being transmitted Press TELETE...

Страница 18: ...to connect external equipment e g video recorder decoder etc which have Euro connectors to your TV use the EXT 1 EXT 1 or EXT 2 EXT 2 terminals If an external device is connected via Euro connector sockets the TV will be switched to AV mode automatically RGB mode If a piece of equipment outputs RGB signals use the EXT 1 Euro connector as this is RGB ready Via the RCA jacks If you have an equipment...

Страница 19: ...vailable TV broadcast outputs Video and Audio L R are available EXT 2 EXT 2 terminal Euroconnector 21 pin SCART Video input and Audio L R inputs are available Video and Audio L R outputs are available see Setting External Source Output on page 13 Front AV F AV terminal RCA connectors x 3 and S VIDEO Y C connector Video input and Audio L R inputs are available S VIDEO input is available 7 7 QWHQQD ...

Страница 20: ...WLRQ 79 VHW RQO HULDO 1 2 79 HULDO 1RW VXSSOLHG HULDO HDG 1RW VXSSOLHG 17 7 7 17 7 7 HULDO RQQHFWLRQV 79 DQG 9 5 HULDO 1RW VXSSOLHG HULDO HDG 1RW VXSSOLHG 17 7 7 HULDO HDG 1RW VXSSOLHG 6FDUW HDG 1RW VXSSOLHG 2 79 HULDO 1 2 9 5 XGLR 9LGHR 5 287 9 7 50 1 9 HULDO 1 Downloaded from http www usersmanualguide com ...

Страница 21: ... and VCR RQQHFWLRQV 79 9 3OD HU 2 5 DQG 9 5 9LGHRUHFRUGHU 9 7 50 1 9 2 79 9 3 5 2 5 6FDUW HDG 1RW VXSSOLHG 6FDUW HDG 1RW VXSSOLHG 9 7 50 1 9 HULDO 1 6FDUW HDG 1RW VXSSOLHG HULDO HDG 1RW VXSSOLHG HULDO 1RW VXSSOLHG HULDO HDG 1RW VXSSOLHG HULDO 1 XGLR 9LGHR 2 9 5 5 287 17 7 7 Downloaded from http www usersmanualguide com ...

Страница 22: ... Box 17 7 7 RQQHFWLRQV 79 9 3OD HU DQG LJLWDO 6HW 7RS R 2 79 17 7 7 9 3 5 6FDUW HDG 1RW VXSSOLHG 9 7 50 1 9 HULDO 1 HULDO 1RW VXSSOLHG 6DWHOOLWH GLVK 1RW VXSSOLHG LVK HDG 1RW VXSSOLHG HULDO HDG 1RW VXSSOLHG 6FDUW HDG 1RW VXSSOLHG HULDO HDG 1RW VXSSOLHG 7 6 7 723 2 5 287 5 1 79 6 57 6 1 Downloaded from http www usersmanualguide com ...

Страница 23: ...LWDO 6HW 7RS R 2 79 17 7 7 9 3 5 6FDUW HDG 1RW VXSSOLHG HULDO 1 9 7 50 1 9 HULDO 1RW VXSSOLHG 6DWHOOLWH GLVK 1RW VXSSOLHG LVK HDG 1RW VXSSOLHG HULDO HDG 1RW VXSSOLHG 6FDUW HDG 1RW VXSSOLHG 7 6 7 723 2 2 9 5 HULDO HDG 1RW VXSSOLHG 6FDUW HDG 1RW VXSSOLHG 5 287 HULDO 1 XGLR 9LGHR HULDO HDG 1RW VXSSOLHG 5 287 5 1 79 6 57 6 1 17 7 7 Downloaded from http www usersmanualguide com ...

Страница 24: ... 79 0 25 5 1 287 1 2 87 XGLR 9LGHR OHDG 1RW VXSSOLHG RQQHFWLRQV 79 DQG 9LGHR FDPHUD URQW FRQQHFWLRQV 79 DQG 9LGHR FDPHUD 1RWH RU IXUWKHU GHWDLOV SOHDVH UHIHU WR RSHUDWLRQ PDQXDO RI RXU 9LGHR DPHUD Note For further details please refer to operation manual of your Video Camera Downloaded from http www usersmanualguide com ...

Страница 25: ... 4 Common earth for audio 11 Green input 18 Earth for Red Green Blue control 5 Earth for blue 12 Not used 19 Video output 6 Audio left input 13 Earth for red 20 Video input PAL SECAM NTSC 7 Blue input 14 Not used 21 Plug shield 21 pin Audio Video EXT 2 1 Audio right output 8 Audio video control 15 Not used 2 Audio right input 9 Earth 16 Not used 3 Audio left output 10 Not used 17 Earth for video 4...

Страница 26: ... WHUPLQDO DW WKH EDFN RI WKH 79 VHW 1R FRORXU 3LFWXUH ZHDN 7U D QHZ FKDQQHO WR FKHFN IRU SRVVLEOH VWDWLRQ WURXEOH HULDO QRW FRQQHFWHG WR WHUPLQDO DW WKH EDFN RI WKH 79 VHW I RXWVLGH DHULDO LV XVHG FKHFN IRU EURNHQ ZLUHV KHFN IRU ORFDO LQWHUIHUHQFH 3RRU UHFHSWLRQ RQ VRPH FKDQQHOV 7U D QHZ FKDQQHO WR FKHFN IRU SRVVLEOH VWDWLRQ WURXEOH HULDO QRW FRQQHFWHG WR WHUPLQDO DW WKH EDFN RI WKH 79 VHW I RXWVL...

Страница 27: ...6 216 Cleaning The Screen Your TV is fitted with a True Flat picture tube The surface of the screen is covered with a foil Under no circumstances may this be damaged To clean Clean the laminated screen with a soft cotton cloth Only non alkaline thinned soapsuds on a basis of water or alkohol be used to moisten the cloth Rub the surface gently with the cloth until the surface is completely dry Unde...

Страница 28: ...ccordance with the following code IMPORTANT As the colours of the wires in the mains lead of this appliance may not correspond with the coloured markings identifying the terminals in your plug proceed as follows The wire which is coloured blue must be connected to the terminal which is marked with the letter N or coloured black The wire which is coloured brown must be connected to the terminal whi...

Страница 29: ...SHARP ELECTRONICS U K LTD Sharp House Thorp Road Newton Heath Manchester M40 5BE R SHARP CORPORATION 50048416 05 04 50048416 Downloaded from http www usersmanualguide com ...

Страница 30: ...t supplied Aerial Lead Not supplied ANT EXT 2 EXT 1 Aerial Lead Not supplied Scart Lead Not supplied BACK OF TV Aerial IN BACK OF VCR Audio Video RF OUT AV TERMINAL AV 1 Aerial IN Typical Connections 28 32LF 92H Note For further details please refer to operation manual of your VCR 1 ANT EXT 2 EXT 1 Downloaded from http www usersmanualguide com ...

Страница 31: ...upplied Satellite dish Not supplied Dish Lead Not supplied Aerial Lead Not supplied Scart Lead Not supplied Aerial Lead Not supplied DIGITAL SET TOP BOX RF OUT AERIAL IN TV SCART DISH IN Note For further details please refer to operation manuals of your DVD Player and Digital Set Top Box 2 ANT EXT 2 EXT 1 Downloaded from http www usersmanualguide com ...

Страница 32: ...to operation manual of your Video Camera 3 ANT EXT 2 EXT 1 BACK OF TV CAMCORDER IN OUT IN OUT Audio Video lead Not supplied Connections TV and Video camera Front connections TV and Video camera Downloaded from http www usersmanualguide com ...

Страница 33: ...then press the button to start Automatic Programming System automatically programmes the received channels in your TV s programme numbers During will be displayed After is finalized the menu appears To cancel press the button TV You can delete a channel insert a channel into a programme number or re start with the menu For details see on A P S PROGRAM PROGRAM Programming menu page 15 in the Operat...

Страница 34: ... station trouble Check for local interference Increase the volume Check Audio levels Picture OK poor sound Try a new channel to check for possible station trouble TV not plugged in Outlet power OFF Main power button of TV not ON Aerial not connected to terminal at the back of the TV set If outside aerial is used check for broken wires Turn OFF using the Main Power button then turn ON again after a...

Страница 35: ...SHARP ELECTRONICS U K LTD Sharp House Thorp Road Newton Heath Manchester M40 5BE R SHARP CORPORATION 50048658 05 04 50048658 Downloaded from http www usersmanualguide com ...

Страница 36: ... tv dvd and othes Manual users user manuals user guide manual owners manual instruction manual manual owner manual owner s manual guide manual operation operating manual user s manual operating instructions manual operators manual operator manual product documentation manual user maintenance brochure user reference pdf manual Downloaded from http www usersmanualguide com ...

Отзывы: