


Doc
#
E145753 V.1.04
QS - 3
Shark® 100BT Quickstart
Electro
Industries/GaugeTech
The Leader In Power Monitoring and Smart Grid Solutions
Electro
Industries/GaugeTech
The Leader In Power Monitoring and Smart Grid Solutions
NOTE:
If you don’t see the screen, reset the meter: insert a pointed tool, for example, a ballpoint pen,
in the Reset button for 30 seconds (see figure at the top of page QS-2 for the Reset button’s location).
Repeat step 7.
8.Enter the following default settings:
User name: admin
Password: admin
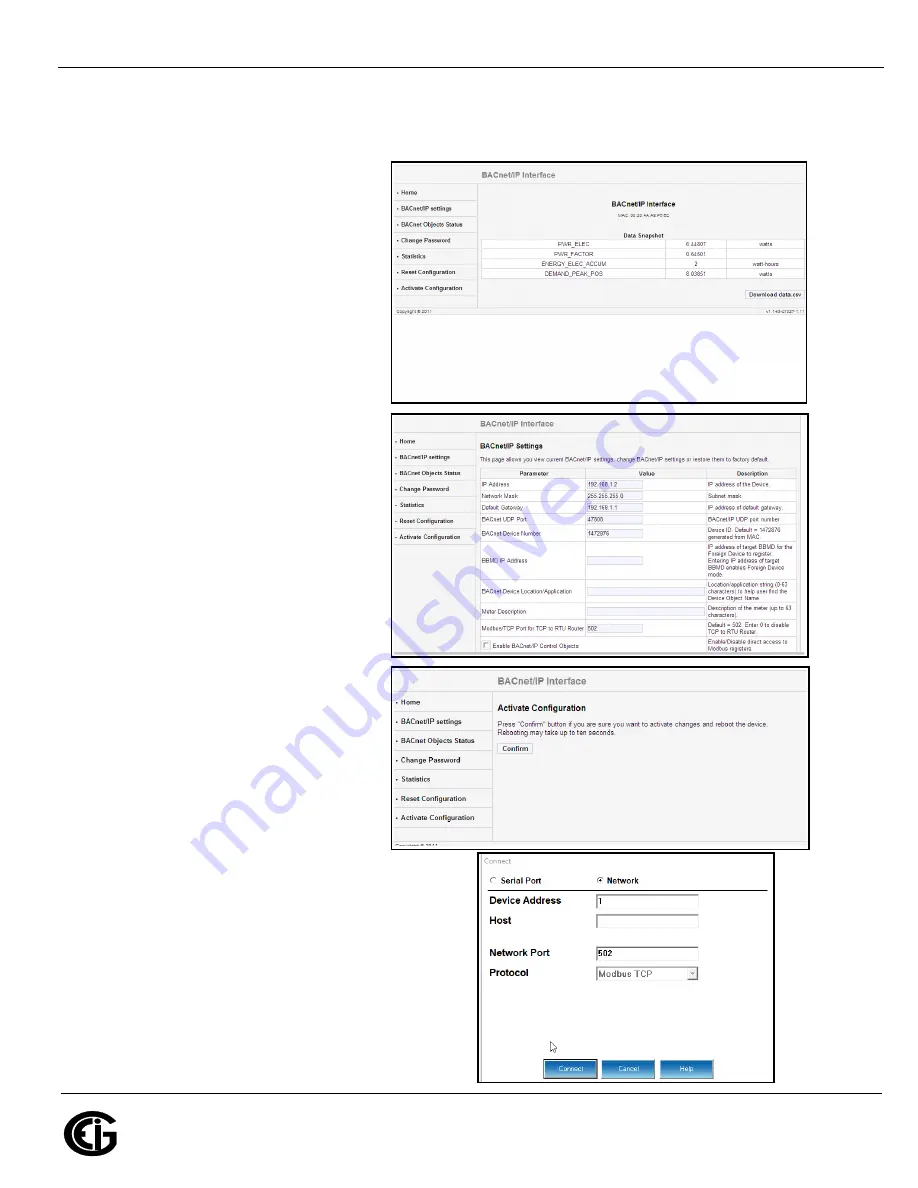
9.Click
OK
. You will see the BACnet/IP
Home webpage, shown on the right.
10.Click BACnet/IP Settings on the
left side of the webpage to see
the page shown below, on the
right.
11.Click in the IP/Address field and
change the meter’s factory-set IP
address (10.0.0.1) to an IP address
in the same subnet as your
Network. Contact your System
Administrator if you are unsure of
the address to use.
12.Click
OK
at the bottom of the
webpage.
13.Click
Activate Configuration
on
the left side of the webpage to
display the screen shown on the right.
14.Click
Confirm
. You will see a
message that the configuration has
been saved and the meter is
rebooting.
15.Disconnect the meter’s RJ45 cable
from your PC and connect it to your
Network.
Software Connection
: connect to the meter at its
new IP address so you can configure it.
1.Open CommunicatorPQA
TM
software (you can
download the software from the CD that came
with the meter).
2.Click
Connect
in the tool bar. You will see the
Connect screen, shown on the right.


