13
12
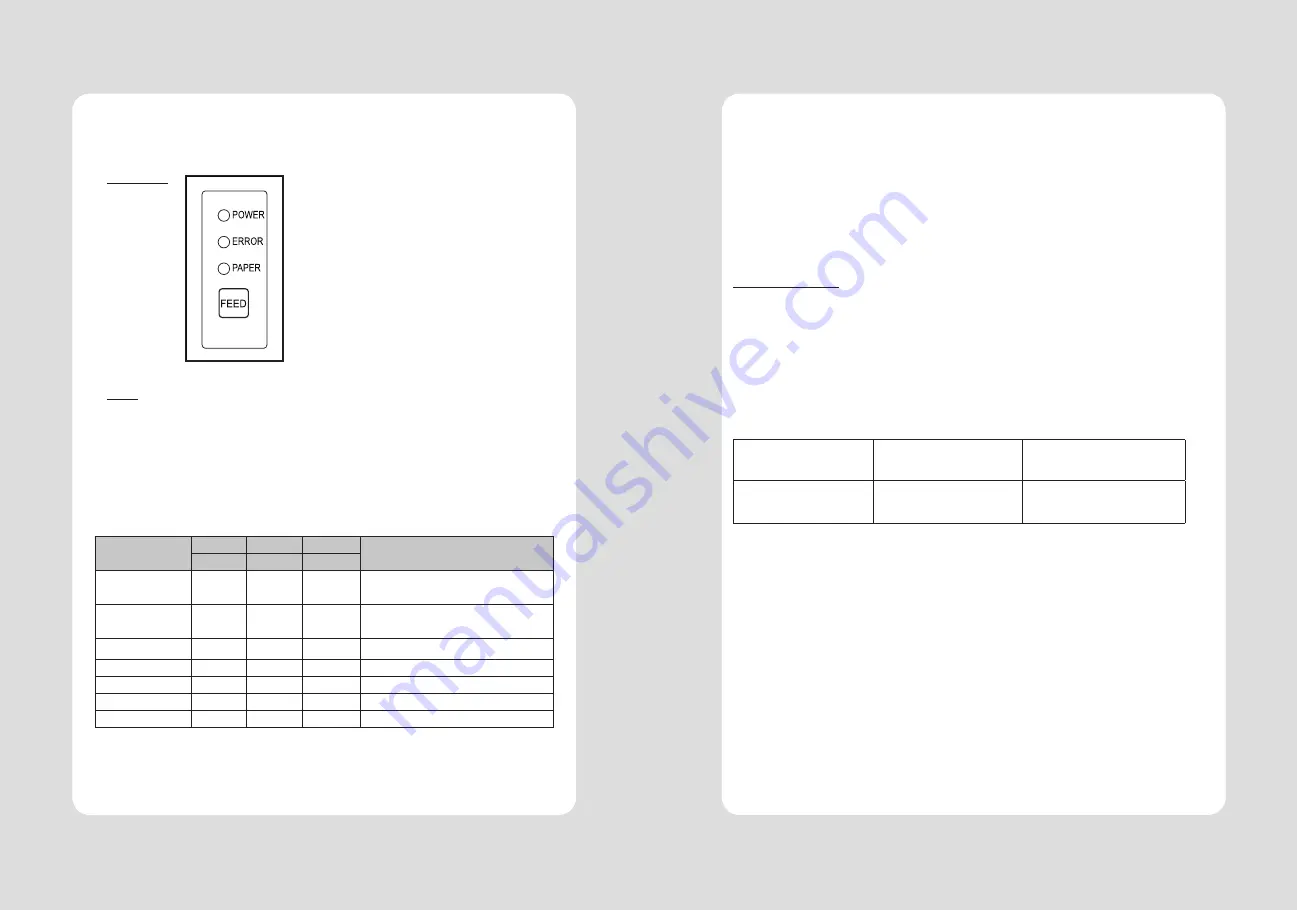
3-1. Control panel
You can control the basic paper feeding operations of the printer with the button on the control panel.
The indicator lights help you to monitor the printer’s status.
Control Panel
Button
The button can be disabled by the ESC c 5 command.
Press the FEED button once to advance paper one line. You can also hold down the FEED button to
feed paper continuously.
3-2. Error indicators
This section explains the different patterns signaled by the three LED indicators located on the top
cover of the printer.
STATUS
PAPER
ERROR
POWER
REMARKS
RED
RED
GREEN
Power off
OFF
OFF
OFF
Normal power is not supplied to
the printer
Power on
OFF
OFF
ON
Normal power is supplied to the
printer
On line
OFF
OFF
ON
Normal error-free mode
Cover open
OFF
ON
ON
Close cover
Paper empty
OFF
ON
ON
Insert new paper roll
Paper near end
ON
OFF
ON
Paper is low
Test mode
OFF
OFF
ON
Ignored error led
3. Control panel and other functions
The self-test result indicated whether the printer is operating properly. Also with this, user can check
following options or status of the printer.
Control circuit
Printer mechanism
Printing quality
ROM version
Interface setting
This test is independent of any other equipment or software.
Running the self test
1. Make sure the printer is turned off and the printer cover is closed properly before performing the self test
2. Turn the printer on holding the FEED button, then the self-test will start. The self-test prints the printer
setting value and then prints the following, and pauses. (Error LED On)
SELECT MODE BY BUTTON
1. ASCII PRINT
2. SELECT BAUDRATE MODE
3. HEXADUMP MODE
3. Press the FEED button consecutively (1~3)
1. ASCII PRINT
(press the FEED button once)
2. SELECT BAUDRATE MODE
(press the FEED button twice)
3. HEXADUMP MODE
(press the FEED button triple time)
Printing test page constructed
with ACII code.
Set the speed of Serial Interface
(You can set the BAUDRATE in
this mode)
Printing the HEX value received
from the interface
♣
Wait for 5~6 seconds if you want to exit. Printer performs a cutting when exiting this mode
4. The printer is ready to receive data after finishing setting.
4. Self Test
Содержание SLK-T21EB Series
Страница 2: ......


