SERVER EDGE 4K2K Скачать руководство пользователя страница 20


18

Step 3

.

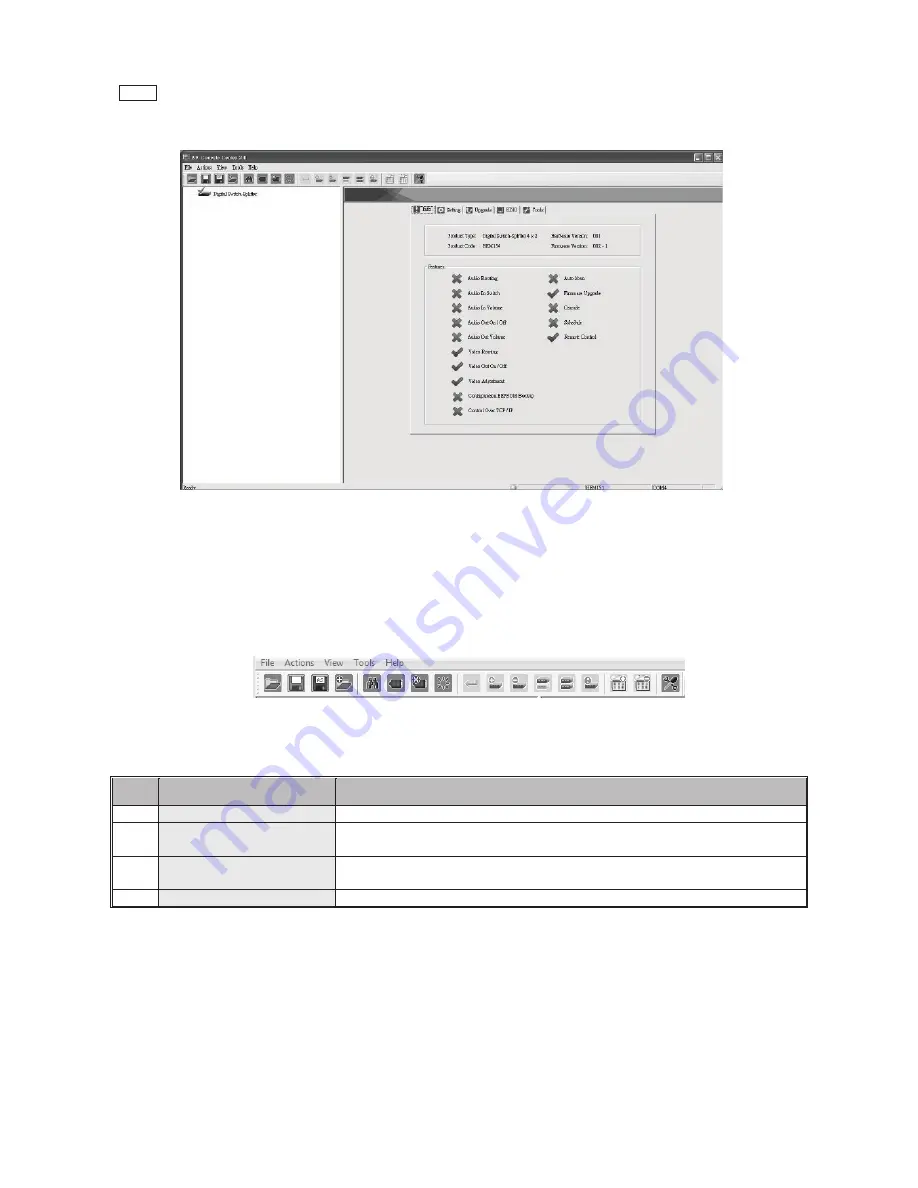
 Double-click “Digital Switch Splitter” on the left block, and the basic information of the device would be displayed 

on the right block (There are other ways to detect the device. Please refer to 

Toolbar Guidance / Action

. ) 


*Note: Multi-layer cascade is not applicable through GUI. 


2. GUI Toolbar Guidance 

You can see the toolbar on the upper-left corner. Both top toolbars are identical in functions. For further 

information, please refer to the following guidance. 


2.1  File

: Allow users to open or save topology files. A topology is a usually schematic description of the 

arrangement of a network, including its nodes and connecting lines. Saving a topology file is highly 

recommended. 

2.1 

Option 

Function 

Open Existing Topology 

Open pre-stored topology file 

Save Current Topology 

Allow users to save the current topology file in the install location of the 

software 

Save Current Topology 

As… 

Allow users to save the current topology file in a specific location 

Exit 

Exit the system 


2.2  Actions

: Detect all devices or connect the selected device. 

When checking 

Detect All Devices

, it will show the dialog box below to indicate successful detection of 

the device(s). 


2.3  View

: Show or hide the (

Icon) Toolbar

 / 

Status Bar

 (on the bottom of the window). 


2.4  Tools

: Select 

Environment

 to set up COM Port and Baud Rate or set up TCP/IP address for the device. 

Содержание 4K2K

Страница 1: ...res and functions may be added or changed after the manual was written Please visit our website to download the latest version of manual for reference HDBaseT 4K2K 4 Input HDMI CATx Gate Repeater User...

Страница 2: ...ection 15 II GUI over Serial 17 A Installing Application 17 B Uninstalling Application 17 C Description Operation 18 Specification 24 Please read this manual thoroughly and follow the Installation pro...

Страница 3: ...g or point to point applications Exclusive EDID Function Multiple functions for EDID setting like EDID Copy and EDID Pre setting ensuring accurate output display Enable separately learn Audio and Vide...

Страница 4: ...III Package Content Content Quantity SW4I 03457 100 1 Power Adapter Set 1 IR Remote Controller 1 CD User s Manual Software Utility 1 Quick Start Guide 1 CATx Cable 1 5M 1 Grounding Wire 1 Foot Pad Set...

Страница 5: ...raight type male female Other transmitter and repeater Other repeater s Optional IR Sensor Kit RJ12 Cable RJ12 to RS232 Adapter Note If users want to use other RJ12 to RS 232 converter please make sur...

Страница 6: ...put Port Connect to an HDMI source I Connect to HDMI sources depend on model Ro Remote Output Port Connect to a receiver Lo Local Output Port Connect to an HDMI display S1 EDID Setting Switch See the...

Страница 7: ...ource detected in Source 1 the system will automatically display the latest video source Priority R Remote input source CATx IN R has the highest priority Priority Source 1 CATx IN R Source 2 Source 3...

Страница 8: ...mage to the product or any connecting devices and to improve audio video signal quality it is important to make sure that the extender systems are properly grounded Device Connection 1 Use CATx cables...

Страница 9: ...7 Connection Pattern HDMI RJ 45 Cable CAT 5e 6 6a IR Cable VGA RJ 12 Cable...

Страница 10: ...port ON blue y d a e r t u p n i e c r u o s o e d i V F F O The LED emits blue and go off once per 2 sec t u p n i e c r u o s o e d i v o N F F O Output LED Indicator STATUS Output device ready Outp...

Страница 11: ...the setting Double click F Press 1 Press 1 Toggle ON OFF Remote Output Port Press F to exit 3 EQ Adjustment To optimize video quality users can adjust the video equalization sharpness for all video in...

Страница 12: ...tep 1 Apply power to the unit Step 2 Connect the EDID compliant monitor to local output port of the Unit and power on the monitor Step 3 Press and hold the button L EDID COPY for 3 5 sec and release t...

Страница 13: ...r is not applicable d The CATx cable is not well connected 7 2 EDID Emulation After EDID Copy you may slide EDID Setting Switch to the desired position and apply the copied EDID to the display Va Vide...

Страница 14: ...video quality users can adjust the video equalization sharpness for all video output ports through push button configuration Since 4 levels for EQ adjustment are provided the output LED flashes blue...

Страница 15: ...hin a second or two press VIDEO of IR remote controller 4 2 ID Operation via IR Remote Controller Each unit will respond to the same signal from the IR remote controller whenever the units are powered...

Страница 16: ...Simple Serial Connection Connect and power on the Unit and then set up serial configuration such as correct baud rate and com port After that you can directly enter the serial commands All the valid...

Страница 17: ...TS HD 7 1 ch AVI n AV Input Port n 1 max OLE Enable Local Output AV OLD Disable Local Output AV ORE Enable Remote Output AV ORD Disable Remote Output AV w e i V S V settings t c u d o r P I P informat...

Страница 18: ...owse There are two ways to install the driver a Manually copy the file TuApp exe to the Windows platform and run it directly b Run Setup exe to automatically install the program on the Windows platfor...

Страница 19: ...After software installation connect the DB9 RS 232 serial cable straight type male female to the serial port of Gate Repeater and connect the other end to the serial port COM1 COM2 of your computer N...

Страница 20: ...ngement of a network including its nodes and connecting lines Saving a topology file is highly recommended 2 1 Option Function 1 Open Existing Topology Open pre stored topology file 2 Save Current Top...

Страница 21: ...as shown below 3 2 Option Function 1 Auto apply Automatically apply settings It is not suggested checking this option for it may result in loading down the system 2 Apply To implement the current set...

Страница 22: ...ommonly used icons Built in Icons as shown on the upper side of the pop up window b User s Icon Reset the button to null As shown on the lower side of the pop up window double click the icon 01 12 and...

Страница 23: ...EDID into inventory for future use As for Built In EDID it provides multiple options for all connected output ports 3 5 Option Function 1 Inventory EDID Make EDID Copy EDID to the selected input port...

Страница 24: ...ID binary file A file that store EDID information Step 1 Check the desired input port s or check All input ports to select all Step 2 Click Make EDID Step 3 Select the desired binary file Copy selecte...

Страница 25: ...x 2160 Extension Distance 100M LED Indicator Status LED 1 Input LED 4 Output LED 2 Slide Switch Audio Video EDID Setting Audio Video Inventory EGO Advanced Auto sensing Setting Switch Auto Priority R...

Страница 26: ...e product or documentation without obligation to notify any user of such revisions or updates For further information please contact your direct vendor All the brand names and registered trademarks ar...

Отзывы: