Serva
05
3. MONTERING
Dammuppsamling
För att hålla arbetsplatsen ren kan slipmaskinen anslutas till er vanliga
hushållsdammsugare. Maskinen levereras tillsammans med två olika muffar, som kopplas
mellan dammsugaren och öppningen baktill på maskinen (2).
Kom ihåg att dammuppsamling bara fungerar när perforerat sandpapper
används.
Byte av utslitet sandpapper
Denna maskin passar för vanligt sandpapper.
Dra alltid ut kontakten ur eluttaget innan sandpapper monteras.
Universalsandpapper (240 x 92 mm)
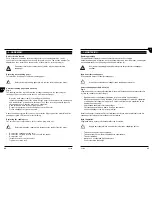
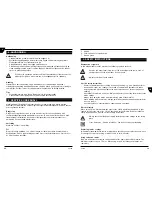
Fig. 2
Slipmaskinen har en rektangulär slipplatta. Genom att fästa sandpapperet ordentligt slits
det inte så snabbt utan räcker längre.
•
Öppna den bakre sandpappersklämman (3) genom att dra upp handtaget.
•
Montera sandpapperet under klämman. Placera sandpapperet i mitten på slipplattan
och titta på perforeringarna i papperet. De måste motsvara de på slipplattan så att
dammet kan sugas upp.
•
Skjut tillbaka handtaget till ursprungsläget.
•
Fäst sandpapperet på den främre delen på samma sätt.
•
Spänn sandpapperet så mycket som möjligt.
Grovt sandpapper (kornstorlek 50) tar i allmänhet bort stora delar av materialet och fint
sandpapper (kornstorlek 120) används som avslutning.
Byta slipplattan
Slipplattan måste bytas ut när kardborrefästena är utnötta.
Koppla bort slipmaskinen från nätströmmen innan slipplattan byts ut.
•
Ta bort sandpapperet från slipplattan.
•
Ta bort skruvarna som fäster slipplattan vid slipmaskinen.
•
Ta bort slipplattan.
•
Montera en ny slipplatta på slipmaskinen.
•
Dra åt skruvarna ordentligt.
S
40
Serva
3. ASSEMBLY
Dust collection feature
For a better dust extraction of the working surface your sanding machine can be
connected to the ordinary vacuum cleaner for house-use. You can use the adaptor. The
adaptor has to be installed on the back side of the machine, in the opening (2).
Remember that the dust extraction only works when using perforated
sandpaper.
Replacing worn sanding paper
This machine is suitable for universal sanding paper.
Before assembly sanding paper always remove the plug from the mains.
Universal sanding paper (240 x 92 mm)
Fig. 2
The sanding machine is provided with a rectangle sanding sole. By tightening the
sandpaper it does not wear out so fast, so it will wear well longer.
•
Open the back paper clamp (3) by pulling the handle up.
•
Install the sandpaper under the clamp. Put the paper in the middle of the sanding sole
and look after the perforations in the paper. They have to correspond with those on
the sanding sole, so that the dust can be exhausted.
•
Push the handle back into its original position.
•
Repeat the operation to fix the sand-paper on the front side.
•
Fix the sandpaper as tight as possible.
Coarse sand-paper (grain 50) removes in general the bigger part of the material and fine
sand-paper (grain 120) is used for the finishing.
Replacing the sanding sole
The sole has to be replaced when the Velcro has been worn out.
Before replacing the sanding sole disconnect the sander from the mains.
•
Remove the sandpaper of the sole.
•
Remove the screws which the sole is fixed to the sander.
•
Remove the sole.
•
Install the new sole on the sander.
•
Tighten the screws well.
GB


