background image


23 


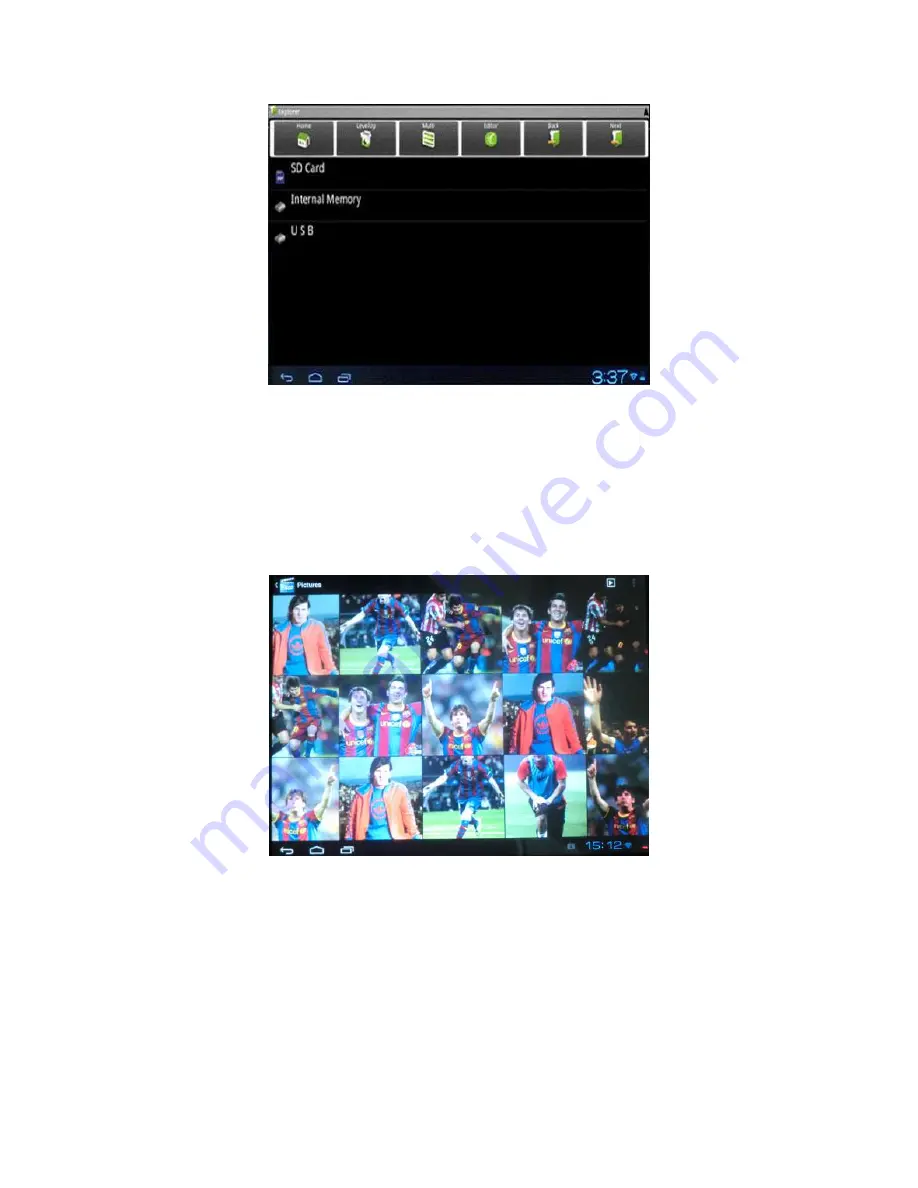
11.7. Galerie 


În cadrul celui de al doilea rând al meniului prin

cipal, puteţi accesa aplicaţia făcând click 

pe  pictograma  "Gallery"  (Galerie).  Puteţi  vizualiza  imaginile  şi videoclipurile,  după  cum   
este prezentat mai jos: 


11.8. 

Latitude şi Maps (Hărţi) 


În  cadrul  celui  de  al  treilea  rând,  puteţi  accesa  aplicaţia  făcând  click  pe  pictogramele 
"Latitude" sau "Maps" pentru a localiza un punct de pe hartă, după cum este prezentat 

Содержание S800TAB

Страница 1: ...800TAB Stimaţi utilizatori Vă mulţumim pentru achiziţionarea produsului nostru Prezentul document constituie un Ghid de Utilizare Pentru ca acest ghid să vă poată fi de folos vă rugăm să îl citiţi înainte de utilizarea produsului ...

Страница 2: ...grame Error Bookmark not defined 11 1 Calculator Error Bookmark not defined 11 2 Calendar Error Bookmark not defined 11 3 Ceas Error Bookmark not defined 11 4 Documents to go Error Bookmark not defined 11 5 Setări Flash Player Error Bookmark not defined 11 6 Manager fişiere Error Bookmark not defined 11 7 Galerie Error Bookmark not defined 11 8 Latitude şi Maps Hărţi Error Bookmark not defined 11 ...

Страница 3: ...re nu utilizaţi căştile când traversaţi strada sau când mergeţi cu motocicleta sau cu bicicleta Vă rugăm să utilizaţi numai bateria încărcătorul şi accesoriile compatibile utilizarea oricărui alt tip de produs reprezentând o încălcare a prevederilor privind garanţia şi putând constitui un pericol Vă rugăm să respectaţi reglementările locale cu privire la protecţia mediului aplicabile deşeurilor el...

Страница 4: ... DIVX XVID MPEG MPG FLV HD 1080P max Foto JPG JPEG GIF BMP PNG Audio Căşti stereo 3 5 mm Acustică de înaltă calitate Microfon încorporat Capacitate de ieşire maximă a căştilor 40mW MP3 WMA MP2 OGG AAC M4A MA4 FLAC 3GP WAV Ecran Dimensiune Ecran tactil capacitiv de 8 inch în cinci puncte Rezoluţie 800 600 Culoare Negru alb şi diferite culori opţional Sistem de operare Sistem ANDROID 4 0 Suport Senz...

Страница 5: ...4 4 Aspect şi butoane ...

Страница 6: ...volum 3 Coborâre volum 4 Tasta de revenire revenire la ecranul anterior 5 Această pictogramă este utilizată pentru revenirea la interfaţa anterioară 6 Din orice interfaţă atingeţi această pictogramă şi veţi reveni la interfaţa principală 7 Atingeţi această pictogramă şi vor fi afişate toate aplicaţiile pe care le aţi utilizat recent 8 Glisaţi această pictogramă către dreapta pentru deblocarea disp...

Страница 7: ...drul procesului de pornire Dispozitivul a fost pornit şi rulează sistemul de operare Android apoi sistemul afişează interfaţa de start implicită 7 2 Oprire Apăsaţi lung butonul de alimentare şi vor apărea pe suprafaţa de lucru opţiuni pop up selectaţi opţiunea Power off Deconectare şi faceţi click pe OK pentru oprirea dispozitivului după cum este prezentat în imaginea de mai jos ...

Страница 8: ...e Google bara de stare şi pictograma de meniu Bara de stare este utilizată pentru a fi afişate starea reţelei sistemului energia bateriei aplicaţiile recente ora şi alte informaţii Pictograma de căutare Google este utilizată prin introducerea de cuvinte cheie pentru căutarea pe Internet Pictograma de căutare Google este în colţul din stânga sus al ecranului Faceţi click pe aceasta şi puteţi începe...

Страница 9: ...ascultaţi muzică şi să urmăriţi videoclipuri să navigaţi în pagini web să jucaţi jocuri şi să efectuaţi alte operaţii 9 Setări de sistem În interfaţa meniului principal faceţi click pe în pictograma Settings Setări apoi deschideţi interfaţa pentru setări de sistem Puteţi glisa în sus şi în jos pentru a alege elementul pe care doriţi să îl setaţi după cum este prezentat mai jos ...

Страница 10: ...de rezervă şi resetare etc 9 1 Wireless networks Wireless şi reţele Faceţi click pe pictograma Settings Setări din meniul principal Faceţi click pe rubrica WIFI iar funcţia WIFI poate fi activată imediat Puteţi selecta reţeaua WIFI afişată în interfaţă după cum este prezentat mai jos Faceţi click pe Data usage Utilizare date pentru a vizualiza informaţiile după cum este prezentat mai jos ...

Страница 11: ...mult pentru a vizualiza alte setări după cum este prezentat mai jos 9 2 Device Dispozitiv În cadrul acestei rubrici puteţi configura şi vizualiza setările pentru Sound Display Storage Battery Apps Sunet Ecran Stocare Baterie Aplicaţii ...

Страница 12: ...neavoastră De exemplu faceţi click pe pictograma Sound Sunet şi configuraţi sunetul dispozitivului aşa cum este prezentat mai jos Faceţi click pe pictograma Display Ecran şi configuraţi ecranul dispozitivului Puteţi seta luminozitatea fundalul de ecran etc aşa cum este prezentat mai jos ...

Страница 13: ... După selectarea Sleep în cadrul interfeţei puteţi selecta timpul de expirare a ecranului conform celor prezentate în imaginea de mai jos Observaţie în timpul redării fişierelor video funcţia de standby automat nu este activă Faceţi click pe pictograma Storage Stocare Pot fi vizualizate spaţiile de stocare ale ...

Страница 14: ...13 dispozitivului şi spaţiile de stocare externe aşa cum este prezentat mai jos Faceţi click pe pictograma Battery Baterie Aici poate fi vizualizata utilizarea bateriei după cum este prezentat mai jos ...

Страница 15: ...sync Location services Security Language input Backup reset Conturi şi sincronizare Servicii de localizare Securitate Setări regionale şi text Copiere de rezervă şi resetare Faceţi click pe fiecare element pentru a l configura în funcţie de preferinţele dumneavoastră De exemplu faceţi click pe pictograma Security Securitate Pot fi vizualizate informaţii cu privire la setările de securitate puteţi ...

Страница 16: ...ii Keyboard input method Tastaturi şi metode de introducere puteţi seta metoda de introducere În cadrul rubricii Speech Vorbire puteţi seta metoda de căutare după cum este prezentat mai jos Faceţi click pe pictograma Backup reset Copiere de rezervă şi resetare Puteţi face o copie de rezervă a datelor dumneavoastră şi o revenire la setările din fabrică după cum este prezentat mai jos ...

Страница 17: ...sibilitate Opţiuni dezvoltator Despre tabletă Faceţi click pe fiecare element pentru a l configura în funcţie de preferinţele dumneavoastră De exemplu faceţi click pe pictograma Date time Dată şi oră Puteţi seta data şi ora sau puteţi activa opţiunea Automatic date time Dată şi oră automate etc după cum este prezentat mai jos De asemenea puteţi seta ora în funcţie de preferinţele dumneavoastră Pen...

Страница 18: ...ţiuni dezvoltator Puteţi configura datele din cadrul acestei rubrici aşa cum este prezentat mai jos 10 Instalarea descărcarea rularea unei aplicaţii Instalare în Android există mai multe metode de instalare a aplicaţiilor cum ar fi prin USB instalare aplicaţii de la terţi card TF instalare prin dispozitive Utilizatorul poate realiza o instalare online prin Android market poate descărca şi instala ...

Страница 19: ...lui principal Faceţi click pe pictograma File Manager Manager fişiere pentru a alege SD card Card SD în vederea găsirii fişierului APK pe care doriţi să îl instalaţi apoi puteţi instala software ul ales Observaţie Metoda de instalare de pe USB U disk este aceeaşi cu metoda de instalare de pa cardul TF Micro SD 10 2 Instalarea unei aplicaţii din Playstore Pentru început este necesar să accesaţi apl...

Страница 20: ...Dezinstalarea unei aplicaţii Dezinstalarea unei aplicaţii puteţi utiliza instrumente de management al aplicaţiilor de la terţi sau software ul de management al aplicaţiilor Android încorporat Selectaţi Settings Setări Apps Aplicaţii şi selectaţi aplicaţiile instalate pentru a vizualiza informaţii pentru dezinstalare şi alte operaţii după cum este prezentat mai jos ...

Страница 21: ...principal puteţi observa pictograma Calculator Puteţi accesa aplicaţia făcând click pe pictogramă după cum este prezentat mai jos 11 2 Calendar În cadrul primului rând al meniului principal puteţi observa pictograma Calendar Puteţi accesa aplicaţia făcând click pe pictogramă după cum este prezentat mai jos ...

Страница 22: ... după cum este prezentat mai jos 11 4 Documents to go În cadrul celui de al doilea rând al meniului principal puteţi observa pictograma Documents To Go Făcând click pe aceasta puteţi accesa interfaţa aplicaţiei puteţi vizualiza fişierele recente fişierele locale fişierele de pe suprafaţa de lucru şi aşa mai departe după cum este prezentat mai jos ...

Страница 23: ... Assisted Networking făcând click pe această pictogramă după cum este prezentat mai jos 11 6 Manager fişiere În cadrul celui de al doilea rând al meniului principal puteţi accesa aplicaţia făcând click pe pictograma File Manager Manager fişiere Puteţi gestiona fişierele din cardul SD imaginile fişierele video USB după cum este prezentat mai jos ...

Страница 24: ...ick pe pictograma Gallery Galerie Puteţi vizualiza imaginile şi videoclipurile după cum este prezentat mai jos 11 8 Latitude şi Maps Hărţi În cadrul celui de al treilea rând puteţi accesa aplicaţia făcând click pe pictogramele Latitude sau Maps pentru a localiza un punct de pe hartă după cum este prezentat ...

Страница 25: ...gare Navigare pe web Când dispozitivul este conectat la Internet deschideţi Browser Programul de navigare şi introduceţi URL ul pentru a naviga în pagina web aceasta se poate realiza şi din bara de căutare a spaţiului de lucru prin introducerea site ului web şi deschiderea paginii web În cadrul primului rând este afişată o pictogramă Atingeţi pictograma pentru a face mai ...

Страница 26: ...ări videoclipuri emisiuni TV şi puteţi asculta posturi de radio online Utilizatorii pot descărca şi alte aplicaţii de la terţi inclusiv programe de navigare web playere video aplicaţii pentru mesagerie instantanee şi altele 11 11 Cărţi Puteţi vizualiza în cadrul acestei aplicaţii mii de cărţi în format digital din Android Market La prima utilizare a acestei aplicaţii este necesar să vă conectaţi c...

Страница 27: ...niul principal şi accesaţi interfaţa principală a camerei foto atingeţi punctele din mijlocul cercului pentru a face o fotografie după cum este prezentat mai jos Faceţi click pe în interfaţă pentru a comuta la o altă interfaţă după cum este prezentat mai jos ...

Страница 28: ...l POP3 sau IMAP după cum este prezentat mai jos Observaţie înainte de configurarea contului de e mail asiguraţi vă că dispozitivul este conectat la Internet Vom lua ca exemplu adresa shellyidea gmail com introduceţi o adresa e mail valabilă în câmpul destinat acesteia shellyidea gmail com introduceţi o parolă valabilă în câmpul destinat acesteia Apoi puteţi selecta Manual setup Configurare manuală...

Страница 29: ...om şi trebuie modificată în pop 126 com Numărul portului este 110 Selectaţi next şi dacă setările sunt corecte va fi afişat mesajul Checking incoming serving settings Verificare setări server de intrare Selectaţi next şi veţi accesa interfaţa pentru informaţii despre cont În cadrul rubricii name nume introduceţi numele care doriţi să fie afişat în mesajul transmis apoi faceţi click pe butonul next...

Страница 30: ...e prezentat mai jos Puteţi introduce un fişier audio prin intermediul USB sincron sau prin intermediul unui card SD De asemenea puteţi descărca fişierul audio prin intermediul reţelei Selectaţi eticheta corespunzătoare şi utilizaţi elementele interfeţei cum ar fi artists artişti albums albume song melodie şi aşa mai departe pentru a reda melodia după cum este prezentat mai jos ...

Страница 31: ...i fişierul video şi accesaţi interfaţa de redare a fişierelor video Selectaţi play stop fast forward rewind progress şi alte butoane de comandă pentru controlul redării după cum este prezentat mai jos 11 16 Recorder MP3 de înaltă calitate Faceţi click pe pictograma Sound Recorder din cadrul meniului principal şi accesaţi interfaţa principală a recorderului după cum este prezentat mai jos ...

Страница 32: ...area înregistrării puteţi selecta butonul Discard Eliminare 11 17 Play Store Magazinul Play Faceţi click pe Play Store Magazinul Play Interfaţa principală va fi afişată conform imaginii de mai jos Puteţi alege să vizitaţi Staff Choices for Tablets Recomandări Games Jocuri sau să utilizaţi Categories Categorii pentru a descărca aplicaţiile preferate Faceţi click pe Games Jocuri şi puteţi accesa int...

Страница 33: ...tiţi sau să tastaţi destinaţiile contactelor şi aşa mai departe conform ferestrei de mai jos 11 19 Search StumbleUpon Talk TED YouTube web online Accesaţi făcând click pe pictograma corespunzătoare 12 Fundalul de ecran Sistemul suportă fundal static şi fundal Super HD ...

Страница 34: ...etare a fundalului de ecran Selectaţi Live Wallpaper Fundaluri live puteţi seta imaginea ca fundal Selectaţi Super HD Player puteţi utiliza fundalul 3D din sistem Selectaţi Wallpapers Fundaluri puteţi seta imaginea ca fundal 13 Dispozitiv extern 13 1 Conexiune USB Puteţi conecta dispozitivul MID şi PC ul prin intermediul USB Modul de conectare implicit este o interfaţă sincronă La conectarea la di...

Страница 35: ...geţi Turn off USB storage Oprire stocare USB Cablul USB nu este conectat la dispozitivul MID şi la PC fiind afişate informaţiile de mai jos 13 2 Utilizarea OTG Dispozitivul suportă echipament mobil în format FAT32 cum ar fi U disk hard disk mobil Metoda de conectare plug and play Utilizaţi cablul OTG pentru a conecta dispozitivul MID USB OTG şi echipamentul extern De asemenea puteţi accesa pictogr...

Страница 36: ...nterfaţa Settings Setări pentru a găsi rubrica WIFI atingeţi bara pentru a porni WIFI iar dispozitivul va căuta reţelele WIFI din zona în care vă aflaţi Atingeţi modulul WIFI pentru conectarea la o reţea WIFI după cum este prezentat mai jos După conectarea reuşită la reţeaua WIFI va fi afişată o pictogramă în colţul din dreapta jos al ecranului 14 2 Reţea Ethernet Aveţi nevoie de un convertor pent...

Страница 37: ...at şi instalat online cu ajutorul unui PC sau prin Android market 4 Care este versiunea sistemului de operare al dispozitivului Răspuns Acest dispozitiv utilizează Android 4 0 accelerare hardware 3D integrată şi poate rula majoritatea aplicaţiilor Android 5 Dispozitivul poate fi încărcat prin USB Răspuns Da dispozitivul poate fi încărcat prin USB Pentru încărcare este recomandată utilizarea adapto...

Страница 38: ...37 Ръководство за употреба Serioux S800TAB Уважаеми потребители Благодарим Ви че закупихте нашия продукт Това ръководство ще Ви помогне да използвате продукта правилно Моля прочетете преди употреба ...

Страница 39: ...10 3 Деинсталиране на приложения 55 4 Представяне на работата на основните програми 56 11 1 Калкулатор 56 11 2 Календар 56 11 3 Часовник 57 11 4 Documents to go 57 11 5 Настройки Flash Player 58 11 6 File Manager 58 11 7 Галерия 59 11 8 Latitude şi Maps Карти 59 11 9 Places Места 60 11 10 Навигационна програма 60 11 11 Книги 61 11 12 Камера 61 11 13 E mail 62 11 14 Music Player 64 11 15 Видео възп...

Страница 40: ...йно увреждане на слуха Не използвайте слушалките когато пресичате улицата карате колело или скутер за да избегнете евентуални пътно транспортни произшествия Моля използвайте само позволените батерии зарядно и аксесоари Употребата на какъвто и да е друг продукт е нарушение на гаранционните условия и може да бъде опасна Моля изхвърляйте отпадъците от техника и аксесоари в съответствие с местните нор...

Страница 41: ... DIVX XVID MPEG MPG FLV HD 1080P max Фото JPG JPEG GIF BMP PNG Аудио Стерео слушалки 3 5 mm Висококачествена акустика Вграден микрофон Максимален капацитет на слушалките за изход 40mW MP3 WMA MP2 OGG AAC M4A MA4 FLAC 3GP WAV Екран Размери Тактилен 8 инчов с пет точки Резолюция 800 600 Цвят Черен бял и други за някои модели Оператионн а система Система ANDROID 4 0 Поддържа Гравитационен сензор Подд...

Страница 42: ...41 4 Изглед и бутони ...

Страница 43: ... на таблета ще блокира интерфейса 2 Увеличаване на звука 3 Намаляване на звука 4 Esc връщане към предната страница 5 Тази икона се използва за връщане към предишния интерфейс 6 Връща към главния интерфейс от която и да е страница 7 Докоснете тази икона и ще се покажат всички апликации които са използвани наскоро 8 Приплъзнете тази иконка надясно за отблокиране на устройството Приплъзнете наляво за...

Страница 44: ...азано по долу Таблета е включен и системата Android е активирана след което системата показва началният интерфейс по подразбиране 7 2 Изключване Натиснете продължително захранващият бутон и ще се покажат pop up опции на работния интерфейс изберете опцията Power off Изключване и кликнете на OK за изключване на таблета както е показано по долу ...

Страница 45: ...ейса по подразбиране съдържа иконката на Google лентата за настройки и иконката за менюто Лентата за настройки се използва за покаване на състоянието на мрежата енергията на батерията последно използваните приложения час дата и други информации Иконката за търсене Google се намира в горния ляв ъгъл Кликнете на нея и можете да започнете търсенето в интернет Иконката меню се намира в долния десен ъг...

Страница 46: ... видеоклипове да сърфирате в нета да играете игри и да извършвате други операции 9 Настройки на системата Кликнете на иконката Settings Настройки в интерфейса на главното меню Можете да приплъзвате нагоре и надолу за да видите всички опции както е показано по долу Изберете съответните елементи за настройка като например Wireless network безжична връзка и мрежа Sound display Звук и екран ...

Страница 47: ...то меню Кликнете на рубриката WIFI функцията WIFI може да бъде активирана веднага Можете да изберете мрежата WIFI за въвеждането на валидна парола след което продължете както е показано по долу Кликнете на Data usage за да видите информациите както е показано по долу Натиснете иконката More за да видите други настройки както е показано по долу ...

Страница 48: ...те и видите настройките за Sound Display Storage Battery Apps Звук Екран Съхранение Батерия Проложения Кликнете на всеки елемент за да го настроите по желание Например кликнете на иконката Sound Звук и настройте звука на устройството както е показано по долу ...

Страница 49: ...ото Можете да настроите яркостта фона т н както е показано по долу Sleep времето за изчакване преди автоматичното блокиране на екрана в режим standby В интерфейса на дисплейя изберете опцията sleep за да настроите времето за блокиране на екрана както е показано по долу ...

Страница 50: ...ция standby не е активна Кликнете на иконката Storage съхранение за да видите паметта и външните устройства за съхранение на данни както е показано по долу Кликнете на иконката Battery Батерия Тук може да се види статуса на батерията както е показано по долу ...

Страница 51: ...е настройките за Account sync Location services Security Language input Backup reset Профили и синхронизиране Местоположение Сигурост Регионални настройки и текст архивиране и нулиране Кликнете на всеки елемент за да го настроите по желание Например кликнете на иконката Security Сигурност Могат да бъдат видяни информации относно настройките за сигурност можете да приплъзвате нагоре и надолу зад а ...

Страница 52: ...тете всички детайли Можете да изберете метода за въвеждане в колоната keyboard input Можете да настроите начина на търсене в колоната Speech както е показано по долу Кликнете на иконата Backup reset Архивиране и нулиране Можете да архивирате данни backup и да възстановите фабричните настройки както е показано по долу ...

Страница 53: ...Достъпност Developer options Опции разработчик About tablet Отностно таблета Натиснете всеки елемент за да настроите по желание Например натиснете Date time Можете да настроите датата и часа можете да настроите Automatic date time Автоматична дата и час т н както е показано по долу Също така можете да изберете да настроите часа както ви харесва след това натиснете Set time Настройка час Ако въведе...

Страница 54: ...те от тази колона както е показано по долу 10 Инсталиране теглене стартиране на приложения Инсталиране в Android има няколко метода за инсталиране на приложения като през USB инсталиране на приложения от трети страни TF карта инсталиране чрез устройства Потребителя може да осъществи онлайн инсталиране през Android market може да сваля и инсталира приложения през колмютъра или през някоя ...

Страница 55: ... cadrul meniului principal Кликнете на File Manager за избор на SD card SD карта с цел да намерите папката APK който желаете да инсталирате след което можете да инсталирате избрания софтуер Бележка Метода на инсталиране от USB U disk в същият като инсталирането от карта TF Micro SD 10 2 Инсталиране на приложение от Playstore Първо трябва да влезете в Market Когато пускате тази програма за първи пъ...

Страница 56: ...еню 10 3 Деинсталиране на приложения Деинсталиране на приложение можете да използвате трети програми за дезинсталиране или вграденият в Андроид софтуер за дезинсталиране Изберете Settings Apps изберете инсталираните приложения за да проверите информациите на програмата деинсталиране на програмата и други операции както е показано по долу ...

Страница 57: ... главното меню ще намерите иконката Calculator Можете да отворите приложението като кликнете на иконката както е показано по долу 11 2 Календар В първия ред на главното меню ще намерите иконката Calendar Можете да отврите приложението като кликнете на иконката както е покаано по долу ...

Страница 58: ...то като кликнете на иконката както е показано по долу 11 4 Documents to go В третия ред на главното меню ще намерите иконката Documents To Go Като кликнете на нея ще отворите интерфейса на приложението където можете да видите последните файлове локалните файлове файловете от десктопа т н както е показано по долу ...

Страница 59: ...те Local Storage и Peer Assisted Networking кликвайки на тази иконка както е показано по долу 11 6 File Manager На втория ред от главното меню можете да отворите приложението кликвайки на иконката File Manager Управление файлове Можете да управлявате файлове от SD карта снимките видео файлове USB както е показано по долу ...

Страница 60: ...и на иконката ще отворите приложението където можете да видите снимките и видеоклиповете както е показано по долу 11 8 Latitude şi Maps Карти На третия ред можете да отворите приложението кликвайки на иконките Latitude или Maps за да локализирате някоя точка от картата както е показано по долу ...

Страница 61: ...а може да ви помогне да локализирате ресторанти кафенета клубове т н както е показано по долу 11 10 Навигационна програма Web навигация Когато устройството е свързано към интернет отворете Browser и въведете URL адрреса за да сърфирате в нета ...

Страница 62: ...приложение можете са гледате видеоклипове TV предавания онлайн радио 11 11 Книги В това приложение можете да визуализирате хиляди книги в дигитален формат от Android Market При първата употреба на това приложение трябва да се логнете с потребителското ви име от gmail след което ще визуализирате онлайн книгите както е показано по долу 11 12 Камера Кликнете на иконката Camera от главното меню докосн...

Страница 63: ...азано по долу 11 13 E mail Кликнете на иконката e mail от главното меню за да въведете данните за вписване в e mail а Имейл приложенията са придружени от гид за настройка и са съвместими с обичайните доставчици на имейл услуги например Gmail Yahoo Hotmail и 163 т н и с потребителски регистрации e mail POP3 или IMAP както е показано по долу ...

Страница 64: ...ързано към интернет За пример ще вземем shellyidea gmail com В лентата за e mail въведете валиден имейл адрес shellyidea gmail com В полето за парола въведете валидна парола След това изберете Manual setup ще се появи прозореца за избор на типа акаунт както е показано по долу ...

Страница 65: ...pection acceptance server settings ако е правилно избран натиснете next ще се отвори личната страница с информациите на акаунта В графата name име въведете името което искате да се показва в изходящото съобщение и след това щракнете върху бутона Напред за да можете да видите интерфейса на имейла Той ще се зареди автоматично 11 14 Music Player Кликнете на иконката music от главното меню така ще се ...

Страница 66: ... таг и проверете интерфейса като artists album и song както е показано по долу 11 15 Видео възпроизвеждане Кликнете на иконката video player в главното меню за достъп до основния интерфейс Super HD player Ще се покажат всички видеофайлове Изберете видео файла Изберете play stop fast forward rewind progress и други командни бутони както е показано по долу ...

Страница 67: ...ете на иконката Sound Recorder от главното меню и влезте в интерфейса на записващото устройство както е показано по долу Натиснете за запис След края на записа натиснете за приключване запаметяване на записа Можете да намерите записите в Internal Memory като ...

Страница 68: ... Magazinul Play Ще се покаже основния интерфейс като на снимката по долу Можете да изберете да посетите Staff Choices for Tablets Препоръки Games JocИгри или да използвате Categories Категории за да свалите желаните приложения Кликнете на Games Игри и можете да видите интерфейса за сваляне на игри Виж по долу 11 18 Search StumbleUpon Talk TED YouTube web online ...

Страница 69: ...статичен и Super HD фон 12 1 Настройка на фона от иконата Display Екран В Settings Настройки на иконата Display Екран можете да изберете Wallpaper тапет фон на екрана след което кликнете на фона на екрана и ще се покаже долния интерфейс Има три опции за настройка на фона на екрана ...

Страница 70: ...вото чрез USB Режима по подразбиране е синхронен интерфейс При свързване на ъстройството ще се покаже съобщение като това по долу Кликнете на Turn on USB storage и ще се покаже интерфейса където можете да изберете Cancel или OK Кликнете на OK и връзката ще се осъществи Кликнете на Cancel и няма да со осъществи връзка Кликнете на Turn off USB storage Спиране USB архивиране USB кабела не е свързан к...

Страница 71: ...ата Explorer за да намерите USB информациите 13 3 Клавиатура и мишка Поддържа мишка USB plug play клавиатура 14 Методи за мрежова връзка Има три начина за осъществяване на мрежова връзка WIFI мрежа Ethernet мрежа 14 1 WIFI мрежа Първо трябва да идете в setting за да намерите WIFI натиснете за да включите wifi ще сканира мрежата wifi от района Натиснете модула wifi за да се свържете към мрежата как...

Страница 72: ... на Android инсталационен пакет Android 3 Как се получава APK Отговор Може да се свали и инсталира с помощта на PC можете също така да свалите и инсталирате системата онлайн от Android market 4 Коя е версията на операционната система на таблета Отговор Този таблет има Android4 0 3D включено хардуерно ускорение може да работи с приложенията Android 5 Може ли да се зарежда таблета през USB Отговор Д...

Страница 73: ...72 ...

Страница 74: ...73 User s Guide Serioux S800TAB Dear Users Thank you for buying our product This is an User s Guide in order to make sure you can use it conveniently please read it before you use the product ...

Страница 75: ...stall the application 93 11 Main programs operation Introduction 94 11 1 Calculator 94 11 2 Calendar 94 11 3 Clock 95 11 4 Documents to go 95 11 5 Flash Player Setting 96 11 6 File Manager 96 11 7 Gallery 97 11 8 Latitude and Maps 97 11 9 Places 98 11 10 Browser 98 11 11 Books 99 11 12 Camera 99 11 13 E mail 100 11 14 Music player 102 11 15 Video play 103 11 16 Hi Q MP3 Recorder 104 11 17 Play Sto...

Страница 76: ... driving a motorcycle or bicycle in order to avoid traffic accidents Please use permitted battery charger and accessories only the use of any other type of product would be a breach of warranty regulations and may be dangerous Please deal with waste machinery and accessories according to local environmental regulations If you have any questions in the process of using of the product please contact...

Страница 77: ...phone High Q dimensional sound acoustics Built in microphone Maximum output capacity of the earphone 40mW MP3 WMA MP2 OGG AAC M4A MA4 FLAC 3GP WAV Screen Size 8 inch Capacitive Touch Panel to support five points touch Resolution 800 600 Color Black white and different colors to optional O S System ANDRIOD 4 0 Support Gravity sensor Support Adobe Flash 10 3 Support web video Others Product Size 200...

Страница 78: ...77 5 Appearance and Buttons ...

Страница 79: ...rmation on boot state short press will lock the interface 2 Volume increase 3 Volume decrease 4 Return key return to the previous desktop 5 This icon is used to return back to previous interface 6 At any interface touch the icon will be back to the main interface 7 Touch this icon it will show the recent applications you have used 8 Slide this icon to the right side on the interface to unlock this...

Страница 80: ...ystem will enter the process of Startup as shown below Startup Logo in the process of startup The system has been started and is entering the Android system Then the system enters the default home interface 7 2 Shutdown To long press the power key then pop up options will be on the desktop choose the option of Power off Click OK to shutdown as shown below ...

Страница 81: ... consumption you can start this function when MID is not used After the normal startup of the system is completed you can see the Android 4 0 desktop below The default desktop is consisted by google search icon status bar menu label icon The status bar is used to display the network status of current system battery power recent app time and other information Google search icon is used by typing ke...

Страница 82: ...terface Then Press the main menu tag on the up right corner for the menu interface as shown below In the main menu you can set the system operate the existed application install a new application and start touch calibration play music and video browse webpage play game and other operations 9 System settings Click the Settings icon on the main menu and then open the system settings interface you ca...

Страница 83: ...k Sound display Date time Backup reset etc 9 1 Wireless networks Click on the Settings icon in the main menu Click on the WIFI column WIFI function can be started at once You can choose the WIFI show on the interface as shown below Click Data usage can know the information as shown below ...

Страница 84: ...83 Touch the More icon to see other settings as shown below 9 2 Device Under this column we can set up and see the Sound Display Storage Battery Apps ...

Страница 85: ...84 Click each item to set as you like For example Click the Sound icon and set the sound for the device as shown below ...

Страница 86: ...isplay for the device Can set up the Brightness Wallpaper etc as shown below Sleep the delay before the screen standby automatic locking In the display of the interface to select sleep to choose the lock time appeared the following interface ...

Страница 87: ...86 Note during video broadcast the screen automatically standby function is invalid Click the Storage icon to see the devices and external storage for the devices as shown below ...

Страница 88: ...87 Click the Battery icon to see battery use situation as shown below ...

Страница 89: ... shown below 9 3 Personal Under this column we can set up and see the Account sync Location services Security Language input Backup reset Click each item to set as you like For example Click the Security icon to see the security situation you can slide up and down to read all the information as shown below ...

Страница 90: ...u can slide up and down to read all the details You can set up the input method under the keyboard input method column also set up the search method under the Speech column as shown below Click the Backup reset icon You can backup you data and reset factory data as shown below ...

Страница 91: ...ions About tablet Click each item to set as you like For example Click the Date time icon You can set the date time or choose the Automatic date time etc as shown below You can also choose to set the time as you like after that click set If the input number is correct showing the operation is successful and the system will use the new settings Click the Accessibility icon You can set the as shown ...

Страница 92: ... 10 Install unload run the application Android installation there are a variety of ways to install applications for example 1 USB setup 2 third party programs support installation TF card 3 install by the devices The user also can do 1 on line installation through Android market 2 download and ...

Страница 93: ... Select File Manager icon in main menu Click File Manager icon to choose the SD card to find the APK file you want to install and you can install the software you choose Note The way to install from the USB U disk is the same as the installation from TF card Micro SD 10 2 Install searched application from the Playstore First go into the market For the first time you go into this program you need t...

Страница 94: ...ding 10 3 Uninstall the application Uninstall the application you can use the third party software management tools or use the built in Android application management software Select Settings Apps select the corresponding installed applications to check the program information uninstall the program and other operations as shown below ...

Страница 95: ...Introduction 11 1 Calculator On the fist line of Main Menu icon as Calculator you can enter by clicking it as shown below 11 2 Calendar In the first line of the Main Menu icon as Calendar you can enter by clicking it as shown below ...

Страница 96: ...as Clock you can enter by clicking it as shown below 11 4 Documents to go On the second line of Main Menu icon as Documents TO Go by clicking it you can enter its interface you can check your recent files local files desktop files and so on as shown below ...

Страница 97: ...on as Flash Player Setting you can make Local Storage and Peer Assisted Networking by click it as shown below 11 6 File Manager On the second line you can enter by clicking icon File Manager you can manage your SD card picture video USB as shown below ...

Страница 98: ...of the Main menu you can enter by clicking icon Gallery you can view pictures and videos as shown below 11 8 Latitude and Maps On the third line you can enter by clicking icon Latitude or Maps to locate a place on the map as shown below ...

Страница 99: ... below 11 10 Browser Webpage browsing When the network is connected open the Browser and enter the URL you can browse webpage or through the main desktop search bar to input the website and open the webpage On first row there is a icon touch the icon to make more setting for the webpage as shown below ...

Страница 100: ...can also download other third party network application software including the webpage browsing video player website client instant messaging and other software 11 11 Books From this item you can view thousands of ebooks online from the android market For the first time you use this need you to sign in with a gmail account and then can view this ebooks online as shown below 11 12 Camera Click on t...

Страница 101: ...nterface for the setting As shown below 11 13 E mail Click on the e mail icon in the main menu to enter email client E mail applications accompany with email settings guide it can add the common Web email service providers e g Gmail Yahoo Hotmail and 163 etc manufacturers external POP3 or IMAP email account As shown below ...

Страница 102: ...gmail com In the password field to enter your valid password Then you can choose the Manual setup account type selection interface Here we are using the POP3 account type And the receiving service settings will appear interface Please according to each email provider s information set different parameter such as The POP3 server default is 126 com and should be modified for pop 126 com The port num...

Страница 103: ...can enter the mail interface It will load the mail automatically 11 14 Music player Click on the music icon in the main menu and then enter the music player interface The default list system in the user data area for all audio files as shown below You can input audio file through the synchronous USB tool by inserting a SD card with audio file to input audio files you can also download the audio fi...

Страница 104: ...player in main menu to enter the Super HD player main interface it will list all video files then Select the video file and enter the video playing interface Select play stop fast forward rewind progress and other control keys to control the broadcast schedule as shown below ...

Страница 105: ...press the to done save the recording then you can find the recorded files in the Internal Memory from the Explorer icon if you don t need to save you can select Discard button 11 17 Play Store Click the Play Store the main interface will be shown as the following picture you can choose to visit Staff Choices for Tablets Games or using Categories to download the items you like ...

Страница 106: ...face to download the games you like to your system 11 18 Navigation Icon as Navigation can lead you to Speak Type Contacts destination and so on window shown below 11 19 Search StumbleUpon Talk TED YouTube online webs Enter these webs by clicking its icon ...

Страница 107: ...erface to find the display icon under this icon you can choose wallpaper then click wallpaper it will shown interface as bellow There are three following options to set as wallpaper Select Live Wallpapers can set image as wallpaper Select Super HD Player can use the systems supplied 3D wallpaper Select Wallpapers can set image as wallpaper ...

Страница 108: ...nect to the device it will come out a note as shown below Click the Turn on USB storage it will appear interface which appears Cancel and OK and click word OK then it will be connected successfully or click Cancel it will not be connected Touch the Turn off USB storage it means USB cable isn t connected with MID and PC can see below information ...

Страница 109: ...he USB information 13 3 Keyboard and mouse Support plug and play USB mouse keyboard device 14 Network connection methods There are three ways to connect to the network WIFI network Ethernet network External 3G network 14 1 WIFI network First need go to the setting interface to fine the WIFI album touch the bar to turn on the wifi it will scan the wifi network around your place Touch the wifi modul...

Страница 110: ... Package acronym Android installation package 3 How to get APK Answer can download and install it by PC terminal online you can also download and install it by Android market online too 4 What is the version of machine operating system Answer This machine adopts Android4 0 3D built in hardware acceleration can run on most Android applications 5 Can the machine be charged by USB Answer Yes it is Re...

Страница 111: ...110 ...

Отзывы: