background image

20

www.sera-web.com

OPERATION

NOTE

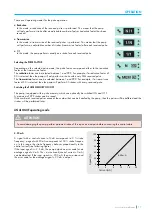
The sensitivity is set to 50% at the factory. This corresponds to a minimum conductivity of the dosing medium of approx. 

45 µS/cm. The minimum conductivity at 100% sensitivity is 5 µS/cm.

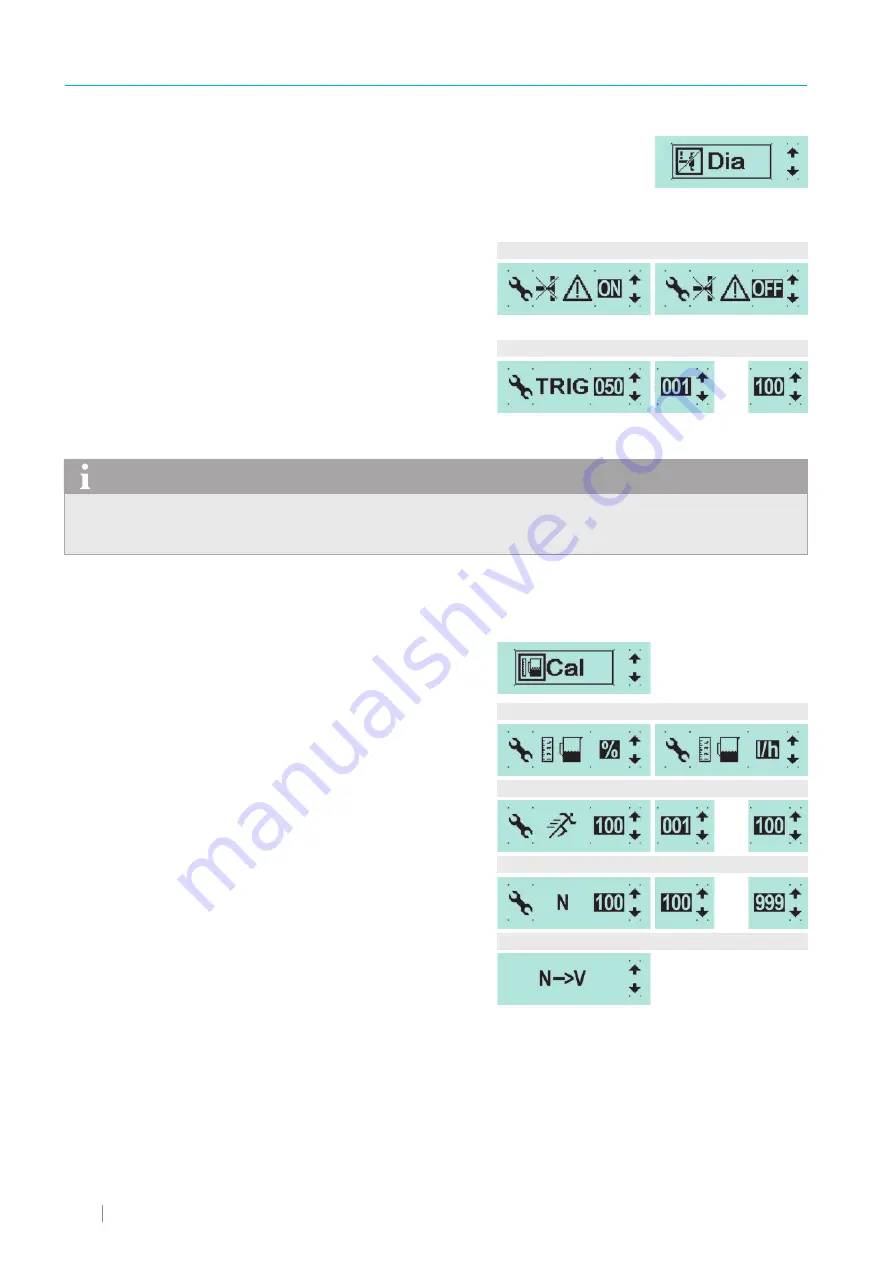
Diaphragm monitoring 

Diaphragm monitoring is installed in every pump. It is used for monitoring 

the delivery diaphragm.

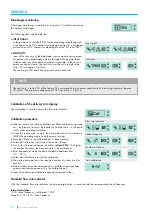
The following items can be adjusted:


INPUT SIGNAL


Selection between switch-off (OFF) of the diaphragm monitoring and 

a configuration as NO contact (for diaphragm pumps "e" and stepper 

motor pumps or NC contact (for diaphragm pumps "ML" and "KM").


SENSITIVITY


Input of the sensitivity of the diaphragm rupture monitoring in percent. 

For pumps with a diaphragm rupture electrode DRD, an adjustment 

to the conductivity of the pumped medium is possible. In the case of 

poorly conductive media, the sensitivity must be set to a high value 

(e.g. 100% at approx. 4 µS/cm). 

The sensitivity of ML and KM pumps must not be adjusted.

Input signal 

Sensitivity 

...

Calibration of the delivery rate display 

The calibration is used to activate the flow rate indicator.

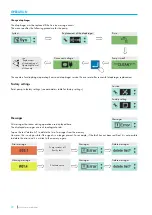
Calibration procedure


 Lead the suction line into a calibration pot filled with the dosing medi-

um – the pressure line must be installed in final position, i.e. the pump 

works under operating conditions.


When the suction pipe is empty, the dosing medium must be drawn in 

(MANUAL operating mode, keep the pump running).


 Note the fill level in the calibration pot (= base quantity).


Select the Calibration (Cal.) menu item under Settings.


 First, enter the required number of strokes (

at least 200!

). The higher 

the number of strokes, the more accurate is the calibration!


 Enter frequency at which the pump should be operated later 

(10...100%).


Select Start Calibration to start the calibration. 


 The dosing pump performs the specified number of strokes (wait for 

process).


 Determination of the delivered quantity (= difference between base 

quantity and remaining quantity in the calibration pot).


 Input of the determined delivered quantity (measured value).

Flow rate indicator

Stroke frequency

Number of strokes

Start calibration

...

...

Standard flow rate indicator 

With the standard flow rate indicator, the entered target value is converted into the corresponding stroke frequency. 

Internal calculation:

100% stroke frequency > calibrated: 10l/h

Setpoint: 8 l/h > 80% stroke frequency

Содержание CONTROL Pro

Страница 1: ...OPERATING MANUAL TRANSLATION OF ORIGINAL OPERATING MANUAL EN CONTROL Pro...

Страница 2: ...le safety requirements and accident prevention regulations SI01 Reference to the instructions of SAFETY INSTRUCTIONS SI01 About this manual Special instructions in this manual are marked with text and...

Страница 3: ...operating mode 15 PULSE operating mode 16 ANALOGUE operating mode 17 Input 1 digital 18 Input 2 18 Outputs 1 and 2 digital 18 Pre alarm dry run 19 Slow mode stepper motor pump 19 Diaphragm monitoring...

Страница 4: ...as heat humidity dust chemicals etc The following storage instructions must be complied with Storage location cool dry dust free and slightly ventilated For storage temperatures and relative humidity...

Страница 5: ...time Minimum interval between pulses Certification SIGNAL INPUT Max load Contact input in the digital mode Max load Analogue input Impedance at 4 20 mA Analogue input Max line resistance Empty Pre emp...

Страница 6: ...n 1 External control 8 pole Control inputs control outputs 2 Level connection 8 pole Pre alarm and dry running protection WARNING Safety instructions must be strictly observed and followed See supplem...

Страница 7: ...e control cable NOTE The following must be observed when replacing a C409 2 Pro for C409 2 Changed factory settings of the input configuration for the input 2 Pin Assignment Function Pin WH white Inpu...

Страница 8: ...put BN GN YE GY PK RD BU GND Stroke signal Ready to run Contact signal Contact signal 24V DC 24V DC mA output Connection of a pulse signal with External Stop external control voltage PLC WH Pulse Exte...

Страница 9: ...RD red Ground Pin 8 The inputs can be switched using a floating contact signal Pre alarm and dry running are set to normally open floating contacts at the factory The sockets of the connections are A...

Страница 10: ...the pump to a sera suction lance an 8 pole ca ble connector with M12 thread is needed accessory part number 90042494 1 or 90022885 2 This cable connector is connected to the level input of the control...

Страница 11: ...stroke Status Pressure stroke Status Alarm Menu Settings Slow Mode Slow Mode active Stroke frequency 1 or Delivery rate 1 0 1 100 0 0 150 l h 15 000 l h calibrated 15 l h START STOP ENTER UP DOWN Back...

Страница 12: ...blue green yellow red Ready x Pump active x Internal error x Mains voltage too low too high x Level monitoring Level pre alarm pump in operation flashing flashing Level pre alarm pump stopped x Dry ru...

Страница 13: ...www sera web com 13 OPERATION Menu Inputs and outputs Parameters Pulse Pulse Manual Pulse Analogue Input 1 Input 2 Output 1 Output 2 Pre alarm Dry run 18 16...

Страница 14: ...ing Calibration System Slow Mode Manual Pulse Analogue Suction stroke speed Input signal Password Sensitivity Flow rate indicator Stroke frequency Number of strokes Start calibration Replacement of th...

Страница 15: ...number sera Code Stroke counter Diaphragm hours Diaphragm process hours Process hours Operating mode Temperature External voltage detect ed Internal 24 V not output at pin 4 of the control socket Ana...

Страница 16: ...as a setpoint in l h or ml h instead of by stroke frequency in see Cali bration of the delivery rate display on page 20 In the Operating Messages view the stroke frequency display is replaced by the...
Страница 17: ...999 For example if a transmission factor of 50 is selected then the pump will perform 50 strokes with every received pulse Switching the PULSE MEMORY ON OFF The pump is equipped with a pulse memory w...

Страница 18: ...using Exter nal Stop Contact NO NC contact Configuration of the contact type NO or NC contact ATTENTION To avoid damaging the pump perform parametrisation of the inputs and outputs before connecting...

Страница 19: ...ith floating normally open contacts pre alarm dry run or only dry run can be connected Configuration 2 This configuration must be selected if a 1 stage level monitor dry run only with floating normall...

Страница 20: ...ow rate indicator Calibration procedure Lead the suction line into a calibration pot filled with the dosing medi um the pressure line must be installed in final position i e the pump works under opera...

Страница 21: ...word is active after restart or during operation after 30 s Thus the pass word can be changed after the restart System Password Replacement of the diaphragm A warning message prompting to order the se...

Страница 22: ...settings Reset pump to factory settings see parameters table for factory settings Service Factory setting Messages All messages that occur during operation are displayed here The displayed messages ar...

Страница 23: ...run NO contact 19 Password PW mode OFF 21 Password 0000 21 Slow mode stepper motor pump Suction stroke 100 19 Diaphragm monitoring Input signal Normally open contact 20 Sensitivity 50 20 Calibration...

Страница 24: ...it overload 24 V ext 16384 Electronics error 32768 Electronics error Electrical data of the pump do not match mains data Check order data Check electrical installation Broken wire in the analogue sign...

Страница 25: ...exceeded the maximum service life of one year or the maximum operating hours Contact sera and order diaphragm kit Pre alarm level of the storage tank has been undercut Fill storage tank with pumped me...

Страница 26: ...ections Take device out of operation Disposal Dispose of correctly and comply with the currently applicable local regulations after shutdown and dismantling MAINTENANCE DECOMMISSIONING DISPOSAL WARNIN...

Страница 27: ...ress the START STOP and UP buttons while switching the power supply of the pump back on The pump is now in the update mode Confirm the instructions with the ENTER button The update is completed The pu...

Страница 28: ...GmbH Subject to change without notice sera shall not accept any liability for errors or omissions or for printing errors FOLLOW US sera GmbH sera Str 1 D 34376 Immenhausen Germany Tel 49 0 5673 999 0...

Отзывы: