background image

4

5

English

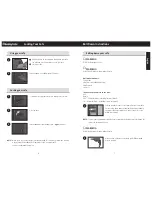
A

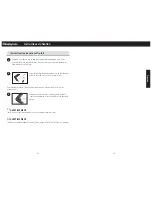
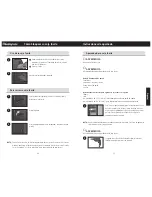
  Find the button located on the ceiling of the unit.

B

  Press and hold the button for three seconds.

C

   Press any button on the keypad to awaken your safe.

D

   The keypad will flash three times and then remain on 

to indicate it is ready to accept a new user code.

A

  Enter a user code that is four, five or six digits long.

B

   A successful programming of the user code is indicated 

when the LED light flashes green three times.

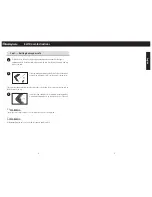
When using your safe, you will ALWAYS need to press any 
button on the keypad to first enable acceptance of your code.

The blue backlights will illuminate to indicate the system 
is active.

Write down your user code, and keep it in a secure location. 

Do not store your code within the safe.

NOTE:

  The user code will not be erased when the battery power is removed.

NOTE:  

If you program a four or five digit user code, then you will need to wait ten seconds until 
your code is accepted. This is only valid during the setup of your safe. If you program a six 
digit user code, then the light will immediately turn green.

NOTE:

  A red light means you are out of sequence.

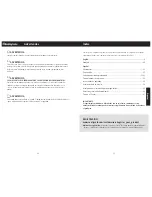
 WARNING

Test your code several times before putting valuables inside.

Programmable Electronic Lock

NOTE:

   Store code and keys in a secure location (other than in the safe).

NOTE:

   Sentry

®

Safe offers a secure on-line location for the entry and retrieval of your code. 

Go to 

www.sentrysafe.com/customercare/register_your_product

 and  

register your safe. 

NOTE:

   The keypad is not numbered – this is for enhanced security.

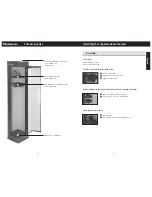
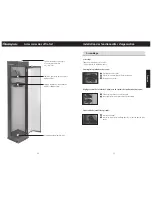
Insert key into keyhole and turn.

Do not lock key into safe – this is an override key and will open 
the safe in the event that you have lost your code.

Turn the handle to the 

left

 (counterclockwise).

A

   Remove the battery pack cover.

B

   Insert four AA alkaline batteries (do not use rechargeable 

batteries or other types of non-alkaline batteries).

C

   Replace the battery pack cover.

The Home Defense Center comes with a built-in code. 
Test the factory code 1, 2, 3, 4, 1.

IMPORTANT
All safe models initially work with the safe code 1, 2, 3, 4, 1. It is therefore important 
to reprogram your safe with a new user code you have personally selected to provide 
maximum security. Please read instructions that follow.

Preparing your safe for first-time use

Programming your safe


1


3


5


1


2


4


6


2

CONFIDENTIAL

Содержание Home Defense Center

Страница 1: ...di au vendredi T l copieur 585 381 2940 Tel fono 585 381 4900 Servicio a clientes 1 800 828 1438 8 00 am 6 00 pm hora del Este lun vier Fax 585 381 2940 Model No Mod le N Modelo No Serial No N de s ri...

Страница 2: ...ll The supplied hardware must be used to bolt the safe to the wall to ensure the necessary level of security Registration www sentrysafe com customercare register_your_product Reasons to register By r...

Страница 3: ...n Note A red light means you are out of sequence WARNING Test your code several times before putting valuables inside Programmable Electronic Lock NOTE Store code and keys in a secure location other t...

Страница 4: ...l from any location inside the safe Wall mount hardware 2 Lag screws 4 Washers mounting and bolting 2 Wall spacers 2 Anchors Tools needed to bolt safe to the wall Drill Wrench 9 32 7 2 mm drill bit fo...

Страница 5: ...e wall spacers will cover the newly created holes There are two separate areas where the safe needs to be bolted Be sure to bolt down the safe at the bottom and the top Install the screws and washers...

Страница 6: ...ews Vertical adjustment for the pistol shelf and the barrel containment system 1 Select the vertical position you desire 2 Pivot the cams to lock into shelf position Preparing your pistol shelf 1 Inse...

Страница 7: ...sentrysafe com Phone Number 1 800 828 1438 Fax 1 585 381 2940 900 Linden Avenue Rochester New York 14625 2784 USA 1 Please go to our website www sentrysafe com to find the necessary replacement form...

Страница 8: ...Fran ais Manuel du propri taire de l unit de s curit pour la maison 14 15...

Страница 9: ...rouill au mur Utilisez la quincaillerie fournie pour attacher le coffre fort au mur alors que vous obtenez le niveau de s curit necessaire Enregistrement www sentrysafe com customercare register_your_...

Страница 10: ...ez pas la s quence de la combinaison AVERTISSEMENT V rifiez votre combinaison plusieurs fois avant de d poser des objets de valeur dans le coffre Serrure lectronique programmable REMARQUE Entreposez l...

Страница 11: ...ulonnant dans le plancher AVERTISSEMENT NE percez PAS depuis l int rieur du coffre fort Ensemble de quincaillerie pour fixation murale 2 tirefonds 4 rondelles monter et verrouiller 2 espaceurs muraux...

Страница 12: ...aceurs couvriront les trous perc s Il est important de fixer le coffre aux deux endroits distincts Assurez vous de fixer le coffre de bas en haut Mettez les vis et les rondelles comme necissit s Mette...

Страница 13: ...tical de la tablette pistolet et du syst me de confinement du canon 1 Choisissez la position verticale souhait e 2 Faites pivoter les cames pour verrouiller la tablette Pr paration de la tablette pist...

Страница 14: ...client le www sentrysafe com Service la client le 1 800 828 1438 Fax 1 585 381 2940 900 Linden Avenue Rochester New York 14625 2784 USA 1 Veuillez visiter notre site Web au www sentrysafe com pour ob...

Страница 15: ...Manual del Due o del Centro de Defensa Residencial Espa ol 28 29...

Страница 16: ...red El hardware suministrado debe ser utilizado a bravo el seguro a la pared para asegurar el nivel necesario de la seguridad Registraci n www sentrysafe com customercare register_your_product Motivos...

Страница 17: ...secuencia ADVERTENCIA Pruebe su c digo varias veces antes de colocar art culos de valor adentro Cerradura electr nica programable NOTA Guarde el c digo y llaves en un lugar seguro que no sea dentro d...

Страница 18: ...raje de montaje de pared 2 tirafondos 4 arandelas montan y cierran 2 espaciadores de pared 2 anclas Herramientas necesarias para apernar la caja fuerte a la pared Taladro Llave Broca de taladro de 7 3...

Страница 19: ...de pared cubrir n los agujeros reci n creados Hay dos reas individuales donde debe apernarse la caja fuerte Cerci rese de apernar la caja fuerte desen abajo hacia arriba Instale los tornillos y las ar...

Страница 20: ...de mariposa Ajuste vertical para la repisa de pistola y sistema de contenci n de ca n 1 Seleccione la posici n vertical que desea 2 Gire las levas para bloquear la repisa en posici n Preparaci n de s...

Страница 21: ...ientes 1 800 828 1438 Fax 1 585 381 2940 900 Linden Avenue Rochester New York 14625 2784 USA 1 Visite nuestro sitio de Internet www sentrysafe com para buscar el formulario de reemplazo necesario Si n...

Страница 22: ...42 43...

Отзывы: