


Collecting Data
142
To locate a feature, simply roll the system back along the same path until the red vertical line is
exactly over the response (usually a hyperbola). You can mark the location of the object on the
ground and push the system forward to continue data collection. Once you reach the point where
you initially started backing-up, the system will continue acquiring new data.
7.1.3
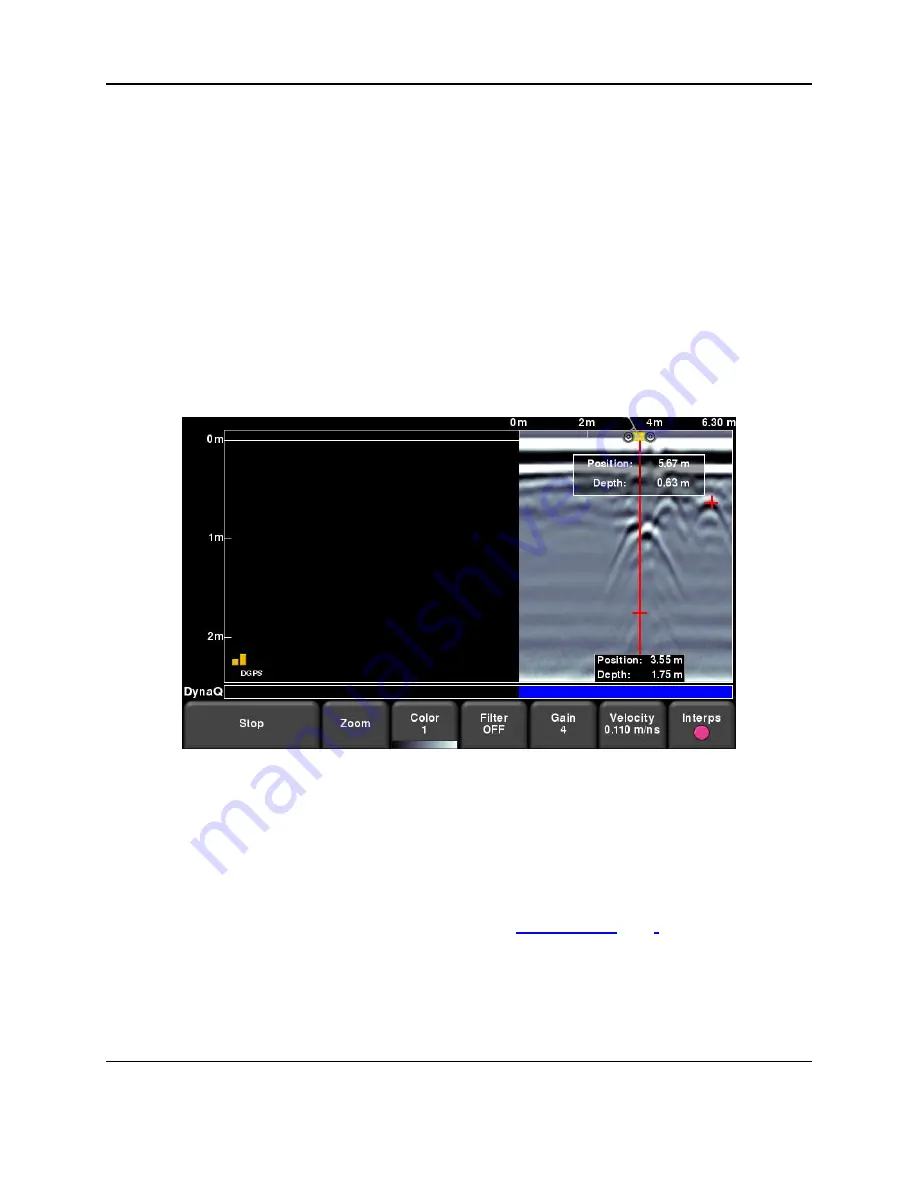
Depth and Position Dialog Box
You can obtain depth and position information anywhere on the Line Scan by touching the screen
and holding for about two seconds. A cross-hair appears where you touched the screen, with a
box displaying the position and depth (Figure 7-9). To get the position and depth information
about a different point on the screen, simply touch and drag the box or cross-hair to the desired
position. This is available regardless of what trigger is selected.
Figure 7-9: Touch the screen for 2 seconds to get depth and horizontal position at any point
7.1.4
Zoom
This button controls the horizontal and vertical scaling of the displayed GPR data. Pressing the
Zoom
button opens a sub-menu with new buttons, which are explained below:
•
Depth
– Pressing
+
and
-
under the
Depth
button allows you to change the maximum
displayed depth (Figure 7-10). This is based on
set in the System
Configuration menu, as well as the currently selected velocity.
Just be clear, the zoom depth setting does not affect the depth (time window) of the
collected data; it only affects the depth
display
of the data. In other words, it is possible
to record data to a depth of 5m but only display the top 3m.
Содержание pulseEKKO
Страница 1: ...2005 00040 09 ...
Страница 2: ...ii ...
Страница 4: ...Warranty Confirmation iv ...
Страница 10: ...x ...
Страница 14: ...Introduction 2 ...
Страница 72: ...Assembling Full Configurations 60 ...
Страница 80: ...Getting Started 68 ...
Страница 116: ...Tools and Preferences 104 ...
Страница 180: ...Collecting Data 168 ...
Страница 185: ...Slice View 173 Figure 8 4 Varying the Grid Lines from top to bottom ON PARTIAL and OFF settings ...
Страница 190: ...Map View 178 ...
Страница 198: ...Managing Data 186 ...
Страница 221: ...Care Maintenance 209 ...
Страница 222: ...Care Maintenance 210 ...
Страница 226: ...Technical Specifications 214 ...
Страница 228: ...Appendix A 216 ...
Страница 234: ...Appendix B 222 ...
Страница 236: ...Appendix C 224 ...
Страница 238: ...Appendix D 226 ...
Страница 246: ...Appendix E 234 ...
Страница 248: ...Appendix F 236 ...
Страница 250: ...Appendix G 238 ...


