ENGLISH -
7/8
t
ELECTRICAL CONNECTIONS
USE OF Z-PC-DINAL ACCESSORY
CAUTION:
When you turn On the module for the first time, the device must be powered
without any interruptions for at least 72 hours in order to charge the internal batteries
Power off the module, using the PS1 button, before connecting the inputs and outputs.
In order to satisfy the electromagnetic compliance requirements:
- use shielded cables for the signals transmission.
- connect the shield to a preferential ground for devices.
- keep the shielded cables at a distance from other cables used for power installations.
(transformers, inverters, motors, induction ovens, etc...).
2
POWERSUPPLY
The power supply must be connected to terminals 2 and 3.
The supply voltage must be between:
.
1 and 40V
(any polarity), or between 19 and 28 V
9
C
A
The upper limits must not be exceeded in order to avoid serious
damage to the module.
The power supply source must be protected from
any malfunctions of the module
appropriately sized safety fuse.
by using an
2
TWO ANALOG INPUTS
Voltage
Current active sensor
Current passive sensor
The module has two
software voltage or
current configurable
analog inputs.
For the configuration
software refer to the
User manual
.
RS485
A
RS485
B
RS485
GND
IDC10
Power supply
AC-
Power supply
AC+
B
A
Don’t turn upside down
don’t force the insertion
the module and
of the IDC10 connector into the
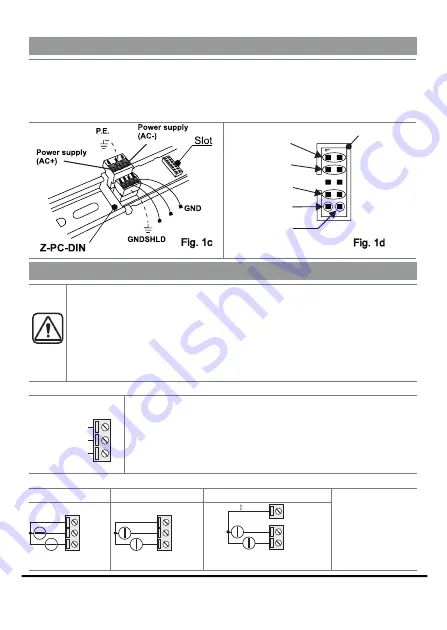
Z-PC-DIN bus. The IDC10 connector located on the rear of the module will be inserted in a free slot of
the Z-PC-DIN accessory. In the figure, you can see the meaning of the various pins of the rear IDC10
connector, if you want to provide the signals directly through this connector. The pictures
and
Fig. 1 c
Fig.1 d
show how to connect the power supply and the RS485 COM1 port to the rear IDC10 connector.
2
1
3
+12V
at 40 mA
C
Auxiliary volt.
Powersupply
Powersupply
19 28V
50 – 60 Hz
–
A
19 40V
6.5W
–
C
4 GND
5 AI1
6 AI2
+
+
4 GND
5 AI1
6 AI2
+
+
5 AI1
6 AI2
1 +12V
(*)
+12V 40mA
(*) Not available without
external powersupply
2 wires
4 wires


![Lambrecht Ser[LOG] Operator'S Manual preview](http://thumbs.mh-extra.com/thumbs/lambrecht/ser-log/ser-log_operators-manual_3390951-001.webp)


