❏
Single sheet paper
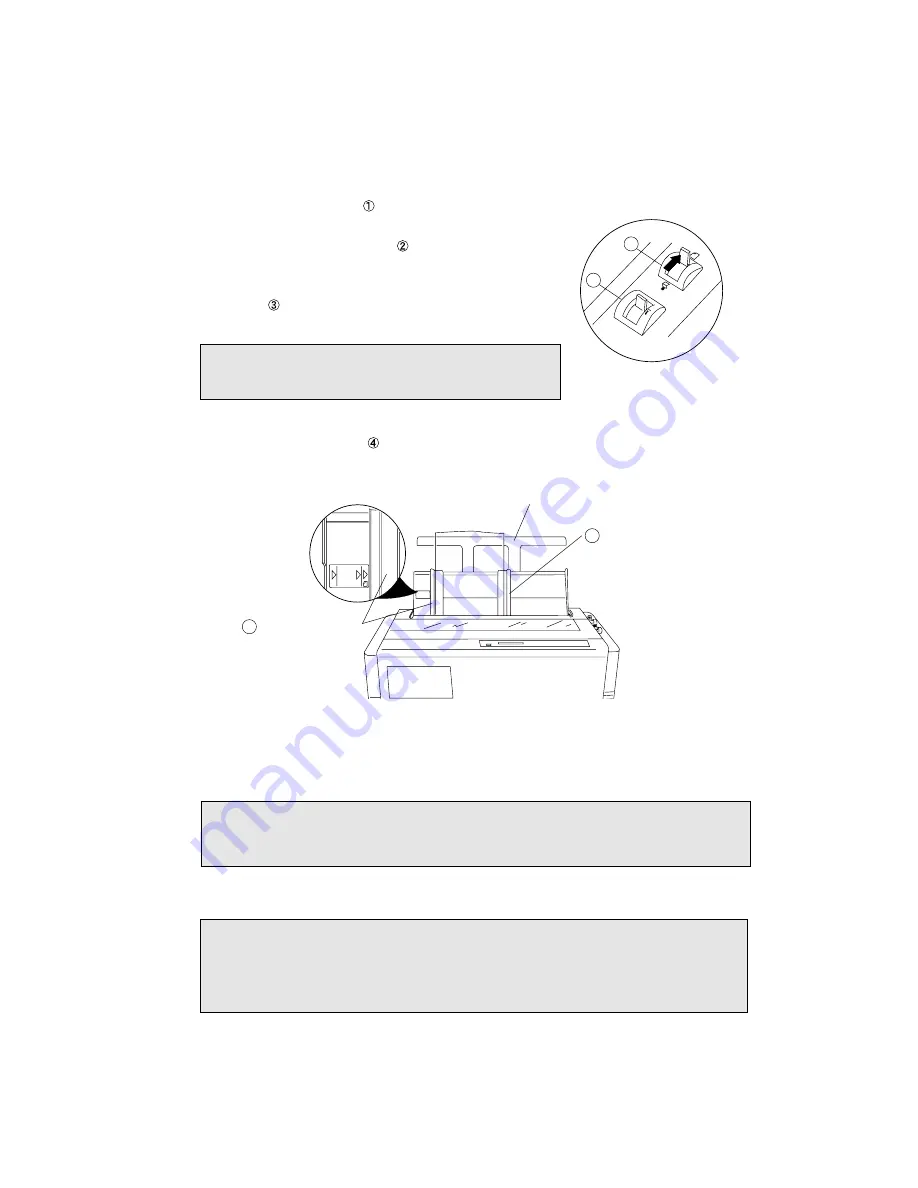
1. Move the paper select lever toward the rear of the printer to the single
sheet setting.
2. Set the print head adjustment lever . In general, position 1 is used
for one-part paper. See page 15.
3. Raise the paper rack to the vertical position and adjust the left
paper guide to the proper position for the size of the paper being
used.
4. Place single sheet paper against the paper rack and let it slide behind the platen.
5. Adjust the right paper guide so that it comfortably holds the paper in between the two paper
guides.
6. Press the
FF
key to load the single sheet paper to the top-of-form position 14/60 inch (6mm) below
the top edge of the paper. The top-of-form position can be adjusted from 0/60 inch to 480/60 inches
(8 inches = 203mm) by using the front panel controls in the basic setup options on page 31.
7. The paper bail automatically lowers to press the paper against the platen when the leading edge of
the paper feeds more than one inch onto the platen.
Note
If the paper is not loaded on the proper mark, the printer may
not detect the paper and will display
PAPER ERROR.
Note
If the paper is not completely fed in, slightly push the paper downward. If it is still not fed in,
look in the TROUBLESHOOTING section.
Notes
1. Extension Arm
The extension arm is used to keep large size (Legal, B4) single sheets from falling behind the
paper rack. When using the extension arm, pull the arm until it clicks and locks in place.
2.
TEAR OFF
key is invalid with single sheet paper.
1
2
A3
B4
Paper Size Marker
Left Paper Guide
Extension Arm
Right Paper Guide
3
4
14
2. Setting up


