


4
3. SC-16DS Installation
3.1 Precaution & Important Notice
Make sure not to supply the power to the main unit before install it.
Avoid any heavy impact, which cause the malfunctions.
Avoid the place where the magnetic material, radio wave such as radio,
TV, etc.
Do not install or use the main unit in an environment where the humidity
is high.
This installation should be made by a qualified service person and should
conform to all local codes.
It should be placed at the open space with the proper temperature and
humidity, and the distance from the wall is at least 15cm.
Keep this main unit out of the direct rays of the sun.
If there is any smell and smoke at the main unit, please stop supplying
the power and kindly contact our service center.
If the power is not turned on, please check the power cord whether it is
connected well or not.
In case nothing appears on the screen, please check the video signal
line connection.
In case the recorder is not working, please check the VCR connection
first and then video tape as well.
If you meet any other trouble not in the above, please contact our
service center.
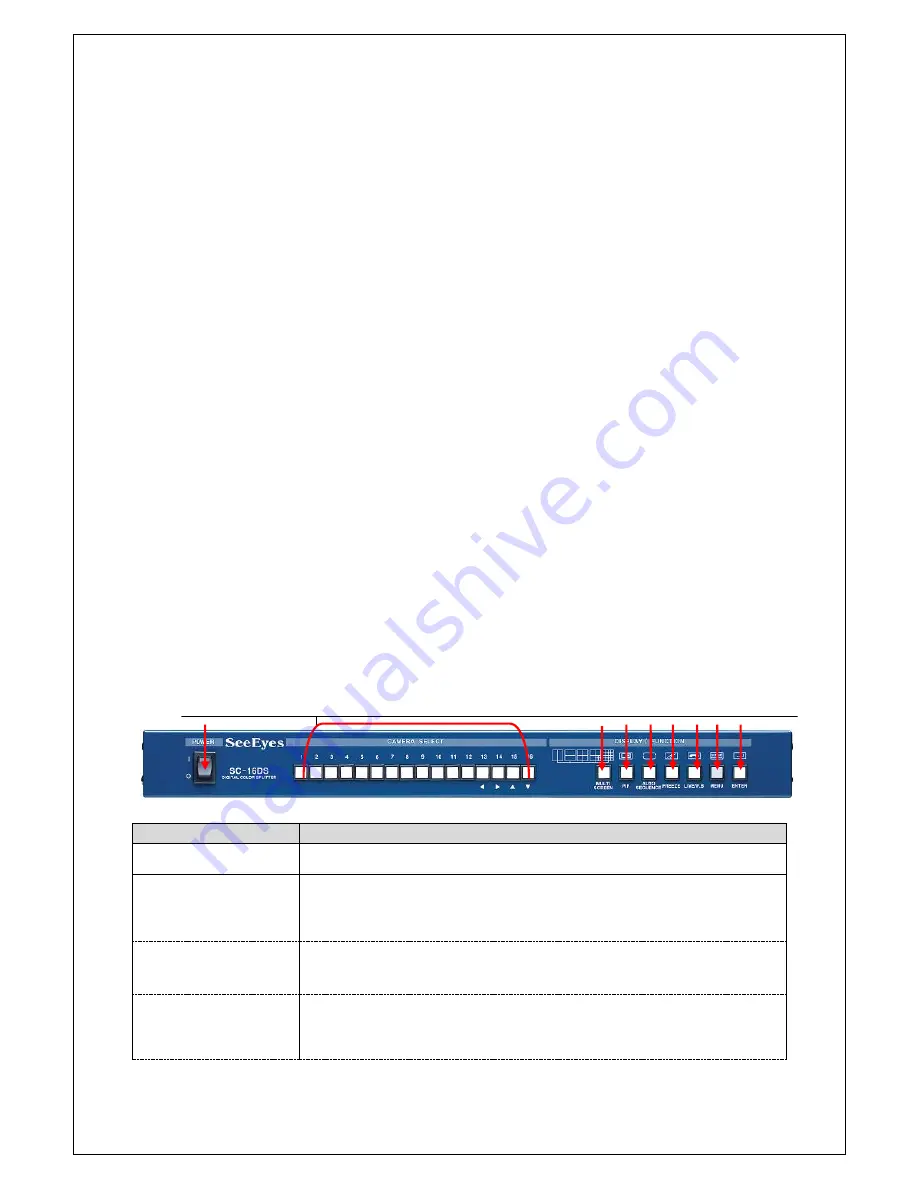
3.1.1 Front Side
Please connect the camera, VCR, monitor as below pictures.
Camera Connection
BUTTON
FUNTIONS
①
POWER SW
Power ON / OFF switch
②
CAMERA SELECT
Full screen displays one by one whenever press each button. The
button number 13, 14, 15 & 16 are also used as the direction
key ; 13 for left, 14 for right, 15 for upper and 16 for below.
③
MULTI
SCREEN
Whenever press the button the screen divide 2, 4, 7, 9 & 16
displays in sequence.
④
PIP
POP UP screen displays when press “PIP” button at full screen.
Press this button again continuously, each camera displays in
sequence. To exit “PIP” mode, press this button long.
① ② ③ ④ ⑤ ⑥ ⑦ ⑧ ⑨
C
C
A
A
M
M
E
E
R
R
A
A
S
S
E
E
L
L
E
E
C
C
T
T
각
각
채
채
널
널
에
에
해
해
당
당
되
되
는
는
버
버
튼
튼
을
을
누
누
르
르
면
면
해
해
당
당
채
채
널
널
을
을
F
F
U
U
L
L
L
L
화
화
면
면
으
으
로
로
D
D
I
I
S
S
P
P
L
L
A
A
Y
Y
하
하
게
게
됩
됩
니
니
다
다
.
.


