15
Set-up, accessory naming and fault finding via remote diagnostics |
Set
Set
Set
Set-
-
-
-up, accessory naming and fault finding via
up, accessory naming and fault finding via
up, accessory naming and fault finding via
up, accessory naming and fault finding via
remote diagnostics
remote diagnostics
remote diagnostics
remote diagnostics
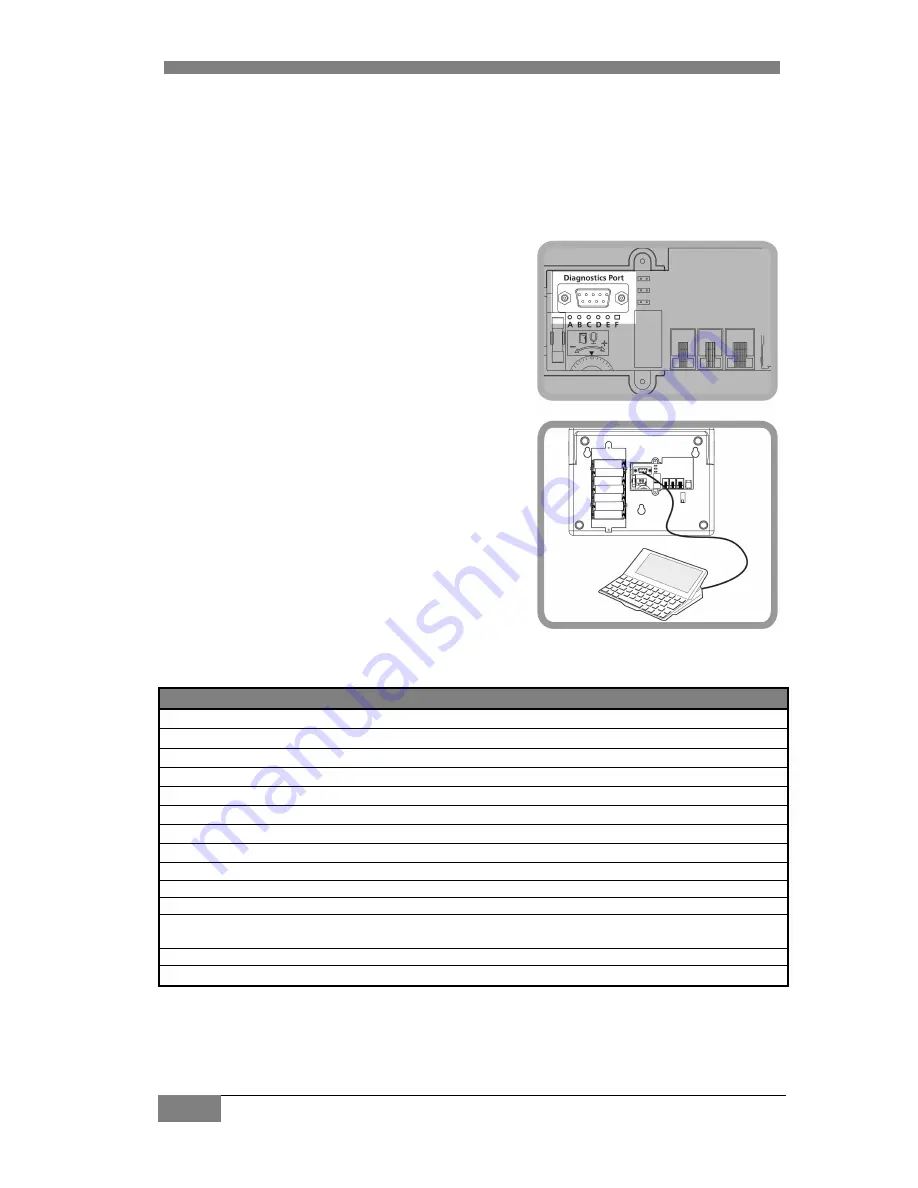
Set-up, accessory naming and fault finding can be made via the
“data out” terminal with a laptop computer.
Remove the rear cover at the back of the alarm and plug the
link cable into the “diagnostic port” plug. Take note of the
polarity. Plug the other end of the cable into a laptop computer
and ensure that the alarm is powered-up. (fig.25 & 26)
Set-up
There are various terminal programs that can used to connect
to the alarm system, we recommend using Teraterm Pro which
is available from this site
http://www.brothersoft.com/tera-term-pro-10856.html
Set the remote terminal program to the following settings:
Com ? (Check in Device Manager to get the Com port number)
Bits per second: 19,200
Data bits: 8
Parity: none
Stops bits: 1
Flow control: none
Command line interface
Open up the correct terminal program. Once you have the terminal window open enter “help” and you will
see the menu displayed below:
Enter: ?
Help
This help
?
This help
h
Alarm history
Clr
Clear history
Acc
List radio accessory
Name
<acc#> <name> Name the accessory
Chime
<Acc#> Accessory chime on/off
Erase
<Acc#> Erase the accessory
erase-all
Erase all radio accessories
Quiet
Switch Quiet Pre-Alarm switch on/off
anti-jam
Switch Anti-Jam on/off
Serial switches
Quiet pre-alarm
OFF
Anti-Jam
ON
Chime:
If this function is enabled for any accessory radio or wired, then while the Alarm is not armed any trigger
from this device will sound a quiet bleep to indicate it has been triggered.
fig.25
fig.26


