


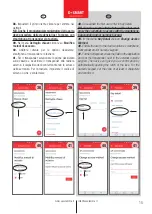

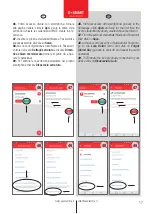

INSTALLAZIONE
Prima di procedere, effettuare la ricarica completa della
batteria (fino all’accensione del led verde sul caricabat-
teria).
1.
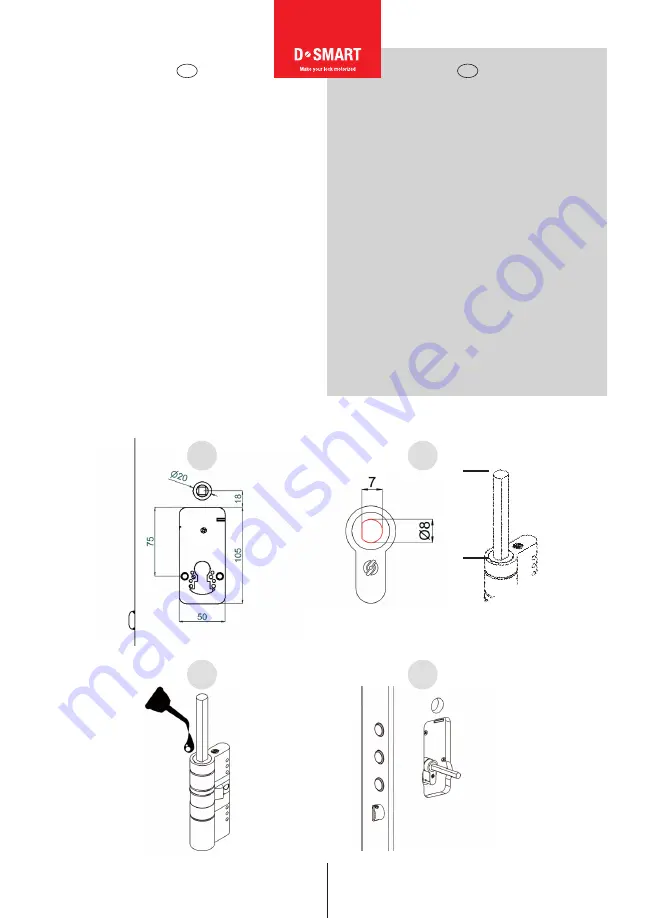
Eseguire un taglio nel pannello interno come in fig. 1,
avente dimensioni di 50 x 105 mm, per alloggio gruppo
motore. Ritagliare la dima in carta disponibile a pag. 21
e posizionarla sul pannello interno porta. Sul pannello
lato esterno predisporre un foro da 20 mm solo se in
possesso della tastiera esterna-lettore di transponder,
inserire il cavo dal lato esterno verso il taglio interno e
collegare il cavo nella scheda elettronica in posizione 3
(vedi pag. 3).
2.
Utilizzare un cilindro con il gambo rasabile “prefe-
ribilmente Securemme” e assicurarsi delle dimensioni.
3.
Per un buon funzionamento del prodotto, si racco-
manda la lubrificazione del gambo nella zona di rotazione.
4.
Montare il cilindro sulla serratura e fissarlo.
www.securemme.it
INSTALLATION
Before you proceed, fully recharge the battery (until the
led on the charger becomes green).
1.
Make a cut in the inner panel as shown in fig. 1, having
dimensions of 50 x 105 mm, to housing the motor unit.
Cut out the paper template available on page 21 and
place it on the inner door panel. On the external panel
prepare a 20 mm hole only if you have the external
numeric keypad-transponder reader, insert the cable
from the external side to the internal cut and connect
the cable to the circuit board in position 3 (see page 3).
2.
Use a cylinder with knob predisposition (preferably a
Securemme one) and make sure that the size is correct.
3.
For a correct operation of the product, the lubrification
of the stem in the rotation area is recommended.
4.
Install the cylinder on the lock and fix it.
5
LATO INTERNO
INTERNAL SIDE
Foro maniglia
Handle hole
1
2
3
4
IT
EN
min.
52 mm
Содержание DSMART
Страница 1: ...SMART ...
Страница 24: ... ...


