


Latest products and information available at www.sealite.com
10
TRIDENT-3000-HEX with hexagonal aluminium tower
3000mm dia. Ocean Buoy
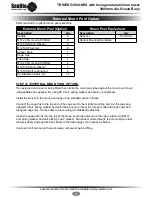
Parts required for solar panel assembly:
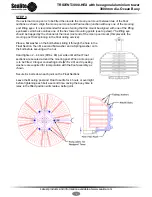
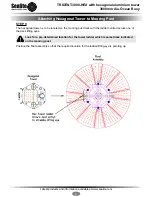
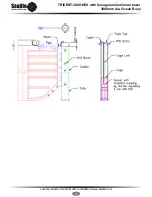
STEP 7
Insert UV-stabilized cable ties in locations which are to be covered by a solar panel. Install solar
panels using M10 Socket Head Cap Screw, 2 x flat washers, a spring washer and plain nut (6 places
each panel). Route cables towards base of tower (or planned location of battery regulator) and tie in
position using supplied cable ties. Loop surplus cable and secure somewhere inside tower and out of
harm’s way.
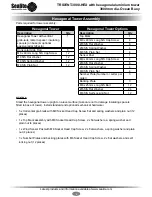
Solar Panel Assembly
Solar Panels (2 x 90W)
Description
Qty
Solar Panel (90W) fitted with mounting plates.
2
M8 x 40mm Long S/S Cap Screw
12
Ø8 S/S Flat Washer
24
Ø8 S/S Spring Washer
12
M8 S/S Plain Nut
12
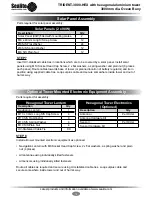
Optional Tower Mounted Electronic Equipment Assembly
Parts required for assembly:
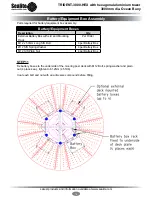
STEP 8
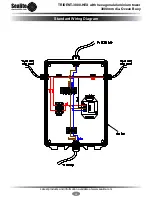
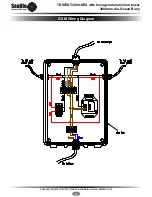
Install all tower mounted electronic equipment as optioned.
• Navigation Lantern with M8 Socket Head Cap Screw, 2 x flat washers, a spring washer and plain
nut (4 places)
• All antennae using individually kitted fasteners
• All sensors using individually kitted fasteners
Route all cables as required and secure using UV-stabilized cable ties. Loop surplus cable and
secure somewhere inside tower and out of harm’s way.
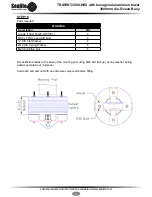
Hexagonal Tower Lantern
Description
Qty
Navigation Lantern
1
M10 x 30mm Long S/S Cap Screw
4
Ø10 S/S Flat Washer
8
Ø10 S/S Spring Washer
4
M10 S/S Plain Nut
4
UV-Stabilized Cable Tie
90
Hexagonal Tower Electronics
(Optioned)
Description
Qty
A
Per Order
Antenna Hardware Kit
Per Order
Sensor Hardware Kit
Содержание TRIDENT-3000-HEX
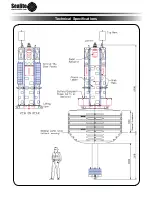
Страница 2: ...Technical Specifications ...


