


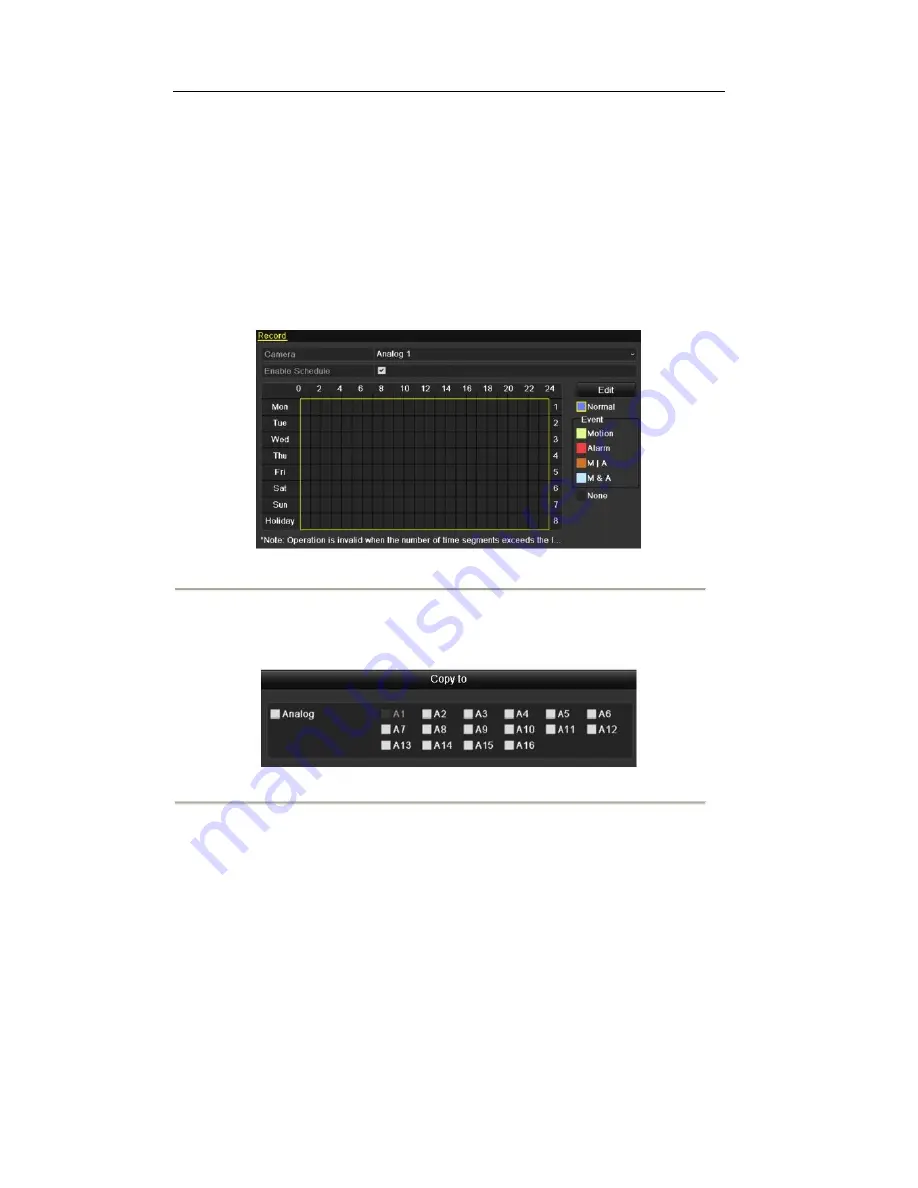
Task 2: Draw the Schedule
Steps:
1) Click the icon on the right to select a record type. Different recording types are available for
different models.
Most models support: Normal, Motion, Alarm, Motion/Alarm and Motion & Alarm.
Note:
To enable Motion triggered recording, you must configure the motion detection settings. For
detailed information, refer to
Chapter 8.1
and
Chapter 8.2
.
2) Use the mouse to drag and draw time periods.
Note:
Up to 8 periods can be configured for each day.
Figure 5. 10 Draw the Schedule
3) You can repeat the above steps to set schedule for other channels. If the settings can also be used to
other channels, click
Copy
to enter the Copy Camera interface and then choose the channel to
which you want to copy.
Figure 5.11 Copy Schedule to Other Channels
4) Click
Apply
in the Record Schedule interface to save the settings.
52
Содержание The Econ D1
Страница 1: ...SCW Support 866 414 2553 User Manual for The Econ D1 Standard Pro line of DVRs...
Страница 12: ...C HAPTE R 1 Introduction 11...
Страница 22: ...C HAPTE R 2 GettingStarted 21...
Страница 27: ...C HAPTE R 3 LiveView 26...
Страница 38: ...C HAPTE R 4 PTZControls 37...
Страница 47: ...C HAPTE R 5 RecordSettings 46...
Страница 68: ...C HAPTE R 6 Playback 67...
Страница 86: ...Figure 6 33 Interface of Playback by Log 85...
Страница 91: ...CHAPTER7 Backup 90...
Страница 105: ...Check for compatibility from vendor Figure 7 28 USB Writer Management 104...
Страница 106: ...CHAPTER8 AlarmSettings 105...
Страница 118: ...CHAPTER9 NetworkSettings 117...
Страница 136: ...CHAPTER10 HDDManagement 135...
Страница 138: ...Figure 10 3 HDD Status Changes to Normal Note Initializing the HDD will erase all data on it 137...
Страница 151: ...C H A P T E R 11 CameraSettings 150...
Страница 155: ...CHAPTER12 DeviceManagementandMaintenance 154...
Страница 158: ...Figure 12 4 HDD Information Interface 157...
Страница 166: ...CHAPTER13 Others 165...
Страница 178: ...CHAPTER14 Appendix 177...


