background image

Connecting the 8300HDC

To connect your 8300HDC to your entertainment devices, complete these steps.

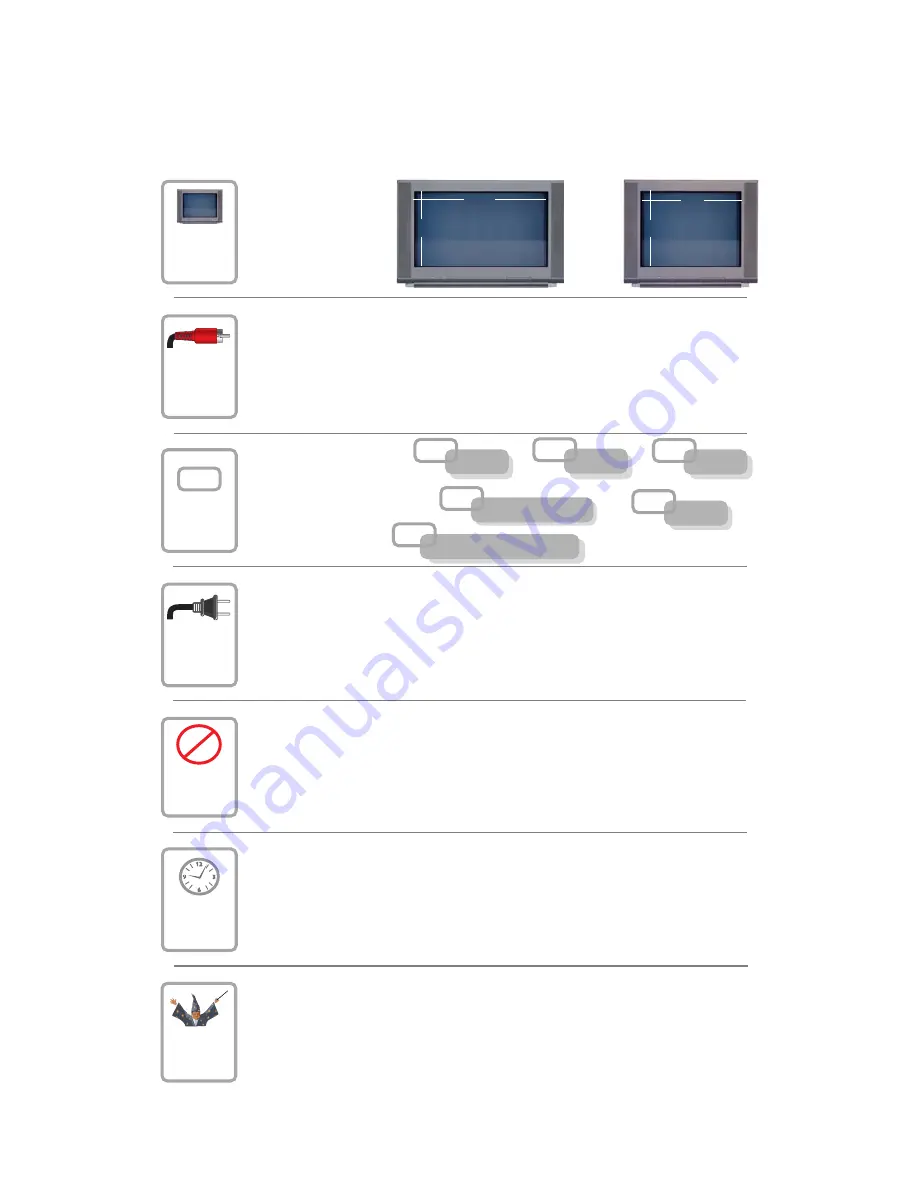
Identify the additional

devices you will connect

to the 8300HDC and TV.

See pages 

9

 through

1

4

 and the related user

guides for more

information.

VCR

DVD

D-VCR

Determine if your TV

is HD or SD and

whether it is wide

screen (16:9) or

standard screen

(4:3). 

See page 

8

for more information.

Home Theater

4

3

16

9

or

Make the connections for your TV and VCR as follows:
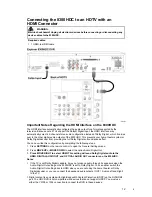
• If you are using an HDTV, 

see page 

5

 and the connection diagrams at the end

of  this guide.

• If you are using an SDTV, 

see page 

5

 and the connection diagrams at the end

of  this guide.

• If you want to archive some programs to VCR tape, 

see pages 

5

 and the

connection diagrams at the end of this guide.

D

3

1

2

4

Plug the 8300HDC and the TV into an AC power source that is not controlled

by a switch.

5

Do not turn on the 8300HDC or TV yet.

POWER

6

It may take several minutes for the 8300HDC to receive the latest sof tware,

programming, and service information. Wait until you see one of the following displays

on the front panel of the 8300HDC that indicates that the update is complete:
• Current time

• Four dashes (- - - -)

Note

: If four dashes are displayed, you must call your cable service provider to get

the 8300HD authorized.

7

Set up your set-top for HDTV by completing the 

HD Setup Assistant

:

• Make sure the 8300HDC and the TV is 

On

.

•  Follow the on-screen instructions to complete the 

HD Setup Assistant

. Set up Widescreen

(16:9) or standard screen (4:3) depending upon your TV type. See page 8 for more

information on the aspect ratio.


                  • At the conclusion of the on-screen instructions, begin watching TV.

5

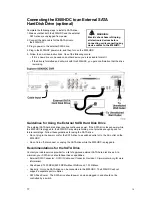
External SATA Drive

Other

4

Содержание Explorer 8300HDC

Страница 1: ...Connecting the Explorer 8300HDC TM Digital Video Recorder 1...

Страница 2: ...pay per view 7 IR Sensor Receives the infrared signal from the remote control 8 LED Display Displays the selected channel number and time of day The LED also displays the following Message HDTV Power...

Страница 3: ...l audio device 8 S Video Out Connect an S Video cable to send an S Video signal to your TV or VCR This signal is standard definition but higher quality than other SDTV connections 9 IR This connector...

Страница 4: ...end of this guide D 3 1 2 4 Plug the 8300HDC and the TV into an AC power source that is not controlled by a switch 5 Do not turn on the 8300HDC or TV yet POWER 6 It may take several minutes for the 8...

Страница 5: ...tches the full capabilities of your HDTV See the connection diagram on page 11 for an example The HDMI connector can provide the connection to an HDTV with a DVI input If your HDTV has a Digital Visua...

Страница 6: ...reen type and resolution No Color Verify that the current TV program is broadcast in color Adjust the TV color controls If you are using a component video connection PrPbY V check that all connectors...

Страница 7: ...et using an antenna to receive over the air signals What is High Definition Television High definition television HDTV is a completely new way to send and receive television broadcast signals HDTV ima...

Страница 8: ...identified by the number of display lines on the screen The techniques that an HDTV uses to paint the picture on the screen are referred to as progressive and interlaced With the progressive method e...

Страница 9: ...tion Audio Digital Out 3 Press MOVE RIGHT to select HDMI This setting will send Dolby Digital audio to the HDMI DIGITAL AUDIO OUT and OPTICAL AUDIO OUT connectors on the 8300HDC Notes If the TV is not...

Страница 10: ...s encrypted with High Bandwidth Content Protection HDCP on the DVI HDMI port The HDC DVR is not compatible with devices that do not support HDCP You must use either the YPrPb or 1394 connection which...

Страница 11: ...h Component Input PrPbY V Required cables 1 set component video cables PrPbY V 1 audio Left Right cable 14 WARNING Electric shock hazard Unplug all electronic devices before connecting or disconnectin...

Страница 12: ...2 AUDIO IN ON OFF IN HD 1 S VIDEO VIDEO Y PB PR L R AUDIO AUDIO Back of Home Theater Receiver VIDEO COMPONENT VIDEO 1 Y PB PR 2 Y PB PR Y PB PR L R AUDIO S VIDEO DIGITAL AUDIO TV CABLE 1 2 3 4 VIDEO...

Страница 13: ...posite A V cables 16 WARNING Electric shock hazard Unplug all electronic devices before connecting or disconnecting any device cables to the 8300HDC Note This connection allows for archiving to the VC...

Страница 14: ...may stop recording or not provide enough sp ace for future recordings Follow these guidelines for using the SATA drive Do not plug in the power cord for the SATA drive to a switched outlet or to the A...

Страница 15: ...rt Echo displays the Output Formats tab Passport Echo will display a message in each of four output formats 2 If the message is clearly visible press the RIGHT ARROW to continue You can press the Back...

Страница 16: ...OW Passport Echo displays the Screen Type tab 5 Do one of the following If you are watching a wide screen TV press the A key If you are watching a standard screen TV press the C key This procedure use...

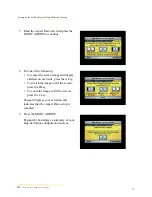
Страница 17: ...wing To center the screen image and display sidebars on each side press the A key To stretch the image to fill the screen press the B key To zoom the image to fill the screen press the C key Passport...

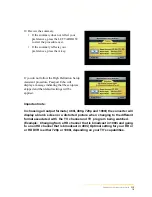
Страница 18: ...ing that the setup was skipped and that default settings will be applied Important note In choosing all output formats 480i 480p 720p and 1080i the converter will display a blank screen or a distorted...

Отзывы: