17
3. Settings.
Settings and adjustments to the product or accessories may only be made
by people who have been given the necessary instructions by a medical
product advisor. Please ensure that none of the user's extremities are in the
respective area when making adjustments of any kind to minimise the risk of
injury.
3.1 Presettings
The
momo tricycle.
is supplied completely as-
sembled. Prior to initial use, however, the fol-
lowing pre-settings must be made.
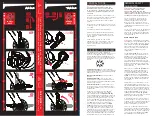
3.1.1 Handlebar adjustment
You can find our scope of delivery for hand-
lebars on page 11 of these Instructions for use.
Height of handlebars
To adjust the height of the handlebars, remove
the protective cap from the hexagon socket
(
A
), loosen the hexagon socket (
A
) and adjust
the stem (
B
) to the required height. By tap-
ping the head of the hexagon socket (
E
) light-
ly with a hammer, the stem in the fork steerer
will loosen. Then re-tighten the hexagon so-
cket.
Ensure that the marking for the minimum inser-
tion depth (C) remains on the stem in the fork
steerer and therefore cannot be seen.
Handlebar adjustment
To adjust the handlebar position, loosen the
clamping screws (
D
), bring the handlebars
into the required position and then firmly
re-tighten the clamping screws (
D
). To change the tilt angle on the stem,
please loosen the clamping screw (
F
). The steerer factory setting is 20°. In
this way you can change the distance between the saddle and the hand-
lebars, and adjust the required handle height. Then firmly re-tighten the
screws again.
After each adjustment, please retighten all screw connections!
After adjustment of the handlebars, there must still be no tension placed on the
brake cables. If necessary, extend the cables!
F
D
A
D
B
E
C


