background image

• 19 •

7.3  UTILIZANDO LA LUZ LED

1.  Deslice el interruptor ON / OFF a la posición ON.

2.  Mantenga presionado el botón de pantalla   durante 3 segundos. 

3.  Una vez que la luz LED está encendido, presione y suelte el botón   

para cambiar entre los siguientes modos: 

• 

Resplandor de constante

• 

Parpadeará como una señal de SOS

• 

Parpadeará como una de luz estroboscópica

4.  Cuando termine de usar la luz del LED, mantenga pulsado el botón   

hasta que la luz se apague. 

5.  Deslice el interruptor ON / OFF a la posición OFF.

6.  Cargue la unidad tan pronto sea posible, después de usarse.

8.  INSTRUCCIONES DE MANTENIMIENTO

8.1  Después de usar la unidad y antes de hacerle mantenimiento, 

desenchúfela y desconéctela.

8.2  Use un paño seco para limpiar cualquier suciedad o grasa de 

loscargadores, de los cables y del estuche.

8.3  No abra la unidad, ya que no hay partes que el usuario; cualquier 

reparación o mantenimiento debe ser realizado por personal técnico 

cualificado.

9.  INSTRUCCIONES DE ALMACENAMIENTO

9.1  Cargue la batería a plena capacidad antes de su almacenamiento.

9.2  Almacene la unidad a temperaturas entre -20 °C-+60 °C (-4 °F-+140 °F).

9.3  Nunca descargue completamente la batería.

9.4  Cargue después de cada uso.

9.5  Cargue al menos una vez al mes, si no en el uso frecuente, para 

evitar la sobre-descarga.

10.  RESOLUCIÓN DE PROBLEMAS

Arrancador

PROBLEMA

SOLUCIÓN

La pantalla del arrancador no 

se enciende.

Asegúrese de que la unidad está cargada.

Conecte a una fuente de alimentación, para 

restablecer.

Asegúrese de que el interruptor ON / OFF 

está en la posición ON.

El símbolo del 

termómetro esta 

parpadeando. 

La unidad está demasiado caliente o fría. 

El símbolo del termómetro desaparecerá 

cuando se elimine la condición.

El arrancador no se recarga. Asegúrese de que la fuente de alimentación 

esté activa.

Содержание SL1314

Страница 1: ... effectively Please read and follow these instructions and precautions carefully POR FAVOR GUARDE ESTE MANUAL DEL PROPIETARIO Y LEER ANTES DE CADA USO En este manual se explica cómo utilizar la unidad segura y efectiva Por favor lea y siga las siguientes instrucciones y precauciones ESSAYER DE GARDER LE MANUEL D INSTRUCTIONS ET LE LIREAVANT CHAQUE UTILISATION Ce manuel explique comment utiliser l ...

Страница 2: ...CATIONS 11 REPLACEMENT PARTS 12 LIMITED WARRANTY 12 WARRANTY CARD 33 CONTENIDOS INSTRUCCIONES IMPORTANTES DE SEGURIDAD 13 PRECAUCIONES DE SEGURIDAD PERSONAL 14 PREPARACIÓN PARA EL USO 15 SIGA ESTOS PASOS CUANDO SE CONECTE A LA BATERÍA 15 CARACTERÍSTICAS 16 CARGAR ELARRANCADOR 16 INSTRUCCIONES DE OPERACIÓN 17 INSTRUCCIONES DE MANTENIMIENTO 19 INSTRUCCIONES DE ALMACENAMIENTO 19 RESOLUCIÓN DE PROBLEM...

Страница 3: ...5 SUIVEZ CES ÉTAPES LORSQUE CONNEXION À UNE BATTERIE 25 CARACTÉRISTIQUES 26 CHARGE LE DÉMARREUR 26 CONSIGNES D UTILISATION 27 CONSIGNES D ENTRETIEN 29 INSTRUCTIONS DE STOCKAGE 29 TABLEAU DE DÉPANNAGE 29 AVANT DE RETOURNER POUR LES RÉPARATIONS 31 SPÉCIFICATIONS 31 PIÈCES DE RECHANGE 31 GARANTIE LIMITÉE 32 CARTE DE GARANTIE 35 ...

Страница 4: ...rporation for the SL1314 may result in a risk of fire electric shock or injury to persons or damage to property 1 6 To reduce the risk of damage to the electric plug or cord pull by the adaptor rather than the cord when disconnecting the unit 1 7 Do not operate the unit with damaged cables or clamps 1 8 Do not operate the unit if it has received a sharp blow been dropped or otherwise damaged in an...

Страница 5: ...ng soda nearby for use in case battery acid contacts your eyes skin or clothing 2 8 Wear complete eye and body protection including safety goggles and protective clothing Avoid touching your eyes while working near the battery 2 9 If battery acid contacts your skin or clothing immediately wash the area with soap and water If acid enters your eye immediately flood the eye with cold running water fo...

Страница 6: ...tal part of the battery clips or cut the insulation of the cables 4 3 Stay clear of fan blades belts pulleys and other parts that can cause injury 4 4 Check the polarity of the battery posts The POSITIVE POS P battery post usually has a larger diameter than the NEGATIVE NEG N post 4 5 Determine which post of the battery is grounded connected to the chassis If the negative post is grounded to the c...

Страница 7: ...age of charge Afully charged internal battery will read 100 Charge the internal battery if the display shows it is under 85 2 To reduce the risk of electric shock unplug the unit s charging cable from a USB or wall charger before attempting any maintenance or cleaning Simply turning off the controls will not reduce this risk 3 When charging the internal battery work in a well ventilated area and d...

Страница 8: ...ded post of the battery Connect the NEGATIVE BLACK clamp to the vehicle chassis or engine block away from the battery Do not connect the clamp to the carburetor fuel lines or sheet metal body parts Connect to a heavy gauge metal part of the frame or engine block 5 For a positive grounded vehicle connect the NEGATIVE BLACK clamp from the jump starter to the NEGATIVE NEG N ungrounded post of the bat...

Страница 9: ...the cable approved by your mobile device manufacturer Consult your mobile device manufacturer for proper charging power specifications Connect a mobile device cable to the appropriate USB port 2 Slide the ON OFF switch to the ON position Charging should begin automatically The display will show which port is in use 3 Charging time will vary based on the mobile device s battery size and the chargin...

Страница 10: ...witch is set to the ON position The thermometer symbol is flashing The unit is too hot or cold The thermometer symbol will disappear when the condition is removed The jump starter will not recharge Make sure the power source is live The jump starter turns on but won t jump start my vehicle Check connections Verify the charge level of the jump starter is at least 40 Do not attempt to jump start you...

Страница 11: ...r assistance services schumacherelectric com www batterychargers com or call 1 800 621 5485 For REPAIR OR RETURN contact Customer Service at 1 800 621 5485 DO NOT SHIP UNIT until you receive a RETURN MERCHANDISE AUTHORIZATION RMA number from Customer Service at Schumacher Electric Corporation When returning an item place the original package into a shipping carton If you received an emailed label ...

Страница 12: ...d by anyone other than Manufacturer or if this unit is resold through an unauthorized retailer Manufacturer may void this Limited Warranty if a warranty may be void if removed label is removed from the product Manufacturer makes no other warranties including but not limited to express implied or statutory warranties including without limitation any implied warranty of merchantability or implied wa...

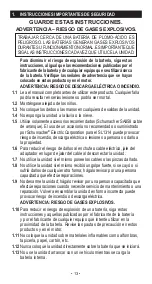
Страница 13: ...1314 puede provocar riesgo de incendio descarga eléctrica o lesiones a personas o daño a la propiedad 1 6 Para reducir el riesgo de daños al enchufe o cable eléctrico jale del adaptador en lugar de jalar del cable al desconectar la unidad 1 7 No utilice la unidad si el mismo posee los cables o las pinzas dañado 1 8 No utilice la unidad si el mismo recibió un golpe fuerte si se cayó o si sufrió dañ...

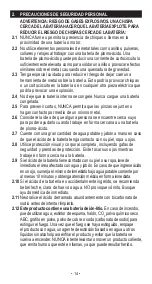
Страница 14: ...o 2 7 Cuente con una gran cantidad de agua potable y jabón a mano en caso de que el ácido de la batería tenga contacto con su piel ropa u ojos 2 8 Utilice protección visual y corporal completa incluyendo gafas de seguridad y prendas de protección Evite tocar sus ojos mientras trabaje en forma cercana a la batería 2 9 Si el ácido de la batería tiene contacto con su piel o su ropa lave de inmediato ...

Страница 15: ...ños a la cubierta a la puerta y a las piezas móviles o calientes del motor NOTA Si es necesario cerrar el cofre durante el proceso de arranca asegúrese que el cofre no toque parte metálica de la batería o pele los cables 4 3 Manténgase alejado de las paletas del ventilador correas poleas y otras piezas que podrían provocar lesiones 4 4 Verifique la polaridad de los bornes de la batería El borne PO...

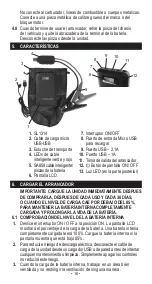
Страница 16: ...rte posterior 6 CARGAR EL ARRANCADOR IMPORTANTE CARGUE LA UNIDAD INMEDIATAMENTE DESPUES DE COMPRARLA DESPUES DE CADA USO Y CADA 30 DÍAS O CUANDO EL NIVEL DE CARGA CAE POR DEBAJO DEL 85 PARA MANTENER LA BATERÍA INTERNA COMPLETAMENTE CARGADA Y PROLONGAR LA VIDA DE LA BATERÍA 6 1 COMPROBACIÓN DEL NIVEL DE LA BATERÍA INTERNA 1 Deslice el interruptor ON OFF a la posición ON La pantalla LCD mostrará el ...

Страница 17: ...arrancador mientras se carga su batería interna IMPORTANTE Utilización de la función arranque del motor sin una batería instalada en el vehículo dañará el sistema eléctrico del vehículo NOTA La batería interna debe tener un cargo si al menos el 40 para iniciar un vehículo 1 APAGUE el motor 2 Conecte el cable de las pinzas de la batería a la toma de salida del arrancador 3 Ponga los cables de CD le...

Страница 18: ...l motor IMPORTANTE NO intente poner en marcha su vehículo más de tres veces consecutivas Si el vehículo no arranca después de tres intentos consulte a un técnico de servicio 8 Después de arrancar el motor desconecte la pinza negro y la pinza roja en ese orden y luego desenchufe las pinzas de la batería desde el arrancador 9 Cargue la unidad tan pronto sea posible después de usarse 7 2 CARGADE UN D...

Страница 19: ...tuche 8 3 No abra la unidad ya que no hay partes que el usuario cualquier reparación o mantenimiento debe ser realizado por personal técnico cualificado 9 INSTRUCCIONES DE ALMACENAMIENTO 9 1 Cargue la batería a plena capacidad antes de su almacenamiento 9 2 Almacene la unidad a temperaturas entre 20 C 60 C 4 F 140 F 9 3 Nunca descargue completamente la batería 9 4 Cargue después de cada uso 9 5 Ca...

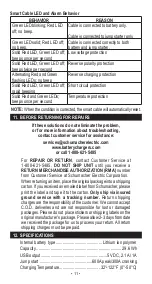
Страница 20: ... alto voltaje falso de la batería pero la protección de carga inversa no se activó El usuario puede girar la llave para arrancar el motor del vehículo LED del cable inteligente y comportamiento de la alarma COMPORTAMIENTO RAZÓN LED verde parpadeando LED rojo apagado no bip El cable está conectado solamente a la batería El cable está conectado al arrancador solamente LED verde sólido LED rojo apaga...

Страница 21: ...número de seguimiento El cargo por el envío de devolución son responsabilidad del cliente No podemos aceptar entregas C O D y no somos responsables de los paquetes perdidos o dañados Por favor no coloque calcomanías o etiquetas de envío en el paquete original del fabricante Por favor necesitamos 2 3 días a partir de la fecha que recibimos el paquete para que podamos procesar su declaración Todos l...

Страница 22: ...oducto El Fabricante no realiza ninguna otra garantía incluidas a título enunciativo las garantías expresas implícitas o legales incluidas a modo de ejemplo las garantías implícitas de comerciabilidad o adecuación a un fin específico Asimismo el Fabricante no será responsable ante reclamos por daños accidentales especiales ni directos en los que incurran los compradores usuarios u otras personas a...

Страница 23: ...cessoires non recommandés ou vendus par Schumacher Electric Corporation pour le SL1314 peut engendrer un risque d incendie un choc électrique ou des blessures 1 6 Pour réduire le risque d endommager le cordon électrique tirez sur la adaptateur plutôt que sur le cordon quand vous débranchez l unité 1 7 Ne pas utiliser l appareil avec des câbles ou des pinces endommagées 1 8 Ne pas faire fonctionner...

Страница 24: ...eau fraîche et du savon à proximité au cas ou votre peau vos yeux ou vos habits viendraient en contact avec l acide de la batterie 2 8 Portez une protection complète des yeux et du corps comprenant des lunettes de sécurité et des vêtements protecteurs Évitez de toucher vos yeux quand vous travaillez près de la batterie 2 9 Si l acide de la batterie rentre en contact avec votre peau ou vos vêtement...

Страница 25: ...te et mobile ou parties chaudes du moteur REMARQUE s il est nécessaire de fermer le capot pendant le processus de départ de saut assurez vous que le capot ne touche pas la partie métallique des pinces de batterie ou de couper l isolation des câbles 4 3 Faire attention aux pales aux courroies et aux poulies du ventilateur ainsi qu à toute autre pièce susceptible de causer des blessures 4 4 Vérifier...

Страница 26: ...GE IMMÉDIATEMENT APRÈS L ACHAT APRÈS CHAQUE UTILISATION ET TOUS LES 30 JOURS OU LORSQUE LE NIVEAU DE CHARGE DESCEND EN DESSOUS DE 85 POUR GARDER LA BATTERIE INTERNE DE L UNITÉ ENTIÈREMENT CHARGÉE ET PROLONGERA LA VIE DE BATTERIE 6 1 VÉRIFICATION DU NIVEAU DE LA BATTERIE INTERNE 1 Mettez l interrupteur ON OFF sur la position ON L écran LCD affiche le pourcentage de la charge de la batterie Une batt...

Страница 27: ...erie interne IMPORTANT Utilisant le démarreur de saut sans batterie installée dans le véhicule peut endommager le système électrique du véhicule NOTE La batterie interne doit avoir une charge si au moins 40 pour démarrer rapidement un véhicule 1 Coupez le contact 2 Branchez le câble batterie de pince dans la prise de sortie du démarreur 3 Disposez les câbles CC loin de toute pales de ventilateur c...

Страница 28: ...échauffements de la batterie avant que le moteur démarre IMPORTANT NE PAS tenter de démarrer votre véhicule plus de trois fois consécutives Si le véhicule ne démarre pas après trois tentatives consulter un technicien de service 8 Après le démarrage du moteur débrancher la pince NOIRE et la pince ROUGE dans cet ordre et alors débrancher les pinces de la batterie de la prise de démarreur 9 Rechargez...

Страница 29: ...rie des câbles et le boîtier externe 3 Ne pas ouvrir l appareil car il n y a pas de pièces réparables par l utilisateur toute réparation doit être effectuée par un personnel qualifié 9 INSTRUCTIONS DE STOCKAGE 1 Charger la batterie à pleine capacité avant stockage 2 Conservez cet appareil à des températures entre 20 C 60 C 4 F 140 F 3 Ne jamais décharger complètement la batterie 4 Recharger après ...

Страница 30: ... inverse la protection de charge n a pas activé L utilisateur peut tourner la clé pour démarrer le véhicule LED de câble intelligent et comportement d alarme COMPORTMENT RAISON LED verte clignote LED rouge éteinte Pas de bip Le câble est connecté à la batterie uniquement Le câble est relié au démarreur uniquement LED verte solide LED rouge éteinte Pas de bip Le câble est correctement connecté à la...

Страница 31: ...et la coller sur le carton Seulement expédier via le service assuré avec un numéro de suivi et pas par air Expédition de frais de retour sont la responsabilité du client Nous ne pouvons pas accepter C O D livraisons et ne sont pas responsables des colis perdus ou endommagés S il vous plaît ne pas placer des autocollants ou des étiquettes d expédition sur l emballage d origine du fabricant Permette...

Страница 32: ...du au travers d un détaillant non autorisé Le fabricant peut annuler la garantie si l étiquette warranty may be void if removed est retirée du produit Le Fabricant ne fait aucune autre garantie y compris mais sans y être limité expresse implicite ou garanties légales y compris mais non de façon limitative toute garantie implicite de valeur marchande ou de pertinence pour un usage particulier De pl...

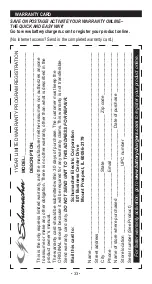
Страница 33: ... claims This warranty is not transferable Send warranty card only DO NOT SEND UNIT TO THIS ADDRESS FOR REPAIR Mail this card to Schumacher Electric Corporation 801 Business Center Drive Mount Prospect IL 60056 2179 Name________________________________________________________________________________ Street address_________________________________________________________________________ City________...

Страница 34: ...lamo de garantía Esta garantía no es transferible Envie tarjeta de garantía solamente Envie tarjeta de garantía solamente NO ENVÍE LA UNIDAD A ESTA DIRECCIÓN PARA SU REPARACIÓN Enviar esta tarjeta a Schumacher Electric Corporation 801 Business Center Drive Mount Prospect IL 60056 2179 Nombre______________________________________________________________________________ Dirección____________________...

Страница 35: ...lamation au titre de la garantie Cette garantie n est pas transférable Envoyer la carte de garantie seulement NE PAS ENVOYER L UNITÉ À CETTE ADRESSE POUR RÉPARATION Envoyer cette carte à Schumacher Electric Corporation 801 Business Center Drive Mount Prospect IL 60056 2179 Nom_________________________________________________________________________________ Adresse__________________________________...

Отзывы: