background image


7


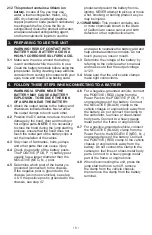
7.4  CHARGING THE INTERNAL BATTERY, 

USING THE AC WALL CHARGER

WARNING! 

Use only the charger included 

with the unit to charge the internal battery. 

Using any other charger will damage  

the unit.

1. 

Plug the AC wall charger into the unit’s 

12V input socket.

2. 

Connect the wall charger to a 120VAC 

electrical wall outlet.

3. 

The green LED will light, and the display 

will show 

CHARGING-xx%

. Complete 

charging may take 4-6 hours. 

4. 

When the internal battery is completely 

charged, the green LED will pulse, and 

the display will show

 FULLY CHARGED

.

5. 

When the battery is fully charged, 

disconnect the wall charger from the 

AC outlet, and then unplug the wall 

charger from the unit.

6. 

Charge the unit as soon as possible 

after use.

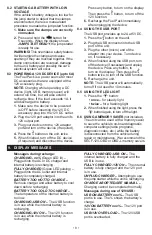
7.5  CHARGING THE INTERNAL BATTERY 

WHILE DRIVING

You may also charge the internal battery 

while driving, using the 12V DC car 

charger (included).

1. 

Make sure the car is running.

2. 

Plug the 12V DC adaptor cable into the 

unit’s 12V input socket.

3. 

Insert the other end of the accessory 

cable into the vehicle’s accessory 

outlet (lighter socket). 

4. 

The green LED will light, and the display 

will show 

CHARGING-xx%

. Complete 

charging may take 4-6 hours. 

5. 

When the internal battery is completely 

charged, the green LED will pulse, 

and the display will show

 FULLY 

CHARGED

.

6. 

When the battery is fully charged, 

disconnect the accessory cable from 

the unit, then from the lighter socket of 

the vehicle. 

7. 

Charge the unit as soon as possible 

after use.

NOTE:

 Completely disconnect the charger 

cable when the engine is not running.

8.  OPERATING INSTRUCTIONS

8.1  JUMP STARTING A VEHICLE ENGINE

IMPORTANT: 

Do not use the jump starter 

while charging its internal battery.

IMPORTANT:

 Using the jump starter 

without a battery installed in the vehicle will 

damage the vehicle’s electrical system.

1. 

Turn the ignition OFF.

2. 

Lay the DC cables away from any  

fan blades, belts, pulleys and other 

moving parts.

3. 

Plug the battery clamp cable into the 

jump starter’s input socket.

NOTE:

 Make sure all of the vehicle’s 

electrical devices are turned off.

4. 

For a negative-ground vehicle (as 

in most vehicles), connect the unit’s 

POSITIVE (RED) clamp to the 

POSITIVE (POS, P, +) battery post. 

Next, connect the NEGATIVE (BLACK) 

clamp to the vehicle chassis or engine 

block, away from the battery. 

5. 

For a positive-ground vehicle, connect 

the NEGATIVE (BLACK) clamp to the 

NEGATIVE (NEG, N, -) battery post. 

Next, connect the POSITIVE (RED) 

clamp to the vehicle chassis or engine 

block away from the battery.

6. 

After a proper connection has been 

made, press the 

 button. When the 

display shows 

JUMP START READY

the jump starter is ready for use.

WARNING! RISK OF EXPLOSION.

If you have connected the clamps 

backwards, an audio alarm will sound, 

and the display will show 

WARNING- 

CLAMPS REVERSED

. Press the 


button to turn off the unit. Reverse the 

connections. Press the 

 button to turn 

the unit back on.

7. 

Crank the engine. If the engine does 

not start within 5-8 seconds, stop 

cranking and wait at least 1 minute 

before attempting to start the vehicle 

again. The display will show 

BATTERY 

COOL DOWN xx SEC REMAINING. 

When the display shows 

JUMP START 

READY

, the jump starter is ready  

for use. 

8. 

After the engine starts, press the 


button to turn the unit off. Disconnect 

the black clamp (-) and then the red 

clamp (+), in that order.

9. 

Recharge the unit as soon as possible 

after each use.

Содержание SL1316

Страница 1: ...ecautions carefully POR FAVOR GUARDE ESTE MANUAL DEL PROPIETARIO Y LEER ANTES DE CADA USO En este manual se explica c mo utilizar la unidad segura y efectiva Por favor lea y siga las siguientes instru...

Страница 2: ...WHEN CONNECTING TO A BATTERY 5 FEATURES 6 CONTROL PANEL 6 CHARGING THE INTERNAL BATTERY 6 OPERATING INSTRUCTIONS 7 DISPLAY MESSAGES 8 MAINTENANCE INSTRUCTIONS 9 STORAGE INSTRUCTIONS 9 TROUBLESHOOTING...

Страница 3: ...LA BATER A 14 CARACTER STICAS 15 PANEL DE CONTROL 15 PARA CARGAR LA BATERIA INTERNA 15 INSTRUCCIONES DE OPERACI N 16 MENSAJES DE LA PANTALLA 18 INSTRUCCIONES DE MANTENIMIENTO 18 INSTRUCCIONES DE ALMA...

Страница 4: ...Review the cautionary markings on these products and on the engine 1 11 Do not set the unit on flammable materials such as carpeting upholstery paper cardboard etc 1 12 Never place the unit directly...

Страница 5: ...tery and chassis as indicated below Never allow the output clamps to touch each other 4 2 Position the DC cables to reduce the risk of damage by the hood door and moving or hot engine parts NOTE If it...

Страница 6: ...leep mode and will not display any messages To turn the display back on press any button LED INDICATOR Green LED solid The internal battery is charging Green LED flashing Charging has aborted Green LE...

Страница 7: ...UMP STARTING A VEHICLE ENGINE IMPORTANT Do not use the jump starter while charging its internal battery IMPORTANT Using the jump starter without a battery installed in the vehicle will damage the vehi...

Страница 8: ...ice on if necessary 4 When finished using the USB port turn off the device if necessary and unplug the device Press any button to turn on the display Then press the button twice to turn off the USB fu...

Страница 9: ...10 1 After use and before performing maintenance unplug and disconnect the unit 10 2 Use a dry cloth to wipe all battery corrosion and other dirt or oil from the battery clamps cords and the outer ca...

Страница 10: ...a warmer area for a short time Have the battery checked The unit won t power my 12V or USB device The device is not turned on The internal battery is not charged Turn on the device Check the battery...

Страница 11: ...d ground service with a tracking number Return shipping charges are the responsibility of the customer We cannot accept C O D deliveries and are not responsible for lost or damaged packages Please do...

Страница 12: ...dified by anyone other than Manufacturer or if this unit is resold through an unauthorized retailer Manufacturer makes no other warranties including but not limited to express implied or statutory war...

Страница 13: ...e provocar riesgo de incendio o descarga el ctrica ADVERTENCIA RIESGO DE GASES EXPLOSIVOS 1 10 Para reducir el riesgo de explosi n de una bater a siga estas instrucciones y aquellas publicadas por el...

Страница 14: ...bater a y ayudar a eliminar la corrosi n producida por aire No toque ojos nariz o boca 3 3 Determine el voltaje de la bater a consultando el manual del usuario del veh culo y aseg rese de que la tens...

Страница 15: ...una lista completa de los mensajes NOTA Si el voltaje de la bater a del veh culo es demasiado baja para detectar la pantalla permanecer en blanco la tensi n no se vea Se requiere un procedimiento de a...

Страница 16: ...ED 6 Cuando la bater a est completamente cargada desconecte el cable de accesorios de la unidad despu s de la toma del encendedor del veh culo 7 Cargue la unidad tan pronto sea posible despu s de usar...

Страница 17: ...toma de 12V DC 2 Conecte el adaptador de puerto de 12V al puerto de salida de 12V de la unidad 3 Conecte su dispositivo al puerto del adaptador 12V y encienda el dispositivo si es necesario 4 Pulse el...

Страница 18: ...utilizaci n del arrancador xx xV Pinzas est n conectados a una bater a de coche pero bot n de arranque no se ha presionado CONNECT CLAMPS BATTERY xxx La unidad est encendida pero no detecta pinzas de...

Страница 19: ...uena ventilaci n y deje que se caliente antes de intentar recargarlo La alarma est sonando y la pantalla muestra WARNING CLAMPS REVERSED Las conexiones se invertido Desconecte la unidad y revertir las...

Страница 20: ...ir asistencia services schumacherelectric com www batterychargers com o llame 1 800 621 5485 lunes viernes 7 00am to 5 00pm CST Para REPARACI N O DEVOLUCI N comun quese con Servicios al Cliente al 1 8...

Страница 21: ...utiliza en forma err nea se trata de manera inadecuada es reparado o modificado por personas que nos sean el Fabricante o si esta unidad es revendida a trav s de un vendedor minorista no autorizado El...

Страница 22: ...22...

Страница 23: ...___________________ Esta es la nica garant a limitada expresa y el productor no autoriza ni otorga a alguien a realizar alguna otra obligaci n No existe ninguna otra garant a m s que la descrita en el...

Отзывы: