background image

GBA C 6001 12 E 


BA 

Page 16 of 26 

Mai 5, 2021 

Last revised 05-2021 


Rev. 12 

S

ch

o

ll

 A

p

p

ar

at

eb

au

 G

m

b

H

 &

 C

o

KG


5.2  I

NSTALLATION AND ELECTRIC CONNECTION


5.2.1  I

NSTALLATION OF THE HOT OR COLD COMBIPLATE 

(

ONLY VALID FOR INSTALLATION VARIANTS


Put your device on a level and safe surface which stands the weight of the device. 


Prepare the cut-out of the table according to our installation drawings and check the cut-out. A 

silicone gap of 5 mm for wood and stainless-steel buffets all around the unit, and a gap of 7 mm for 
stone and Dekton is mandatory. The maximum corner radius shall not be wider than the silicon 
gap. 


For Dekton (artificial stone) and stone plates please refer to the stone manufacturer’s references. 


Make sure the surface is free from dust and grease. 


Put your hot or cold combiplate into the cut-out. Please make sure that the hot or cold combiplate 

fits exactly. 


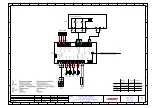
Connect the controller and both cables to the circuit board according to the connection plan. 


Locate the hot or cold combiplate in the middle of the cut-out. 


Grout the hot or cold combiplate with the silicone which is available in the accessories and remove 

the excess silicone. 


After a drying time of 24 hrs, you can connect the hot or cold combiplate to the power supply and 

start to operate. 


   NOTE regarding the installation! 


The device has to be installed in vertical position. 


The hot or cold combiplate has to left in vertical position at least 15 minutes before operation. 


The installation variants of the hot or cold combiplates can be built-in flush-mounted or sunk in 

every top plate (wood, granite, corean or stainless steel; see installation drawing). 


The supply and exhaust air must be ensured for all the plug-in units. The ambient temperature of 

30°C mustn’t exceed in operation (heat accumulation) because the cooling performance decreases 
and the device might get damaged. Please note that warm air rises. Please use parts of the wide 
range of built-in accessories like fans or tubes in adverse built-in situations. Referring to this, the 
qualified professional can give you some advices. 


On-site supply and exhaust air must be taken into account when installing the devices in base 

cabinets. The open cross-section for the supply air and exhaust air openings must be at least 200 
cm², and the air should be able to flow freely over the cooling unit. 


   ATTENTION! 

The device must be installed by a qualified professional. 


Содержание C 6001

Страница 1: ...001 CPZ 330 C 6003 CPA 330 W C 6106 CP 330 RAL C 6002 CPZ 330 RAL C 6004 CPA 330 SI C 6107 CP 660 C 6005 CPZ 660 C 6007 CPA 330 S C 6108 CP 660 RAL C 6006 CPZ 660 RAL C 6008 CPA 660 W C 6109 CP 990 C...

Страница 2: ...7 2 3 Intended use 8 3 Transport packaging and storage 9 3 1 Transport inspection 9 3 2 Packaging 9 3 3 Storage 9 4 Technical data 10 4 1 Technical specifications 10 4 1 1 Built in hot or cold combipl...

Страница 3: ...ical connections 17 5 3 Operation 17 5 3 1 Control panel 18 6 Cleaning and maintenance 19 6 1 Safety instructions for cleaning 19 6 2 Cleaning 19 6 3 Safety instructions for maintenance 20 6 4 Mainten...

Страница 4: ...lly before starting up this appliance On the following pages you will find important notes regarding its operation care and maintenance so that you will be able to enjoy its use for a long time If a m...

Страница 5: ...1 2 LIABILITY AND WARRANTY All information and instructions in this user manual have been compiled in accordance with cur rent regula tions the current state of engineering technology and our many ye...

Страница 6: ...erpts as well as the utilization and or communication of the content is forbidden without permission in writing from the manufacturer Any non compliance is liable for damages All other rights are rese...

Страница 7: ...egarding operational safety are based on the regulations of the European Union valid at the time of manufacturing of the device If the device is used commercially the operator is obliged during the en...

Страница 8: ...intenance are to be made by qualified service personnel The hot or cold combiplate is for keeping dishes warm or cool not for warming or cooling of prepared dishes ATTENTION Any and all use diverting...

Страница 9: ...kaging of your device It might be useful for storage purposes when moving or if the device needs to be sent to our service centre in case of damage The outer and inner pack aging material has to be re...

Страница 10: ...oise level 49 9 dBA 59 3 dBA 59 3 dBA Condensing temperature 12 1 C 12 1 C 12 1 C Power requirement 230 V 50 60 Hz ready to plug in connection cable with Schuko plug 1 6 m Separate control panel 120 x...

Страница 11: ...50 100 W 1520 100 W 2340 100 W Power requirement 230 V 50 60 Hz ready to plug in connection cable with Schuko plug 1 6 m Separate control panel 120 x 55 x 42 mm controller with cable length 1 2 m Dime...

Страница 12: ...330 x 530mm 660 x 530mm 660 x 530mm Temperature range 5 C to 140 C continuously variable Amount refrigerant 38 g 38 g 38 g 39 g 39 g Refrigerant R600a R600a R600a R600a R600a Heating capacity cooling...

Страница 13: ...i 5 2021 Last revised 05 2021 Rev 12 Scholl Apparatebau GmbH Co KG 4 2 PRODUCT DIAGRAM 4 2 1 BUILT IN HOT OR COLD COMBIPLATE Figure size 1 x 1 1 GN 4 2 2 BUILT IN HOT OR COLD COMBIPLATE FOR CENTRAL CO...

Страница 14: ...GBA C 6001 12 E BA Page 14 of 26 Mai 5 2021 Last revised 05 2021 Rev 12 Scholl Apparatebau GmbH Co KG 4 2 3 TABLE TOP HOT OR COLD COMBIPLATE Figure size 1 x 1 1 GN...

Страница 15: ...g operation some parts of the device become very hot To avoid burns do not touch hot parts Do not use this device if it is not working properly is damaged or has been dropped Do not use any accessorie...

Страница 16: ...le in the accessories and remove the excess silicone After a drying time of 24 hrs you can connect the hot or cold combiplate to the power supply and start to operate NOTE regarding the installation T...

Страница 17: ...r the following devices C 6001 C 6002 C 6005 C 6006 C 6009 C 6010 5 3 OPERATION Clean the device prior to use as described in chapter 6 2 Cleaning Press the button to switch on the device Do not place...

Страница 18: ...ng the button the adjusted tempera ture will be shown in the display To change the temperature press and either or to adjust the temperature accordingly Selection button The button is used to switch b...

Страница 19: ...th a water jet Therefore do not use a pressure water jet to clean the device 6 2 CLEANING Clean the device regularly with a neutral cleaning agent Before cleaning the device switch it off with the but...

Страница 20: ...tenance and repair work may only be performed by qualified professionals using original spare parts and accessories Never try to carry out repairs to the device yourself 6 4 MAINTENANCE Check in regul...

Страница 21: ...pply Contact the seller Contact the seller Bad cooling Evaporator dirty Fan dirty Overheating on installation site Cleaning by service engineer Cleaning by service engineer Check supply and exhaust ai...

Страница 22: ...advisable to contact a specialised waste management company or to contact the local disposal service in your community WARNING To avoid misuse and the associated dangers make sure the old device is un...

Страница 23: ...23 of 26 Mai 5 2021 Last revised 05 2021 Rev 12 Scholl Apparatebau GmbH Co KG 9 INSTALLATION DRAWINGS Dimensioned drawings are available upon request 9 1 TEMPERATURE CONTROLLER HOT OR COLD COMBIPLATE...

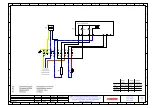
Страница 24: ...GBA C 6001 12 E BA Page 24 of 26 Mai 5 2021 Last revised 05 2021 Rev 12 Scholl Apparatebau GmbH Co KG 10 CIRCUIT DIAGRAMS Circuit diagrams are available upon request...

Страница 25: ...will be accepted Further warranty information is contained in our Gen eral Terms and Conditions of Sale or can be made available upon request Appliances not produced by ourselves are subject to the w...

Страница 26: ...he following times Monday Thursday from 7 00 a m till 4 00 p m Fridays from 7 00 a m till 12 15 p m Outside these office hours please communicate your requests per e mail or telefax Scholl Apparatebau...

Страница 27: ......

Страница 28: ......

Страница 29: ......

Отзывы: