background image

1

Locate Programming Code and Preset User Codes

The programming code and the preset user codes are printed on the yellow stickers located on the back of the 
keypad and on the installation sheet that came in the box. Write these codes in the space provided on the first page.

2

C\,

” (60 mm)

OR
2

C\v

” (60 mm)

2

Z\,

” (53 mm)

Hole

2

Check Door Dimensions

If your door does not match the dimensions shown, go to www.part2.schlage.com for instructions on how to prepare 
your door.

Содержание LINK FE599

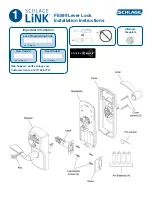
Страница 1: ... Installation Instructions 1 Alternate Faceplate Important Information Lock Programming Code six 6 digits User Code A four 4 digits User Code B four 4 digits Web Support part2 schlage com Customer Service 877 288 7707 ...

Страница 2: ...rs located on the back of the keypad and on the installation sheet that came in the box Write these codes in the space provided on the first page 2C 60 mm OR 2C v 60 mm 2Z 53 mm Hole 2 Check Door Dimensions If your door does not match the dimensions shown go to www part2 schlage com for instructions on how to prepare your door ...

Страница 3: ...3 Install Strike Into Frame 4 If Necessary Change Latch Faceplate Check edge of door to determine the type of faceplate required ...

Страница 4: ...5 Door Jamb Door Jamb 6 5 Install Latch Latch must be flipped so that bevel faces toward door jamb 6 Remove Sticker from back of Lock ...

Страница 5: ...at the lock will hold itself on the door Hands free post may need to be adjusted with a screwdriver to the dimensions shown below Z Z v 3 mm 6 mm Hold keypad against door Adjust with screwdriver so screw extends beyond door edge 7 Install the Keypad Feed the cable under latch assembly as shown below Then slide the tailpiece through the hole as shown below ...

Страница 6: ...ds free post should lock plate against door surface If hands free post does not lock plate onto door see step 8 for adjustment Hands free post Feed Cable through Baseplate Feed the cable through the hole as shown below DO NOT connect the cable at this point ...

Страница 7: ...12 Install Batteries and Battery Cover 11 Connect the Cable Snap the connectors together ...

Страница 8: ...tly to match your door If the lever does not snap into place easily you may have to tap the lever with a hammer using a piece of wood to cushion it Be careful not to damage the finish of the lever Tuck wires into open space on baseplate Be careful not to pinch any wires between cover and baseplate ...

Страница 9: ...Check Handing of Lever 14 Incorrect See steps below to change lever handing Correct Go to step 15 To Change Lever Handing a b c d ...

Страница 10: ...nlocked Red light indicates locked To Unlock Press Button To Lock Press Button Press four numbers Green flash unlock Test with door open to avoid possibly being locked out Verify that latch retracts when lever is turned on keypad Test with door open to avoid possibly being locked out Follow the directions on document 2 to continue setup Document 2 is located at part2 schlage com 17 This portion of...

Страница 11: ...e the equipment FCC ID P2GFE599 IC 7954A FE599 PATENT NOTICE Schlage products and those of its subsidiary companies and licensees may be covered by both issued and pending U S and foreign patents copyrights and trademarks Manufactured items are covered by one or more of the following patents 5070715 5152558 5308131 5395144 5593193 5598726 5640863 5683127 5715717 5765412 5769472 5809816 5816086 582...

Отзывы: