


Installation and Setup
11
Instruction Manual
SK6288VKOC-4L
shar
ed_Installation-Softwar
e_GigEV
.indd
Instruction Manual SK6288VKOC-4L © 2018-04 E
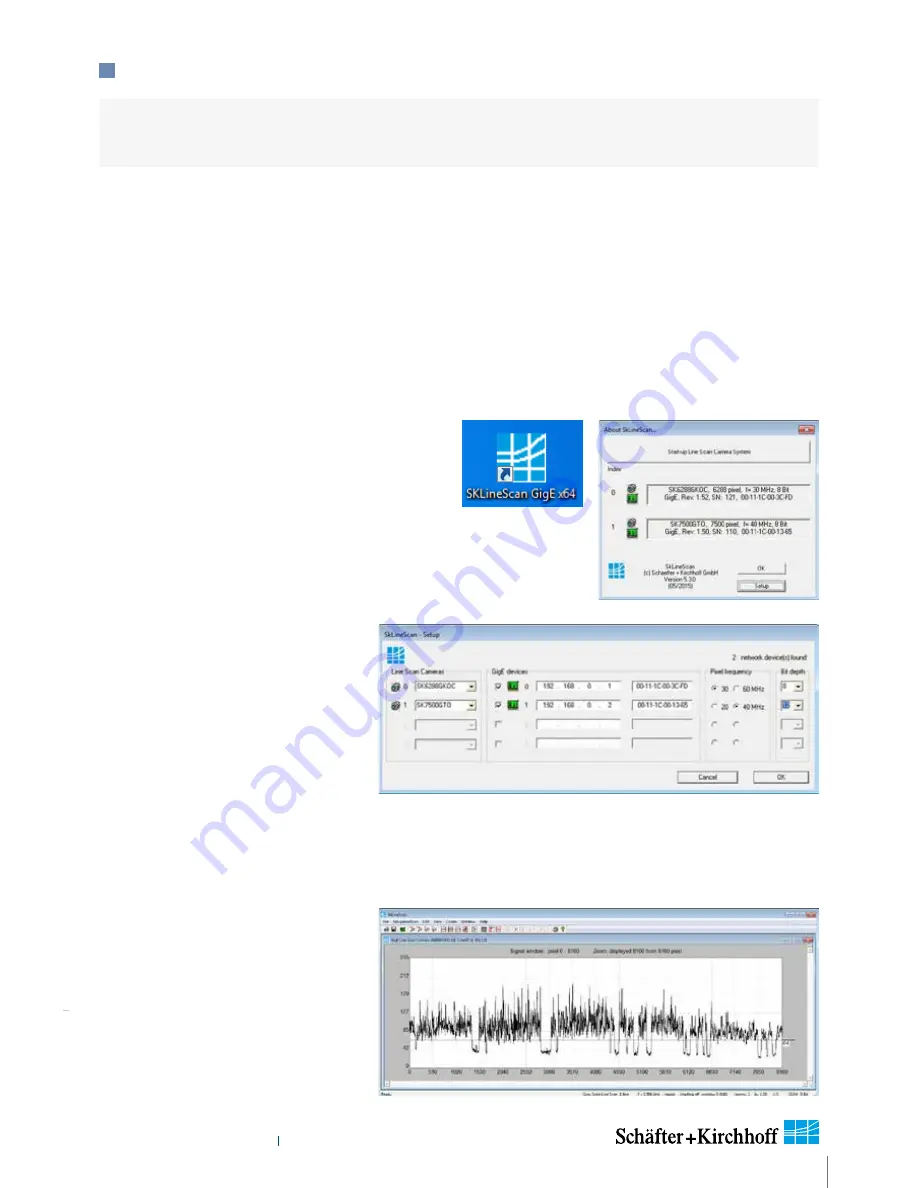
Initial Function Test
• Quit the SkLineScan startup dialog
box.
• Select "OK" in the SkLineScan
start-up dialog.
The Signal Window plotting the current
brightness versus the pixel number
indicates the correct installation.
Camera Setup
Use the Setup dialog for
• activating/deactivating a connected
GigE camera (activated device is
ticked)
• changing the IP address
• changing the pixel frequency
• setting the bit depth of the video
signal to 8 or 12-bit.
The MAC addresses are displayed for identification of each camera with the defined CamID (0, 1, …). This is
useful when several cameras with the same name are connected.
SkLineScan Setup dialog
SkLineScan Start-up
• Start SkLineScan. A start-up dialog box pops up
and displays the connected cameras that have
been automatically detected.
Desktop Icon
2.4 SkLineScan Software Installation (Optional)
SkLineScan Installation
Prior to the installation, power on the PC (not the camera) and unpack the downloaded zip-file to a temporary
folder. Alternatively, if your installation medium is a CD, insert the disk into the drive.
The autostart function may launch the setup program automatically from CD. Otherwise, look for the installation
file:
SkLineScan_GEV.msi
Then start the applicable installation file manually. This will set up the
Schäfter + Kirchhoff
SkLineScan
camera
control and adjustment tool.
This section is a quick reference for installing the
SkLineScan
adjustment and configuration software.
SkLineScan and the SkLineScan manual is provided for download on the
Schäfter + Kirchhoff
website under
http://www.sukhamburg.com/supporte.html
.


