


Standalone usage
15
© 2021 Scan Electronics Ltd.
– – – – [< <<];
– – – [Alarm 2]
– transition to submenu.
– – – – [Sound]
– selection
[On]
/
[Off]
– – – – [Vibro]
– selection
[On]
/
[Off]
– – – – [< <<];
– – – [Out of scale]
– transition to submenu.
– – – – [Sound]
– selection
[On]
/
[Off]
– – – – [Vibro]
– selection
[On]
/
[Off]
– – – – [< <<];
– – – [< <<];
– – [< <<];
– [< <<];
·
[Bluetooth]
– selection
[On]
/
[Off]
·
[Language]
– selection
[Russian
(Русский)
]
/
[English]
·
[Time]
– transition to the time setting dialog
·
[Device info]
– transition to the device information submenu
·
[Factory settings]
– transition to the reset dialog
–
selection
[No]
/
[Yes]
·
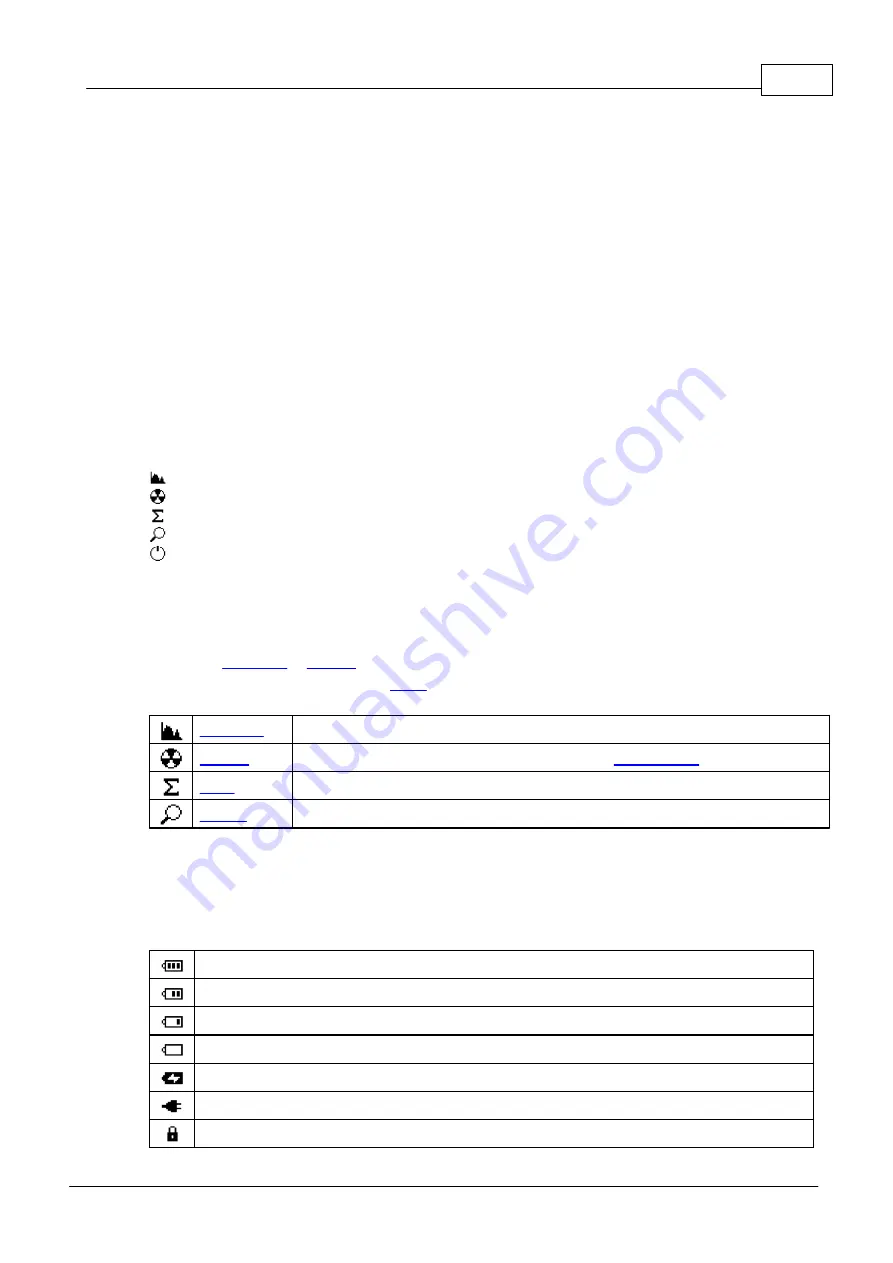
[< <<];
[Spectrum]
– display of photon energy spectrum;
[Monitor]
– display of dose rate or count rate;
[Dose]
– display of accumulated dose;
[Search]
– display of count rate search graph;
[Power off]
– turning off the device.
3.7
Display modes
One of four display modes is available at any time of the assessment of radiation situation. The default
mode after
The display mode is selected via the
. In the menu, the items are marked with icons and text
names (see the table below):
Display mode: energy spectrum of absorbed photon radiation (X-ray and gamma)
Display mode: dose rate or count rate (see also
Display mode: accumulated dose (X-ray and gamma).
Display mode: graphical representation of the count rate (search graph).
Selected item of the menu is marked with a negative icon.
You can view the device status in any of the display modes in the screen status bar. The status bar is
located at the top of the display.
On the right side of the status bar, you can see standard information (that does not depend on the
selected mode) (see the table below):
At least 60% of the charge.
At least 30% of the charge.
At least 10% of the charge.
Less than 10% charge, need to charge the battery.
The battery is charging.
Powered from an external source, charging is finished.
Swing buttons are locked.
Содержание RadiaCode-101
Страница 1: ......
Страница 3: ...Chapter I...
Страница 8: ...Chapter II...
Страница 10: ...Chapter III...
Страница 33: ...Chapter IV...
Страница 35: ...Chapter V...