background image


Please  read  these  user  instructions  carefully  to  understand, 

quickly  and  thoroughly,  how  to  use  your  new  fridge/freezer. 

Underline  any  parts  you  consider  particularly  important.  Look 

after this document so that you may consult it in future or pass 

it on to any future owners. 
You have purchased a reliable appliance which will serve you 

for many years if it is used and maintained properly. The de-

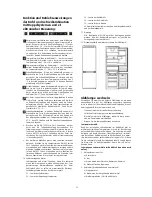
tailed illustrations can be found on the last pages of this user 

manual.  The  performance  data  on  the  rating  plate  refer  to  a 

room temperature within the range of +10

 to 38

Important! 

This appliance is designed for domestic use only. 
The  appliance  has  been  tested  against  leakage  in  compliance 

with the relevant legal safety standards. 
Should you have bought your new fridge / freezer to replace 

an  old  appliance,  please  make  sure  that  all  existing  latch  or 

bolt-locks  on  the  old  appliance  are  destroyed  before  you  dis-

pose of it. This will ensure that a child can not get trapped in-

side. 
Please  have  the  old  appliance  ecologically  disposed  of  by  a 

company  specialized  in  environmental  protection,  since  the 

appliance may contain harmful components in the refrigerant 

and  this  must  be  removed  with  special  equipment.  Please 

check with your dealer or your local authority. 
Make sure that the refrigerating system containing the refrig-

erant  ,  especially  the  condenser  at  the  back  of  the  appliance 

not damaged during transportation to the disposal site. So that 

you can be sure that the refrigerant does not leak out .Details 

of utilized refrigerant and insulation propellant are on the rat-

ing plate affixed to the appliance. 
 

Protecting of environment / advice 

for disposal 

Packing 

Serves to protect the appliance during transportation and recy-

clable  materials  have  been  used  for  packaging.  Corrugated 

board/ cardboard (mainly from waste paper) 
• 

Shaped parts in PS( foamed CFE-free Polystyrene) 

• 

Foils and bags in PE (Polyethylene) 

• 

Strapping tapes in PP( Polypropylene) 

Please hand over all packaging to the nearest official collection 

point, so that all the different materials can be reused or recy-

cled as far as possible and any illegal depositing of such mate-

rials is thus avoided. 
 

Deciding where to locate your ap-

pliance 

In  order  to  avoid  any  damage  or  injury  to  persons  or  things, 

the appliance should be unpacked by two people and placed in 

the chosen location. Before positioning it, check that your new 

appliance has no visible outer damager. On no account should 

you start up your appliance if it is damaged. Check the appli-

ance carefully for: 
• 

Damage  to  the  packaging  which  might  indicate  that  the 

appliance has been mishandled during transportation. 

• 

Damage to the outer case. 

• 

Any visible damage to the cable / plug. 

If  in  any  doubt  let  the  customer  service  department  to  check 

the appliance. It must be at all costs be avoided,that any envi-

ronmentally damaging refrigerant leaks out by starting up the 

appliance. 


Installing your appliance 

a  Unpack the appliance 
b  In order to unnecessary waste raw materials, the handles 

have not been mounted on to the separate part of the ap-

pliance. Mount the door handles and at the same time any 

other enclosed parts according to the relevant instructions 

enclosed. 

c  Remove any objects from inside the appliance 
d  Carefully remove all film and adhesive tape from the case. 
e)  Remove any polystyrene pieces from around the compres-

sor(if it exists) 

f)  Remove all documents and accessories inside 
g  Clean  the  inside  of  the  appliance  with  lukewarm  water 

and vinegar and dry it thoroughly with a soft cloth. 

• 

Make  sure  that  the  pipes  for  the  circulation  of  the  refri-

gerant are not damaged in any way during installation. 

• 

The appliance must only be used for the purpose for which 

it is intended. 

• 

The appliance must be placed on a firm, level surface. This 

is the only way to ensure that the refrigerant can circulate 

freely and thus ensure that your appliance will work effi-

ciently. 

• 

If  possible,  place  your  appliance  in  a  cool,  well  aired  dry 

room. 

• 

Do  not  place  your  appliance  in  direct  sunlight,  nor  in  a 

room at high temperature. 

• 

Do not place your appliance in the vicinity of any sources 

of direct heat such as heating, ovens, cooking stove etc. 

If installation near a direct heat source can not be avoided, we 

recommend fitting a suitable distance from the heat source 
• 

From cooker: 3cm 

• 

From Oven: 30cm 

• 

From refrigerator: 2cm 

Never obstruct the ventilation 

Always pull out the plug, not pull the cable when cutting the 

appliance off from the mains supply. 

Warning:

 Leave the appliance standing in its final position for 

at least 2 hours before switching it on, so that the circulation 

of the refrigerant stabilizes and no operation problem occur. 
Before connecting up the appliance, make sure that it is abso-

lutely dry inside. 
Any inexpert interference might well create a fire hazard. 
Make  sure  nothing  mechanically  effects  the  circulation  of  the 

refrigerant,  nor  in  particular  the  accessible  parts  around  the 

compressor. 

Warning:

  Depending  on  its  composition  ,  the  refrigerant  can 

be easily inflammable, the refrigerant circuit has been hermet-

ically  sealed  and  has  been  tested  many  times  for  possible 

leaks. 
Only professional expert should intervene on the refrigerating 

system. Any refrigerant spilling out can injure your eyes .In the 

event of eye contact with the refrigerant, wash your eyes in-

stantly with plenty of water and consult a doctor immediately. 
The  appliance  according  to  its  climate  category,  is  meant  for 

use at certain room temperatures lower than 38


Rating plate 

The rating plate with the technical data is located on the side 

of the appliance inner or outside, on the rear side of the unit. 

Take a note of the technical data 

Copy  here  below  the  technical  data  from  the  rating  plate  so 

that it is easily accessible without having to move out the ap-

pliance. 

Содержание BIC 335

Страница 1: ...BIC 335 BIC 400 Brugermanual User manual Bedienungsanleitung Scandomestic A S Thrigesvej 2 DK 8600 Silkeborg T 45 7242 5571 F 45 8622 5571 scandomestic dk ...

Страница 2: ... medmindre andet er lov mæssigt fastlagt Transportskader En transportskade der konstateres ved forhandlerens levering hos kunden er primært en sag mellem kunden og forhandle ren I tilfælde hvor kunden selv har stået for transporten af produktet påtager leverandøren sig ingen forpligtelser i for bindelse med evt transportskade Evt transportskader skal anmeldes omgående og senest 24 timer efter at v...

Страница 3: ...ike og tør grundigt efter med en blød klud Pas på at rørene til cirkulering af kølemidlet ikke på nogen måde beskadiges under installationen Apparatet må kun anvendes til den formålsbestemte brug Apparatet skal anbringes på en fast jævn overflade Kun på denne måde sikres det at kølemidlet kan cirkulere frit så apparatet arbejder effektivt Opstil om muligt apparatet i et køligt og tørt rum med god ...

Страница 4: ... Friske fødevarer bør lægges i den øverste skuffe og flyttes ned i en af de nederste skuffer efter ca 24 timer Undlad at anbringe friske fødevarer i direkte kontakt med dybfrosne fødeva rer De dybfrosne fødevarer risikerer at tø op og holder sig måske ikke så længe som normalt B Inden for et tidsrum på 24 timer må du kun fylde fryseren med den mængde friske fødevarer der passer til din fry sers fr...

Страница 5: ...der ingen omstændigheder benyttes en damprenser til optøning af islagene i apparatet stor risiko for elektrisk stød Benyt følgende fremgangsmåde ved afrimning af dit ap parat 1 Find en egnet beholder frem ikke af metal 2 Vær helt sikker på at du har taget stikket ud af stikkont akten 3 Tør dine hænder grundigt så de ikke tager skade af kont akten med isen 4 Fjern alle frosne fødevarer fra fryseren...

Страница 6: ...ren i fryseren kan kun ske når kontrolpanelet er låst op Tryk på temperatur knappen for at justere temperaturen i intervallet fra 15 til 25 4 Hurtig nedkøling Når kontrolpanelet er låst op tryk da på hurtig nedkøling knappen Knappen lyser op og funktio nen Hurtig nedkøling er aktiveret Køleskabet kører nu ved en temperaturindstilling på 2 og funktionen deaktiveres efter 24 timer hvorefter symbolet...

Страница 7: ... er koldt kan der dannes kon densvand på apparatets ydervægge Det betyder ikke at der er en fejl Kondensvandet forsvinder når temperaturen stiger Tilkald kun serviceafdelingen hvis du efter en analyse af de mulige fejlfaktorer ikke har fundet årsagen til defekten eller ikke kan afhjælpe fejlen Apparatet fungerer ikke det arbejder ikke Er stikket i god stand og sidder det rigtigt i stikkontakten Er...

Страница 8: ...ter sin gyldighed Se det vedlagte garantikort eller den vedlagte liste over ser vicecentre for at finde ud af hvilket firma der er ansvarligt for servicearbejde på dit apparat Kontakt din forhandler hvis der ikke er angivet en nærmeste serviceafdeling i den leverede dokumentation Reparationer foretaget af serviceafdelingen med henblik på afhjælpning af fejl der er opstået på grund af manglende eft...

Страница 9: ...at all costs be avoided that any envi ronmentally damaging refrigerant leaks out by starting up the appliance Installing your appliance a Unpack the appliance b In order to unnecessary waste raw materials the handles have not been mounted on to the separate part of the ap pliance Mount the door handles and at the same time any other enclosed parts according to the relevant instructions enclosed c ...

Страница 10: ... added foods which have not yet frozen Instructions for the fridge Relevant instructions can be found in one of the following chapters Freezing Storing fresh food Almost all fresh products are suitable for freezing and storing in the freezer For the most common of these products a stor age guide with details of acceptable storage times and the most suitable packaging is provided Label fresh produc...

Страница 11: ...e inside walls use a plastic or wood screaper with no sharp edges When doing this remove the drawers and lay a cloth on the bottom of the appliance to catch the ice as it is scraped off so that it can be easily re moved The method least likely to damage your appliance when re moving the layers of ice is to defrost it Defrosting In normal circumstances the freezer compartment should be defrosted on...

Страница 12: ...button 3 seconds to unlock the control panel The light of lock button elimi nates Then operations can be conducted 2 Fridge temperature adjustment only when the control panel is unlocked press button to achieve different tem peratures from 2 to 10 3 Freezer temperature adjustment only when the control panel is unlocked press button to achieve different tem peratures from 15 to 25 4 Fast cooling fu...

Страница 13: ...igerant flowing through the pipes cir cuit These noises are normal and do not indicate any fault in the functioning of your appliance In unheated rooms and in cold weather conditions condensa tion can build up on the outer walls of the appliance This does not mean there is fault and it will disappear when the temper ature increases Only call the service department if after analysis of the possi bl...

Страница 14: ...e valid Consult the enclosed guarantee card or the separately enclosed list of after sales centers to see which company is responsible for servicing your appliance If there is no indication of the nearest service department in the documentation provided then contact your dealer Repairs by the service department to eliminate faults which have occurred because of non adherence to the information and...

Страница 15: ...es beschädigt ist Prüfen Sie das Gerät sorgfältig Ein Schaden der Verpackung kann darauf hinweisen dass das Gerät beim Transport misshandelt wurde Schäden am äußeren Gehäuse Sichtbare Schäden am Kabel Stecker Sollten Sie Zweifel haben lassen Sie das Gerät von der Kundendienstabteilung überprüfen Es muss um jeden Preis vermieden werden dass das umweltschädliche Kältemittel bei Inbetriebnahme des Ge...

Страница 16: ...bar ermittelt werden die auf der Sprühdose selbst aufgedruckt sind Wenn Sie tiefgefrorene Lebensmittel einlagern müssen Sie die Herstelleranweisungen auf der Lebensmittelver packung befolgen Tiefgefrorene Eiscreme darf erst einige Minuten nach der Entnahme aus dem Gefrierabteil gegessen werden um Verletzungen der Lippen und Zunge zu vermeiden Aus dem gleichen Grund dürfen Sie die Innenwände des Ge...

Страница 17: ...Reinigen Sie das Gerät regelmäßig Die verschiedenen Innenteile der Kühl und Gefrierkombi nation sind generell nicht für Geschirrspüler geeignet Die se sollten von Hand mit warmem Wasser und etwas Ge schirrspülmittel gewaschen werden Verwenden Sie niemals unverdünnte Reinigungsmittel und auf keinen Fall irgendwelche abrasiven oder säurehaltigen Mittel d h ein chemisches Reinigungsmittel wird empfoh...

Страница 18: ...erfügen wurde ein Schalter integriert Wird die Kühlschranktür geöffnet wird das Licht automatisch eingeschaltet bzw ausgeschaltet wenn die Tür geschlossen wird Die Glühlampe ist durch eine transparente Abdeckung geschützt Die Ersatzglühlampe sollte max 15 W haben Wenn Sie die Glühlampe auswechseln befolgen Sie die An weisungen auf dem gesonderten Blatt oder die Abbildung auf der letzten Seite dies...

Страница 19: ... Das Symbol leuchtet und die Stromversorgung ist wiederhergestellt 9 Bei frostfreien Modellen gibt es eine Funktion Forciertes Abtauen Drücken Sie die Temperatur und ON OFF Tasten für 3 Sekunden um die Funktion des forcierten Abtauens einzuschalten den Verdampferzylinder zu reinigen und die digitalen Symbole zu aktivieren Drücken Sie die Tempera tur und ON OFF Tasten 3 Sekunden um die Funktion des...

Страница 20: ...nden stehen gelassen wurde Zum Stabilisieren der Zirkulation des Käl temittels siehe Inbetriebnahme Falls nicht ziehen Sie das Gerät von der Steckdose ab und heben Sie es bei geschlossener Tür auf einer Seite an d h neigen Sie es zur Seite und setzen Sie es dann wieder auf des sen Füße ab Stecken Sie es nach 2 Stunden wieder in die Steckdose Öffnen Sie die Tür ca 12 Stunden lang nicht mehr Die Tür...

Отзывы: