


Sawn
Craft
Micro
F
‐
4D
Skyray
Manual
Page
11
141216
Micro
F
‐
4D
Skyray
Manual.docx
3)
If
you
already
have
a
prop
on
your
gearbox
from
another
aircraft
you
will
need
to
remove
the
prop
and
install
it
"backwards".
By
this,
you
will
screw
the
prop
onto
the
motor
shaft
with
the
molded
‐
in
numbers
on
the
prop
facing
the
motor.
This
is
done
because
of
the
location
of
the
motor/gearbox
as
compared
to
the
other
aircraft's
stock
location.
4)
Glue
the
motor
onto
the
top
of
the
main
wing
by
inserting
the
motor
mounting
pins
into
the
pre
‐
cut
alignment
dots
in
the
wing
with
the
prop
located
inside
the
open
slot.
Route
the
motor
wires
around
the
slot
and
to
the
brick
and
cut
the
micro
wire
to
the
proper
length.
Solder
the
motor
plug
onto
the
micro
wire
and
cover
with
heat
shrink
tube.
Use
small
pieces
of
tape
or
glue
to
secure
the
motor
wires
around
the
slot.
Plug
the
completed,
longer
motor
wire
into
the
brick.
We
have
found
that
some
pilots
prefer
to
have
some
down
‐
thrust
in
their
motor
as
opposed
to
it
being
mounted
flush
on
the
main
wing
when
using
more
powerful
motors.
To
do
this,
simply
add
a
small
piece
of
scrap
foam
below
the
rear
of
the
motor/gearbox
assembly
(the
non
‐
prop
side)
and
glue
the
assembly
down
as
you
would
normally.
Doing
this
can
prevent
some
unwanted
climbing
under
power,
but
otherwise
doesn’t
noticeably
change
the
flight
characteristics.
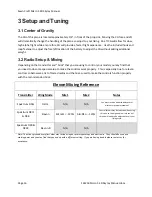
Alignment
Dots