background image


TG_TF-BA-e-2020 

5. 

Measurement procedure 

 
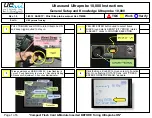
4.1 The power key 3-3 has to be pressed to switch on the instrument. `0` appears on 
the display 3-2. 
Both instruments, TF and TG, will recognize the mode of the last measurement itself 
by the symbol appearing in the display `Fe` (= F) for ferrous metals or `NFe` (= N) for 
non-ferrous metals. The instrument changes into the automatic measurement mode, 
which also is able to recognize and assign also the zeroing plate or any other base 
material.      
       
4.2 The sensor 3-1 has to be placed onto a coating layer to be measured. The reading 
on the display is the thickness of the coating layer. This can be corrected by pressing 
the Plus- key 3-4 or the Minus- key 3-5. For doing this, the sensor should be kept away 
from the measured object or the base plate for at least 5 cm.           
                      
4.3 To perform the next measurement, the sensor 3-1 has to be lifted for more than 
1cm

, “0” will be displayed and step b) has to be repeated. The instrument memorizes 

the continuous measured value automatically with statistic measurement times. 
Meanwhile, the Max, Min and average value will be displayed.           
    
4.4 To avoid any appearing incorrect measurement values, we recommend adjusting  
the instrument before starting with the measurements, as described in chapter 9. 
 
4.5 To change the 

measurement unit from „µm“ to “mil” or vice verse, the Power-key 

3-3 

has to be pressed and not released until “UNIT” is shown on the display. Then the 

same key 3-3 (this time Zero-key) has to be pressed. 
                
4.6 To change the measuring mode from `single` to `continuous`  or vice verse,  the 
Power-key / Zero 

–key 3-3 has to be pressed and not released until `SC` appears on 

the display. Then the Zero- key 3-3 (the same one) has to be pressed.  
The symbol “STATS” represents the continuous mode and `S` represents the single 
mode.               

6. 

Statistics 

 
This  instrument  calculates  and  displays  a  statistical  analysis  of  readings  while  the 
measurements are taken. 
The statistics available are: 

  Last value 

  Average value, marked by AVE 

  Highest reading marked by Max 

  Lowest reading marked by Min 

  Number of measurements taken 

Содержание SAUTER TF

Страница 1: ...ail info kern sohn com Phone 49 0 7433 9933 0 Fax 49 0 7433 9933 149 Internet www sauter eu Instruction Manual Digital Coating Thickness Gauge SAUTER TG TF Version 2 0 04 2020 GB TG_TF BA e 2020 PROFESSIONAL MEASURING TF 1250 0 1FN TG 1250 0 1FN ...

Страница 2: ...wishes and suggestions please do not hesitate to contact us Table of contents 1 Introduction 3 2 Functions 3 3 Technical data 4 4 Front panel description 5 5 Measurement procedure 6 6 Statistics 6 7 How to store and recall readings 7 8 How to delete readings 7 9 Transfer of readings to a PC 7 10 Calibration 8 11 Battery replacement 8 12 Adjustment foils 8 13 Correct handling at Coating Thickness M...

Страница 3: ... etc is measured These layers should be on magnetic materials such as steel iron nickel etc This test method is often used to measure the thickness of galvanised layers lacquer layers enamelled porcelain layers phosphorescent layers copper plates aluminium plates alloys paper etc In the N mode the layer thickness of non magnetic layers on non magnetic metals It is used to measure anodizations lacq...

Страница 4: ...ction RS 232 interface Power supply 2x1 5 AAA batteries Ambient temperature 0 C to 50 C Air humidity 80 Dimensions 126 x 65 x 35mm Weight Ca 81g without batteries Scope of delivery Carrying case Operating instructions TF 1250 0 1FN Built in measuring probe F and built in measuring probe N carrier material is automatically detected TG 1250 0 1FN Measuring probe FN external carrier material is autom...

Страница 5: ...ng key READ key 3 7 Delete key DEL key 3 8 Socket for RS 232 interface 3 9 Battery cover 3 10 Wrist ring 3 11 Battery indicator 3 12 Symbol for ongoing measurement 3 13 Last reading browsing value 3 14 Indication for single measurement mode 3 15 Max value indicator 3 16 Min value indicator 3 17 Browsing state 3 18 Measuring state 3 19 Unit 3 20 Average indicator 3 21 Base material indicator 3 22 C...

Страница 6: ...epeated The instrument memorizes the continuous measured value automatically with statistic measurement times Meanwhile the Max Min and average value will be displayed 4 4 To avoid any appearing incorrect measurement values we recommend adjusting the instrument before starting with the measurements as described in chapter 9 4 5 To change the measurement unit from µm to mil or vice verse the Power ...

Страница 7: ...s on the display it means that there is no reading to delete any more 6 4 The Zero key 3 3 has to be pressed to quit the measurement state 8 How to delete readings 7 1 To delete a reading on the display the DEL key has to be pressed no matter whether you are located in the measurement state marked SV or in browsing state marked RD Browsing state can be entered by pressing the READ key and measurem...

Страница 8: ... the uncoated standard material Annotation Please place the sensor at least with 3mm distance from the border of the base plate 9 4 The sensor 3 1 has to be pressed carefully onto the calibration foil and then lifted The reading on the display is the value measured This can be corrected by pressing the Plus key 3 4 or the Minus key 3 5 while the sensor is removed from the base plate or the measure...

Страница 9: ...uncoated base material to be measured instead of the base plate included in the delivery Like this accuracy is more precise from the beginning 13 2 Sensors will eventually wear off Life of the sensor will depend on the number of measurements taken and how abrasive the coating is Replacement of a sensor should only be performed by qualified staff 15 Restore factory settings 14 1 In the following ca...

Страница 10: ...stment of the value of Ln will seriously affect the accuracy This value should only be adjusted by professional persons Generally said The bigger the value of Ln the smaller the reading on the display for the same coating thickness Only a small change on the value of Ln causes a big change in the reading of the upper measurement range at 500µm 20 mil The value of Ln has to be adjusted as follows P...

Отзывы: