background image

Controls, Indicators, and Connections

Device Name

Primary Function

Use

FEED Button

Advances print media

PRESS - to advance media

PRESS while pressing READY

indicator - to print test label

PRESS - to pause printing during

batch mode operation

READY

Indicator

ON-OFF Button

Shows printer status

Places printer in On-Line

or Off-Line mode

GREEN - Printer ready for data

OFF - Printer busy, or Off-Line

RED - Printer needs attention

PRESS to switch to/from Off-Line

or to reset the printer

Power Input

Connects to power supply

Connect to transformer provided

with printer

Serial Port

Data input

DB9 female connector for

connection to host controller,

RS232 interface

Parallel Port

Data input

Centronics compatible connector

for connection to host controller

Print Head

Release

Unlocks print head

Push both releases toward rear

of printer to release print head

Top Cover

Protects print media and

mechanism

Lift to open

Push outward at hinge to remove

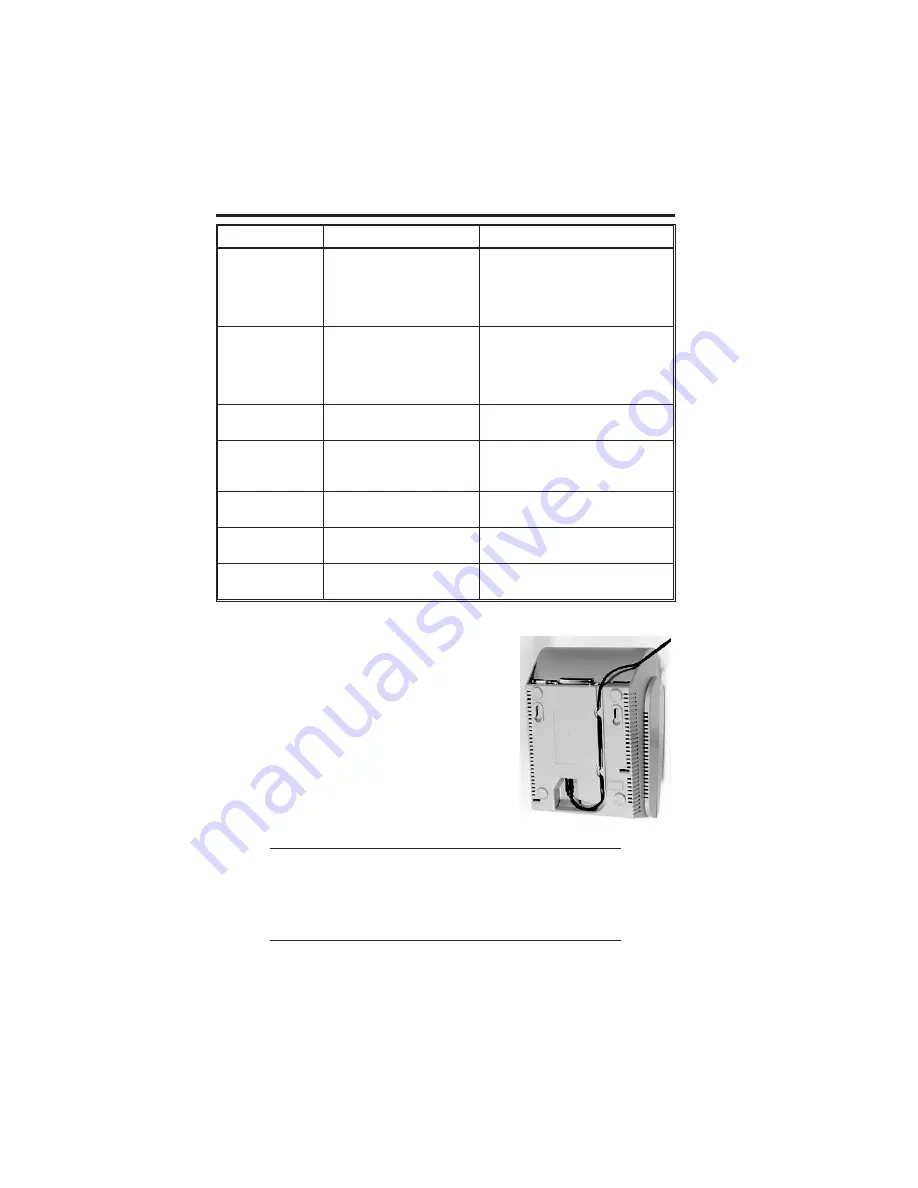
Printer Power Connection

1.

Plug the output of the AC power supply
provided with the printer into the connec-
tor on the bottom panel.

2.

Connect the supply into an AC outlet
having the proper voltage.

Note:

CX208/212 printers consume very little power

when idle, so are not equipped with a power

switch. Pressing the READY indicator/ON-OFF (a

combined control) will reset the printer and switch

it from Off-Line to On-Line mode.

Important!
The required AC voltage is marked on the power supply.
Confirm that your AC voltage matches the power supply
requirements. Do not use any power supply other than
the one provided with the printer.

Page 2

PN 9001091 Rev.

B

CX208/212 User's Guide

Содержание CX208

Страница 1: ...CX208 212 Desktop Label Printer USER S GUIDE ...

Страница 2: ...elevision reception which can be determined by turning the equipment off and on the user is encouraged to try and correct the interference by one or more of the following measures Reorient or relocate the receiving antenna Increase the separation between the equipment and the receiver Connect the equipment into an outlet or a circuit different from that to which the receiver is connected Consult a...

Страница 3: ...el Service Standard warranty repair is five 5 working days but SATO America Inc can not guarantee that all repairs will be completed within this time 7 If on our inspection it is determined that the warranty has been voided for any reason you will be notified prior to the initiation of any charge able repair activity 8 The foregoing warranties are the only warranties provided by SATO America Inc i...

Страница 4: ...PN9001091 Rev B SATO America Inc 10350 A Nations Ford Rd Charlotte NC 28273 ...

Страница 5: ...e Maintenance 11 What To Do If 12 READY light is not lit 12 READY light glows red 12 Self test label will not print 13 Labels will not feed 13 Host stops responding 13 Labels feed continuously 14 Poor print quality 14 Common Problems and Their Solutions 12 READY light is not lit 12 READY light glows red 12 Selt test label will not print 13 Labels will not print 13 Host stops responding or printer ...

Страница 6: ......

Страница 7: ...l of 4 x 4 Labels Thermal Transfer Ribbon not supplied with the CX208DT User s Guide CD ROM Containing Label Wizard CX Label Design and Production Software Label Wizard CX Manual Files CX208 212 User s Guide CX208 212 Programming Reference Guide Windows Printer Driver for CX208 212 Label Wizard SE Evaluation Software SATO Product Catalog Adobe Acrobat Reader for viewing and printing the manuals PN...

Страница 8: ...ctor for connection to host controller Print Head Release Unlocks print head Push both releases toward rear of printer to release print head Top Cover Protects print media and mechanism Lift to open Push outward at hinge to remove Printer Power Connection 1 Plug the output of the AC power supply provided with the printer into the connec tor on the bottom panel 2 Connect the supply into an AC outle...

Страница 9: ...other end to the parallel input port on the printer PN 9001091 Rev B Page 3 CX208 212 User s Guide Ready LED Indicator ON OFF Button Top Cover FEED Button Paper Guide Print Head Release Print Head Release Ribbon Cover Parallel Port Wall Mount Slots Power Cable Routing Channel External Media Feed Knockout Power Input Serial Port ...

Страница 10: ...Page 4 PN 9001091 Rev B CX208 212 User s Guide Media Roll Center Justified Paper Guides Paper Guide Lock Print Head Drive Platen Sensor Light Source Labels Print Head Release Label Exit Slot ...

Страница 11: ...ss it down firmly until it locks closed on both sides 9 Close the top cover 10 Wait until the Ready Indicator glows green and press the FEED but ton to feed a label or to resume printing Loading Ribbon The CX208 212TT thermal transfer printer transfers ink from a ribbon to the label to produce an image 1 Lift open the top cover 2 Press the two print head releases back to unlock the print head and ...

Страница 12: ...e up Core Spindle Spring Loaded Take up Spindle Left Supply Spindle Spring Loaded Supply Spindle Take up Core Ribbon Supply Roll Spindle Notches Spring Loaded Take up Spindle Supply Roll Mounted on Spindles Supply Roll Take up Core Ribbon Path Ribbon Cover ...

Страница 13: ...any slack Check to make sure there are no ribbon wrinkles 11 Close the Ribbon Cover and lower the print head Press the print head down firmly until it locks closed on both sides 10 Close the top cover 11 Wait until the Ready Indicator glows green and press the FEED button to feed a label or to resume printing Sensor Calibration The CX208 212 uses a single sensor element for both direct thermal wit...

Страница 14: ...rovide a means to set up these parameters See your software documentation for details If you are writing your own software or controlling the printer using direct commands you must use printer commands to set up the print mode and sensing method Refer to the programming information provided in the Program pdf file for further information Note The Program pdf file is in Adobe Acrobat format To view...

Страница 15: ...he printer Off Line Press and hold in the FEED button to feed multiple labels Label Reprint If the last label printed has not been cleared from the print buffer by press ing the READY indicator to take the printer Off Line then pressing the FEED button will cause the last printed label to be reprinted Sending Data to the Printer To print labels using data sent from a host computer or terminal 1 Co...

Страница 16: ...ware is included on the CD ROM If you want to print labels from another Windows applica tion the CX208 212 Windows Printer Driver must be installed It is found on the CD ROM and must be loaded using the standard Windows printer in stallation instructions Controlling the Printer Using Direct Commands You can also produce labels by sending commands directly to the printer Simple ASCII commands contr...

Страница 17: ...DO NOT USE SATO THERMAL PRINT HEAD AND PLATEN CLEANER it contains solvent that can attack the plastic frame Caution Do not clean the print head or drive roller using abrasive or metallic objects ammonia based cleaners or other harsh chemicals These practices can cause serious dam age and will void the warranty 3 Wipe the drive roller with the cleaning cloth To reach all portions of the drive rolle...

Страница 18: ...ew the common problems described in the following section 9 If these steps do not correct the problem contact your SATO Amer ica dealer or our Technical Support Department You will find Tech nical Support contact information on page 14 Note The information here assumes you are using label printing software If you are programming the printer please review the information in the CXMan ual pdf file l...

Страница 19: ...and repeat step 2 If the printer feeds with the cable disconnected suspect a problem with the host computer or cable Host stops responding or displays printer not ready message 1 Review your software setup following the instructions provided with the software 2 Confirm that the host to printer communication cable is connected and undamaged If using the serial port confirm that you are using a null...

Страница 20: ...con tacting your dealer 90 days of free telephone support is provided to all us ers who have returned the filled in registration card The 90 day period starts with the receipt of your first telephone support call If you are having difficulty with application software other than that supplied with the printer please contact the software vendor for support SATO America cannot pro vide support for th...

Страница 21: ... OD 5 0 in 127mm Ribbon 459 ft max 0 5 core Ink Side Out Label Sensing method Eye Mark Gap or Notch Fixed Position Min Form Length 0 25 in 6 35 mm Text fonts 12 proportional and monospaced fonts up to 12X expansion Graphics PCX and SATO Hex Binary Bar codes UPC A E EAN 8 13 UCC EAN 128 Bookland Code 39 I 2 of 5 Code 128 Codabar Plessey MSI Code 93 Post net PDF417 Maxicode Rotation Text and bar cod...

Страница 22: ...ables The following standard cables are available for CX2xx printers Centronics Parallel Cable 6 ft Order PN 14S000132 RS232 Cable DB9M to DB9F 6 ft Order PN 14S000133 RS232 Cable DB9M to DB25F 6 ft Order PN 14S000134 Serial Port Parameters CX208 212 printers are configured as Data Terminal Equipment DTE equipment and use Request To Send Clear To Send RTS CTS handshak ing or X On X Off flow contro...

Страница 23: ...ATO America printers including the CX208 212 Please contact your dealer for upgrade information The CD ROM will Autorun under Windows 95 98 ME To manually load the software place the CD ROM in your CD drive and then select RUN from the Start Menu Enter X CXWiz ard Disk1 Install where X is the drive letter associated with your CD drive Follow the instructions on the screen After the software has be...

Страница 24: ...nt dialog box of your Windows application Printer configuration is managed using the Advanced dialog box To print bar codes you must first define a bar code font using the Barcodes dialog box Media and Supplies The CX208 212 comes from the factory set up to operate with the SATO media supplies that are shipped with the printer These supplies have been carefully selected to give optimum results wit...

Отзывы: